Introduction
Unlocking the Power of the Model Context Protocol
The Model Context Protocol (MCP) is an open standard that helps artificial intelligence (AI) models connect smoothly with external tools, data sources, and software systems. MCP acts as a universal interface, allowing AI assistants and different applications to exchange data and run functions easily. You can think of it as a “USB-C for AI apps” because it helps different systems work together without compatibility issues. When you build your own MCP server, you learn how backend system architecture works. You also develop practical skills for connecting AI with real tools and daily workflows.
This MCP server guide walks you through everything you need to know, step by step. You will start with basic ideas and move on to hands-on setup, testing, and deployment. If you want to automate business tasks, link AI agents to productivity apps, or try out new AI integration methods, you will find useful instructions and best practices here. This guide gives you the tools and knowledge you need to get started with confidence.
Understanding MCP and Its Purpose
What is Model Context Protocol (MCP)?
The Model Context Protocol, or MCP, is an open standard that helps artificial intelligence (AI) models share information easily with different software and tools. MCP works like a common bridge, allowing AI systems, such as large language models (LLMs), to talk with many types of software, databases, and live resources through a consistent and clear set of rules.
Core Purpose of MCP
MCP helps AI assistants connect with outside data safely and efficiently. Without MCP, developers would need to create a unique connection for every new application, which can be slow and complicated. MCP solves this by providing standard message formats and clear ways for AI systems and external tools to communicate. No matter what technology each tool uses, they can still understand each other through MCP.
Developers often use structured data formats like JSON with MCP. This makes it simple to use MCP across different programming languages and platforms. With MCP, AI models can ask for information, carry out tasks, or start actions in other systems. For example, an AI assistant can use MCP to look up calendar events, check a database, or send a notification, all without building special connections for each task.
Real-World Applications and Significance
MCP supports many practical uses:
- Enterprise Automation: AI assistants can use MCP to manage business tasks by connecting with systems like customer relationship management (CRM) tools, ticketing platforms, or data dashboards.
- Enhanced User Experience: Chatbots and virtual assistants rely on MCP to find current information or complete actions for users.
- Research and Data Analysis: AI models can access and review scientific databases or structured data sets in real time using MCP.
With MCP, you can connect new tools or add features much more easily. Development becomes faster, security improves with clear access rules, and you can build AI solutions that can grow as needed.
Why MCP Matters
MCP gives developers a straightforward and flexible way to link AI features with other tools and data. This helps you create new solutions quickly, keep systems running smoothly, and adjust to new needs as they come up. When organizations use MCP, their AI assistants can access real-time, detailed information to give better answers and perform more accurate tasks.
Learning about the Model Context Protocol gives you the basics you need to build reliable and adaptable AI systems that can work with many different tools and data sources.
Ready to grow your business?
Start your free trial today and see results within days.
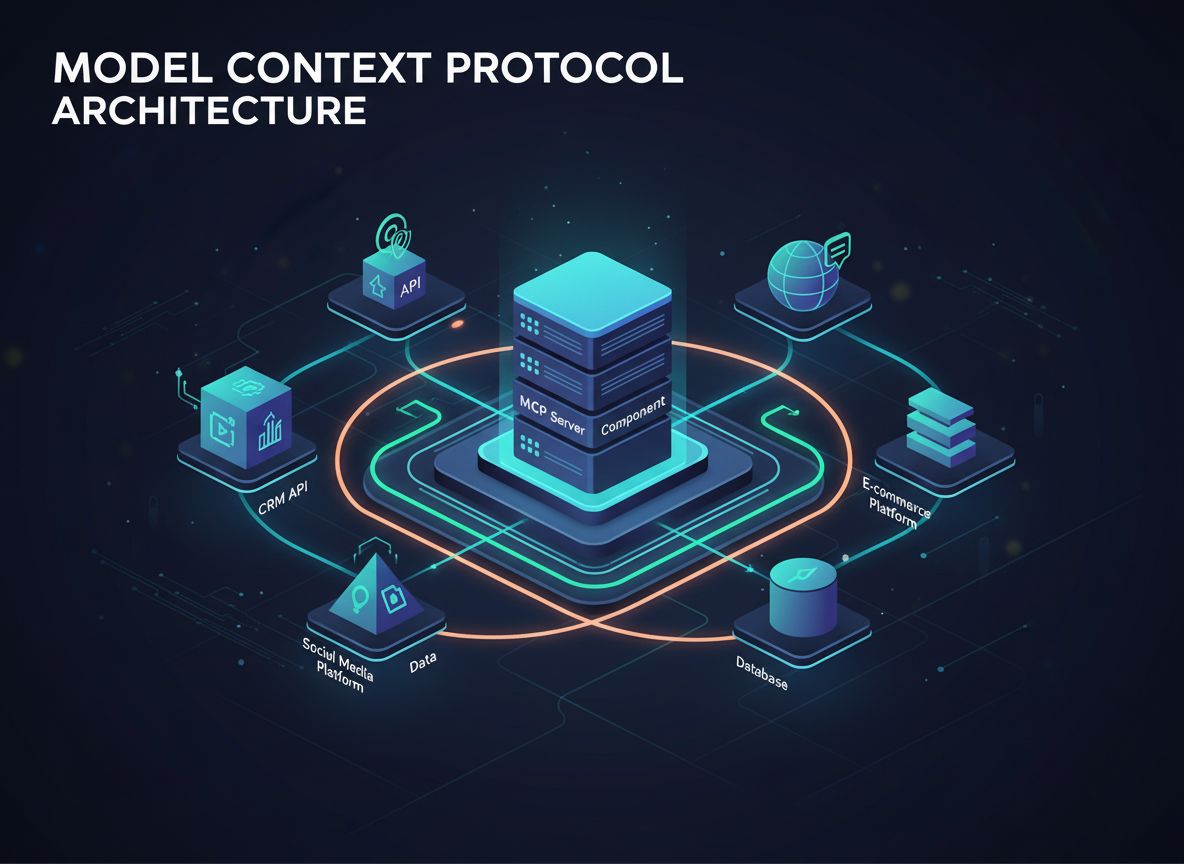
Anatomy of an MCP Server
Core Structure of MCP Server Architecture
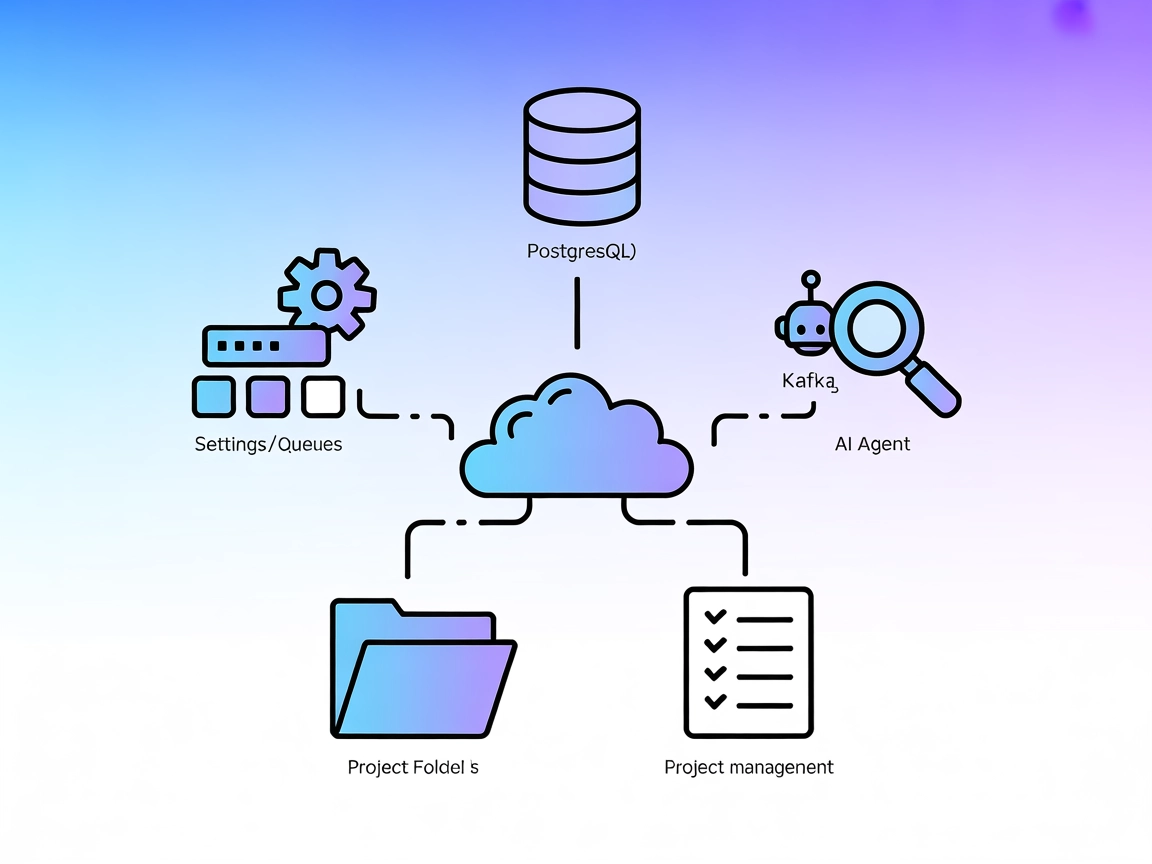
An MCP server manages protocol-based communication between AI assistants and external tools or data sources. The architecture uses a modular design, so each part handles a specific task within the system.
Primary Components
Server Application
The server application serves as the main hub. It receives, interprets, and responds to MCP protocol messages. This process includes handling secure network connections, checking the identity of clients, and managing the flow of data between different parts of the server. The server application keeps the system stable and running well, and often works with several connections and tasks at the same time.
Tool and resource modules are separate code units that the server registers. Each tool performs a specific job, such as getting data, running calculations, or automating tasks. The MCP server keeps a list, or registry, of these tools, which allows it to call the right tool when a request comes in. This setup lets you add new tools easily, without changing the main server logic.
Communication Handlers
Communication handlers take care of reading messages that follow the MCP protocol. They check if each request is in the correct format and send it to the right tool or resource module. Communication handlers also prepare the response in the correct format before sending it back to the client. This part of the server hides the details of the protocol, so different clients can connect without problems.
Integration Points
Integration points are special interfaces that link the MCP server to outside clients, like AI assistants or other apps. These interfaces can use HTTP endpoints, WebSockets, or other supported transport methods. Integration points let clients use the server’s tools, allowing for real-time communication and data sharing.
Component Interaction Flow
- Client Request: An external application or AI assistant sends a structured request to the MCP server through an integration point.
- Message Handling: The communication handler receives the request, checks that it is valid, and finds which tool or resource it should use.
- Tool Execution: The server calls the chosen tool or resource module, which processes the request and creates a response.
- Response Delivery: The communication handler formats the response to match MCP protocol rules and sends it back to the client.
Modular and Extensible Design
The MCP server architecture focuses on modularity. By keeping the server application, tools, communication handlers, and integration points separate, you can update or add new features with little trouble. This design makes the system easier to maintain and expand, helping support large and complex setups.
This overview shows how each part of an MCP server works together and how their connections support clear and reliable protocol-based communication.
Setting Up Your Development Environment
Start by picking a programming language that offers strong community support and is easy to use for building an MCP server. Python and Node.js both work well. Python is known for its simple syntax and comes with many useful libraries. Node.js handles asynchronous tasks efficiently. Choose a code editor that fits your workflow, such as Visual Studio Code, PyCharm, or WebStorm, to help you write and manage your code.
When managing dependencies and packages, use pip and venv for Python projects. For Node.js, use npm or yarn. Set up version control with Git so you can track changes and work with others more effectively. These tools help keep your development process organized and make it easier to repeat your setup on other computers.
Structuring Your Project Directory
A well-organized folder structure makes it easier to maintain and expand your project. Arrange your server project like this:
/mcp-server-project
/tools
/handlers
server.py (or server.js)
requirements.txt (or package.json)
README.md
Put each tool or resource into its own module inside the /tools folder. Place all protocol-related logic in the /handlers folder. This setup keeps your code clean and separates different parts of your project, following recommended best practices.
Setting Up Your Workspace
- Install the runtime for your chosen language (Python 3.8 or newer, or Node.js 16 or newer).
- For Python, create and activate a virtual environment using
python -m venv venv && source venv/bin/activate. - For Node.js, initialize your project with
npm init -y. - Add essential packages. For Python, run
pip install flask. For Node.js, use npm install express. - Create a
.gitignore file so you do not include virtual environments and system files in version control. - Write down your setup steps and list all dependencies in your
README.md file to make it easier for others to reproduce your environment.
Best Practices for MCP Server Setup
Work inside virtual environments to keep dependencies separate. Use clear and consistent names for files and folders, and document your code as you go. Make regular commits to your Git repository and keep backups. Following these steps helps you create a stable and scalable MCP server setup that supports professional development.
Join our newsletter
Get latest tips, trends, and deals for free.
Writing the Basic Server Code
Coding a Minimal MCP Server
You can build a simple MCP server using clear and modular code. With Python and Flask, you set up an endpoint that receives requests in MCP format and returns organized responses. This section walks you through a minimal, working MCP server example. The code follows best practices, so you can easily read and expand it when needed.
Step 1: Creating the Server Endpoint
First, import Flask and create an application instance. Set up an endpoint at /mcp that accepts POST requests. MCP uses POST because this method is standard for sending protocol messages.
from flask import Flask, request, jsonify

app = Flask(__name__)

@app.route('/mcp', methods=['POST'])
def handle_mcp():
    data = request.json
    # Placeholder for the logic that handles MCP messages
    return jsonify({'result': 'Hello, MCP!'})

if __name__ == '__main__':
    app.run(port=5000)
Scientific rationale:
POST requests with JSON allow you to send structured data that works across different programming languages. Flask’s request handling checks that the content is correct and manages errors properly.
Step 2: Processing and Routing MCP Requests
Next, update the handler so it can direct protocol requests based on the tool specified in the incoming data. This approach keeps the code organized and easy to maintain.
def handle_mcp():
    data = request.json
    tool = data.get('tool')
    if tool == 'calculator':
        result = calculator_tool(data)
    else:
        result = 'Tool not found'
    return jsonify({'result': result})
Step 3: Running and Verifying the Server
To start the server, run:
You can test the server by sending a request with curl:
curl -X POST -H "Content-Type: application/json" -d '{"tool":"calculator","num1":2,"num2":3}' http://localhost:5000/mcp
If the server works as expected, it will respond with a JSON message. This confirms that the server can accept and process requests for different tools.
Best Practices for MCP Server Code
- Place each tool’s logic in separate functions or files to make the code easier to update.
- Always check incoming data to prevent errors from bad requests.
- Use clear and descriptive response keys like ‘result’ so responses are easy to understand and follow a standard format.
This example gives you a solid starting point for developing an MCP server. You can add more protocol-compliant tools and expand its functionality as your project grows.
In an MCP server, tools are separate functions or endpoints that clients or AI models can use to carry out specific actions or get access to certain data. Each tool focuses on one defined job. For example, you might use a tool to run a calculation, fetch data from a database, or connect to an outside API. These tools follow the Model Context Protocol (MCP) rules for how to receive and send information.
You register each tool in the MCP server as its own function. Each tool follows a schema that explains its job, the inputs it needs, and what it returns. The Model Context Protocol specification requires every tool to include:
- A unique name or ID.
- A clear explanation of what it does.
- A schema that shows which parameters it accepts and what results it gives back, often using JSON Schema.
This setup lets clients, including AI models, find and use tools as needed. It helps different systems work together and reduces mistakes when they communicate. Scientific studies on protocol design show that using clear schemas lowers errors and makes it easier to connect different systems. You can find more about this in the Model Context Protocol documentation.
You keep track of tools in a registry, usually a dictionary or mapping, inside the MCP server code. When you get a request, the server looks at the request, finds the tool name, and sends the request to the right function. To add a new tool, you should:
- Write the function with checks for the input data.
- Document what the tool does and what arguments it needs.
- Add the function to the server’s tool registry.
This modular design means you can add new tools without changing the main server code. You can add features as needed, making the server scalable.
tools = {
    'calculator': calculator_tool,
    'weather': weather_tool,
    # Register more tools here
}

def handle_mcp():
    data = request.json
    tool_name = data.get('tool')
    if tool_name in tools:
        result = tools[tool_name](data)
    else:
        result = 'Tool not found'
    return jsonify({'result': result})
- Atomicity: Every tool should do only one clear job.
- Discoverability: The server’s capability schema must list all available tools, so clients know what they can use.
- Input/Output Consistency: Always follow the set schemas for input and output to keep the protocol working smoothly and avoid confusion.
Resources: Beyond Code
Tools are the functions you can run. Resources are the data, services, or outside APIs that these tools can reach. Tools can connect to databases, file storage, or third-party services. This setup allows the MCP server to link AI clients with many digital resources.
Testing and Debugging Your MCP Server
Strategies for MCP Server Testing
To test your MCP server, start by checking each endpoint using tools such as MCP Inspector, Postman, or cURL. These tools let you send sample protocol messages to your server. After sending a message, make sure your server gives back the correct data structure and error codes, following the Model Context Protocol specification.
You can use automated tests to check separate parts of your code. For example, use pytest if you work with Python or mocha for Node.js. These frameworks help you test the logic of each tool and how your server handles different messages. Test both correct and incorrect requests to see how your server deals with errors. Integration tests can help you copy real client behavior, so you can check if your server sends requests to the right places and keeps track of information if needed.
When you debug your MCP server, monitor logs in real time and step through the code to spot problems. Turn on detailed logging at important points, like when your server receives a request, parses a protocol message, runs a tool, or sends a response. This helps you see how data moves through your server and where something might go wrong. Use logging libraries, such as logging for Python or winston for Node.js, to organize your logs clearly.
For a closer look, use a debugger in your coding environment, like the PyCharm Debugger or VS Code Debugger. These tools let you set breakpoints and check the values of variables as your code runs. If your server runs in the cloud, you may need remote debugging tools or log collection services like Dynatrace or CloudWatch to keep track of errors in one place.
Common Testing Pitfalls and Solutions
When you test your MCP server, you might run into problems like using the wrong endpoint URLs, sending messages in the wrong format, or missing dependencies. To avoid these issues, double-check your server settings, such as configuration and port numbers. Use schema validation to make sure incoming messages match the format your server expects. If a tool does not give the results you want, test its logic separately with unit tests and check any recent code changes.
Good tests and detailed logging make it easier to find and fix problems. They help your server stay stable and easier to maintain over time.
Deploying and Scaling Your MCP Server
Choosing a Deployment Environment
You can deploy MCP server instances on local machines if you want to test features or on cloud platforms when you need production-level reliability. Cloud providers like Google Cloud Run, AWS Elastic Container Service (ECS), and Microsoft Azure App Service offer features such as automated scaling, built-in security controls, and high availability. Using Docker containers helps you create consistent server environments and makes it easier to move your server between different platforms.
Configuration for Secure and Reliable Operation
Set environment variables for sensitive information such as API keys and database credentials before you deploy your server. Adjust resource limits, including CPU and memory, to match the workload you expect. Always use HTTPS with TLS certificates to protect data sent between clients and the server. Restrict network traffic to only the necessary ports by setting up firewall rules or security groups.
Authentication and Access Control
Protect your MCP server endpoints by implementing authentication methods, such as API keys or OAuth. Only allow access from trusted clients. Regularly update and rotate credentials to lower the risk of unauthorized access.
Monitoring, Logging, and Health Checks
Turn on server logging and use cloud monitoring tools, like CloudWatch or Google Operations Suite, to track how your server performs and to watch for errors. Create health check endpoints so you can monitor server uptime automatically. Set up alerts to notify you when your system detects unusual activity or failures.
Scaling Strategies
Take advantage of autoscaling options from your cloud provider to adjust the number of server instances as demand changes. When your tools require a lot of CPU or memory, assign resources dynamically. If your platform supports it, use horizontal scaling by adding more instances instead of only increasing the resources of a single server. This method helps your server manage higher loads.
Maintenance and Updates
Plan regular updates for software dependencies and operating system patches to keep your server protected from security threats. Use blue/green or rolling updates when you deploy changes. These methods help you avoid downtime and keep your services running smoothly.
Following these steps helps you set up your MCP server so it remains accessible, secure, and able to handle future growth. This process supports stable, production-ready integrations.
Extending Your MCP Server
When you want to expand your MCP server, start by adding new and more advanced tools. For example, you can include data analytics modules, automated report generators, or connectors that link to workflow automation platforms. Make sure each tool works as a separate function or microservice. Follow the MCP tool registration protocol for each new addition. This approach keeps your server easy to manage, even as you add more features.
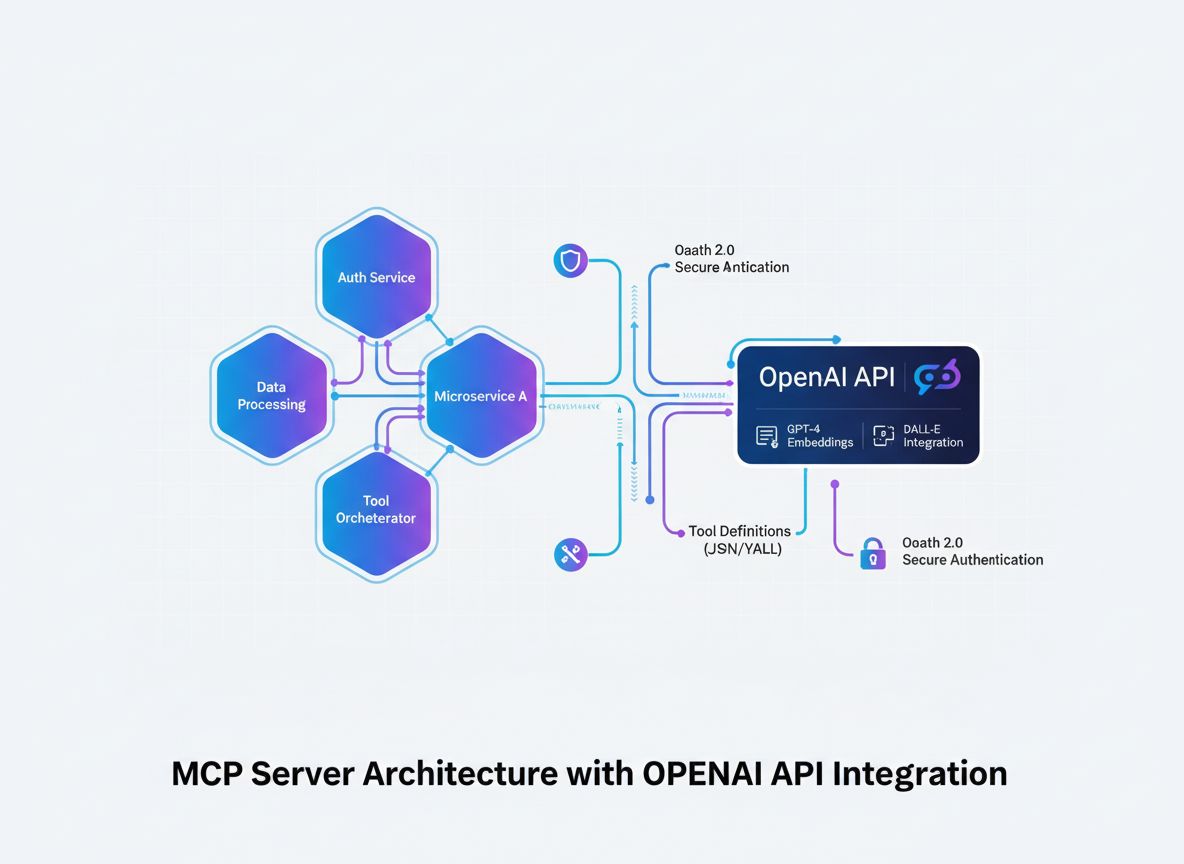
Integrating AI Models
To bring AI into your MCP server, add interfaces to external language models and AI APIs. You can connect to providers like OpenAI, Claude, or Mistral by using their SDKs or RESTful endpoints. Set up your server so it can keep track of the conversation’s state from one session to the next. This allows for more complex AI-driven tasks and lets you chain together multiple actions. You might use community-built adapters or SDKs, such as the Vercel AI SDK or LangChain MCP Adapters, to help with integration and ensure broad compatibility.
Connecting to External APIs
You can connect your server to third-party APIs, such as weather, payment, or notification services, by building special MCP tools. Each tool should handle tasks like authentication, formatting requests, and parsing responses. Use secure authentication methods, such as OAuth 2.1 or API keys. Run these tools in protected environments, like containers or WebAssembly, to keep your server and user data safe.
Best Practices for Secure and Scalable Extension
- Authentication and Authorization: Require authentication for every new tool to manage access and protect sensitive tasks.
- Sandboxing: Use isolated environments for tools to block security risks from untrusted code or integrations.
- Performance Optimization: Watch for any delays and work to keep response times low, especially when dealing with real-time AI or external API calls.
- Observability: Set up logging and monitoring to keep track of tool usage, find errors, and keep your server running smoothly as you add more tools.
- Context Management: Use smart strategies like sharding or archiving to keep interactions fast and organized as they become more complex.
Continuing Your MCP Journey
Check the official MCP documentation and open-source projects for example implementations and community-made extensions. Join developer forums and help improve shared standards and best practices. Each new tool you build makes your server more powerful and gives you hands-on experience with protocol engineering.
By using these methods, you can extend your MCP server to support advanced, AI-ready, and secure applications.
Next Steps
When you build an MCP server, you gain hands-on experience with protocol-based integration, modular backend design, and connecting AI to other systems. In this guide, you worked through key steps: learning how the Model Context Protocol works, putting together the main server parts, writing and testing your code, deploying your server with security in mind, and planning how to add more advanced features later.
The MCP framework gives you a clear method for real-time data exchange between AI agents and external tools. This structure makes integration less complicated and helps you support automation that can handle growth and change (Anthropic, 2024). By building these skills, you can keep up with new AI workflows and changing backend needs.
You can keep learning by trying out new tools, bringing in different types of data, and joining discussions in the MCP developer community. Developing your abilities in MCP server setup can help you create new solutions with AI and improve modern software projects.
Start now. Use the resources you have and apply what you learned.