Google Tasks
Integrate FlowHunt with Google Tasks to automate your task management. Effortlessly list, search, create, update, and delete tasks, enabling seamless productivi...
4 min read
AI
Google Tasks
+3
Replace the chat input with a Scheduled Task trigger and let your workflows run automatically on any schedule you define.
Instead of waiting for input, a Scheduled Task triggers your entire workflow automatically on a schedule you define. The rest of the flow runs exactly as it would with a manual trigger
Scheduled Tasks are useful any time you want something to happen automatically and repeatedly:
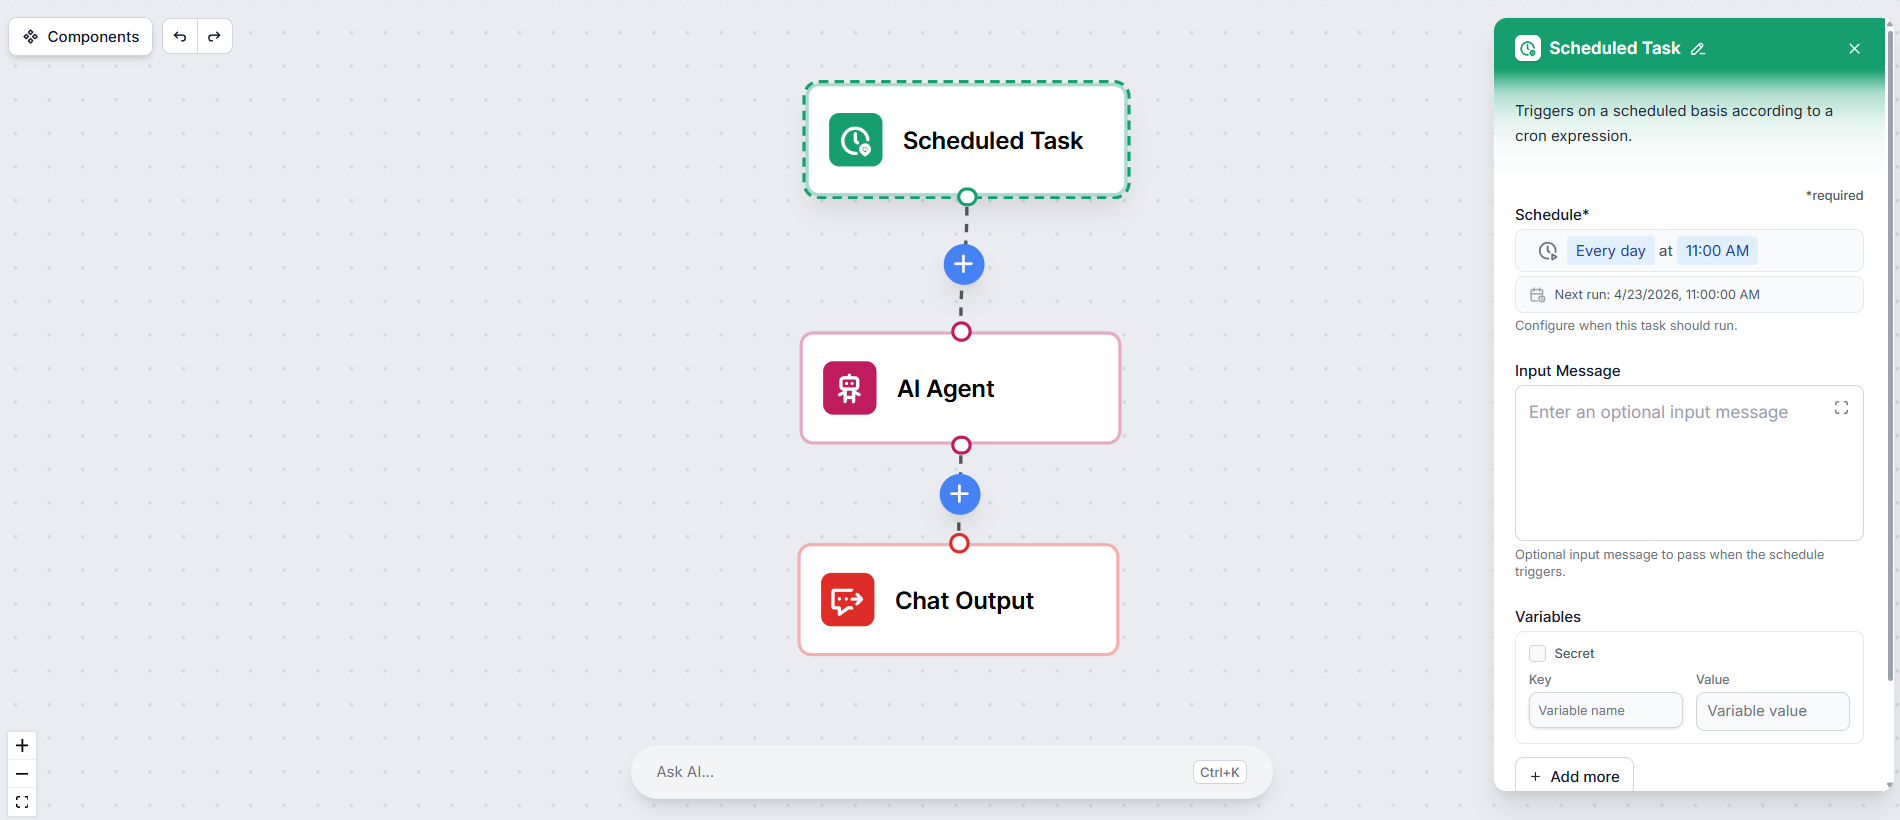
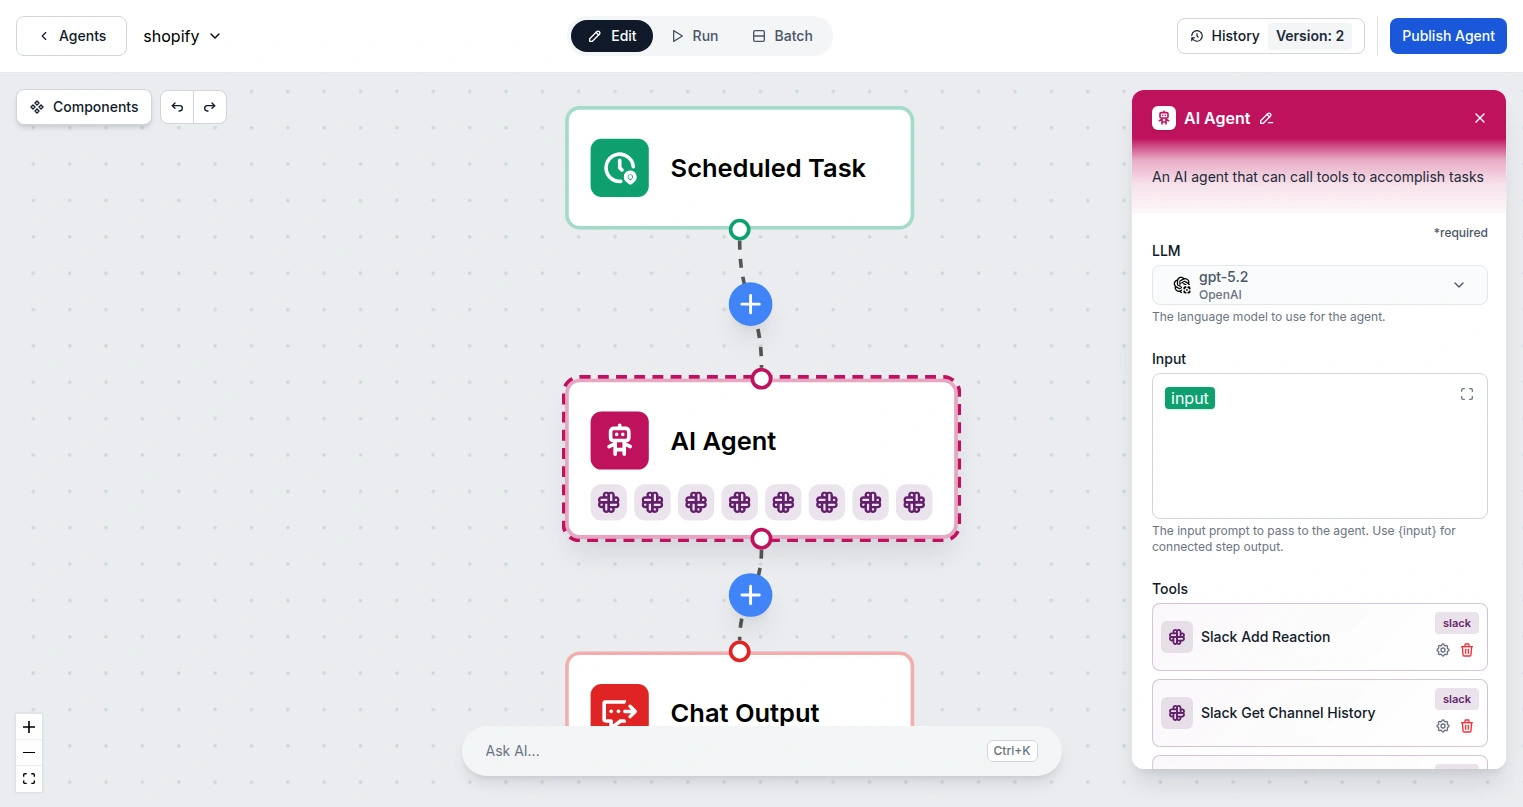
Open your flow in the flow editor . Your Flow likely starts with the default Chat Input component. Delete it.
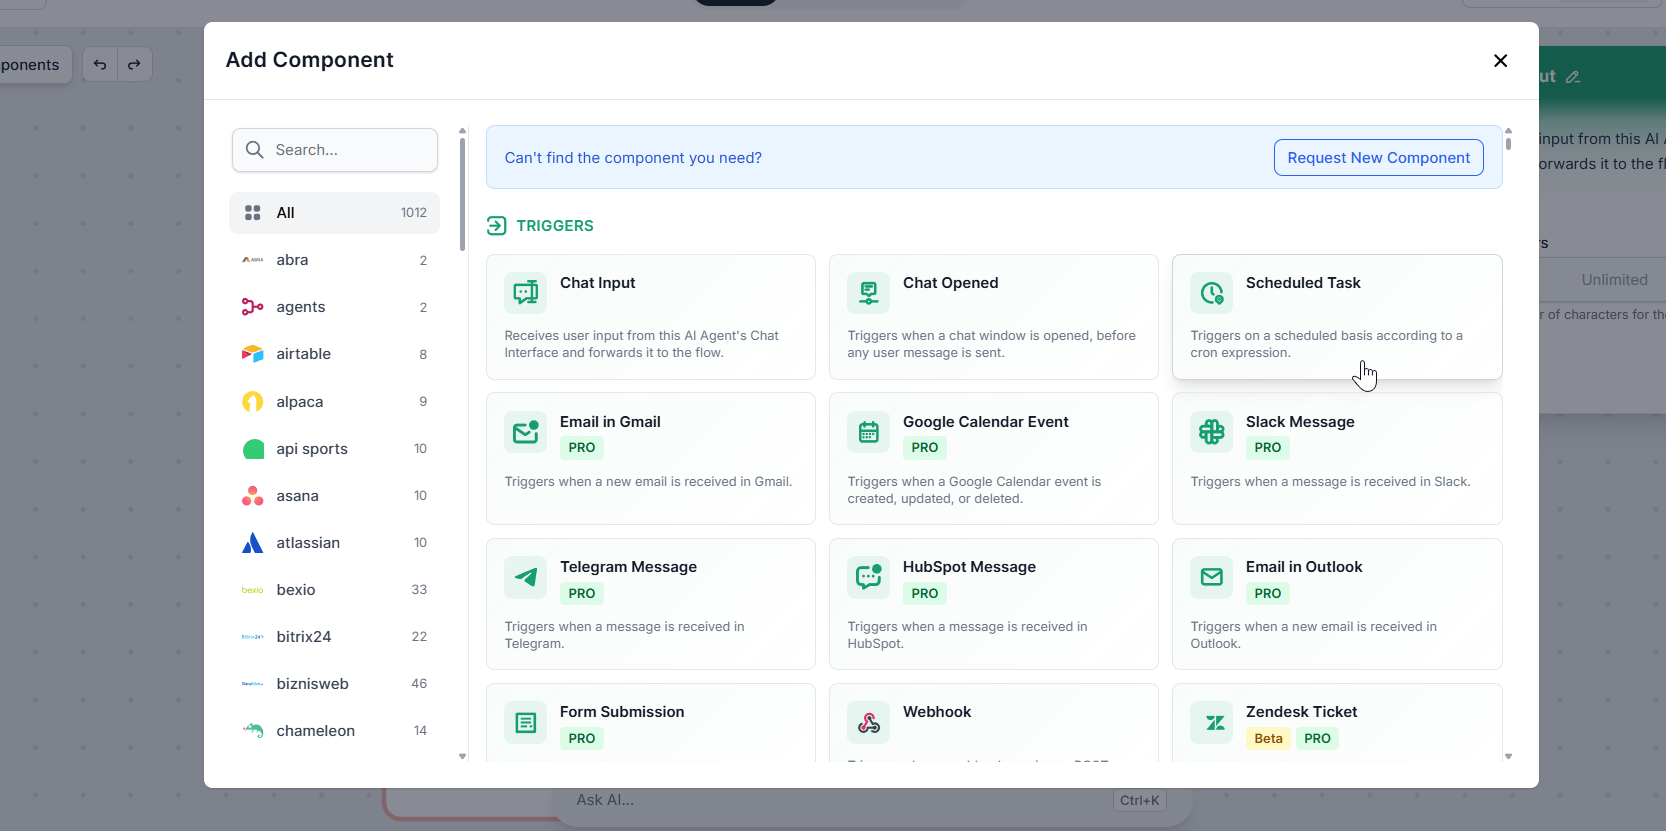
In the component panel on the left, open the Triggers category and pick the Scheduled Task component. Connect it to the first component in your flow, just as the Chat Input was connected before.
Click the Scheduled Task component to open its settings. By clicking the Schedule setting, you can set the frequency at which the flow should run.
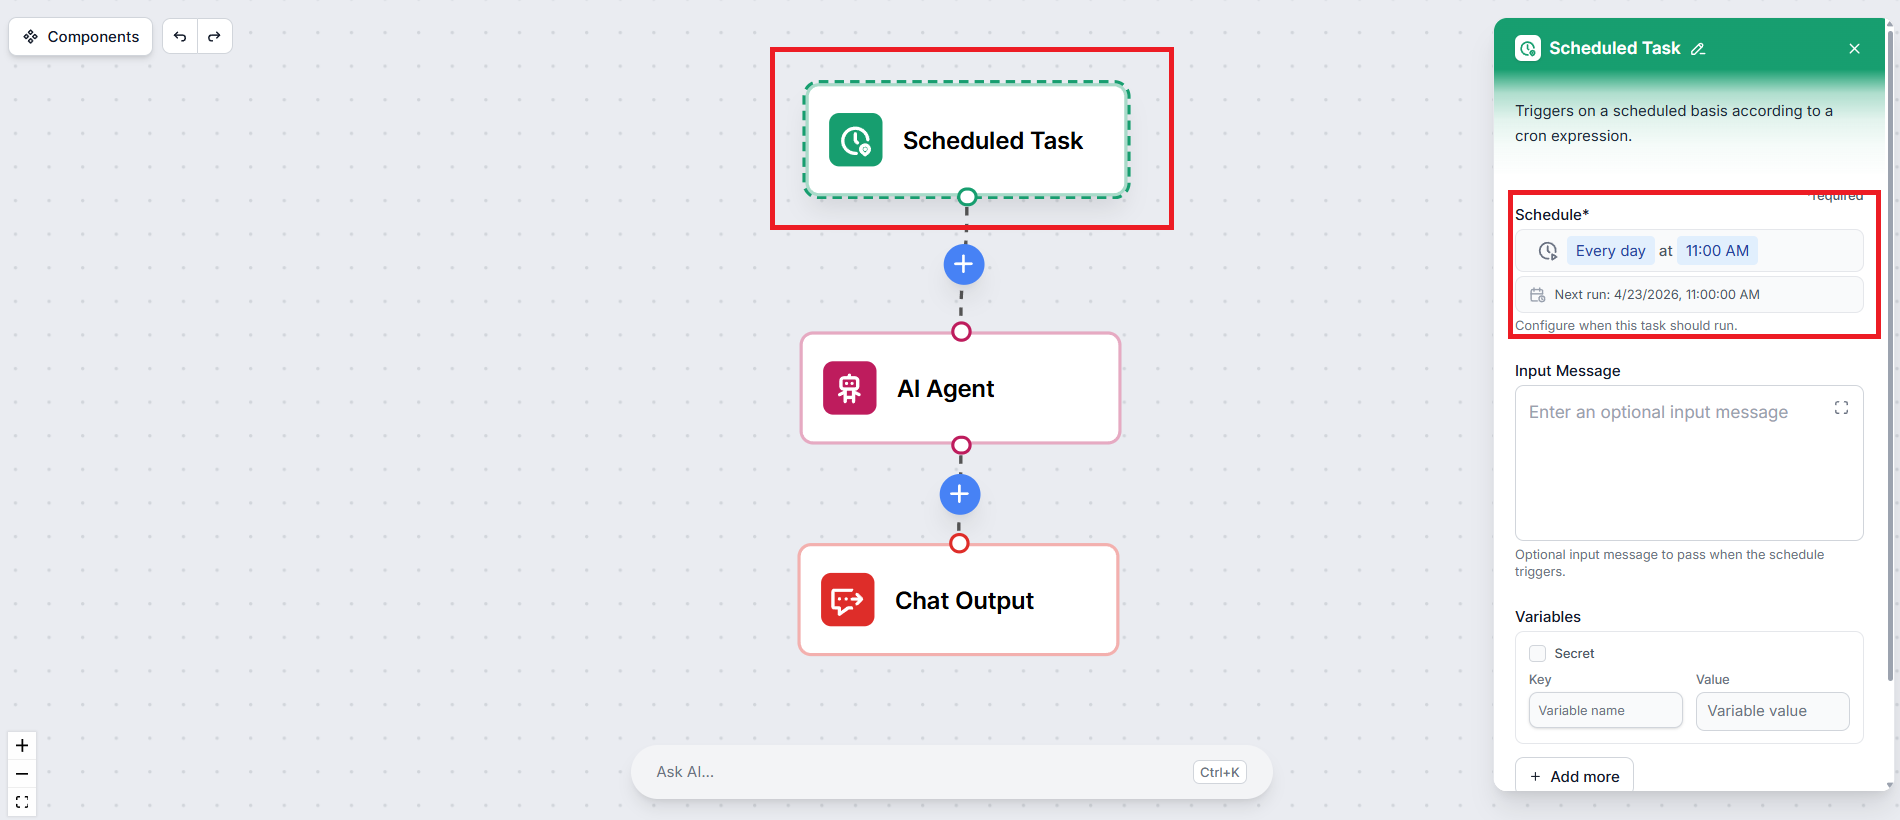
You can choose from common intervals like hourly, daily, or weekly, or define a custom cron expression for more precise control.

If your flow expects a starting message, for example, a prompt that tells the AI what to do, you can enter it in the Input Message field. This message will be passed into the flow every time the schedule fires, exactly as if a user had typed it.
For example, if your flow generates a weekly content brief, your input message might be:
“Generate a content brief for this week focused on AI automation trends.”
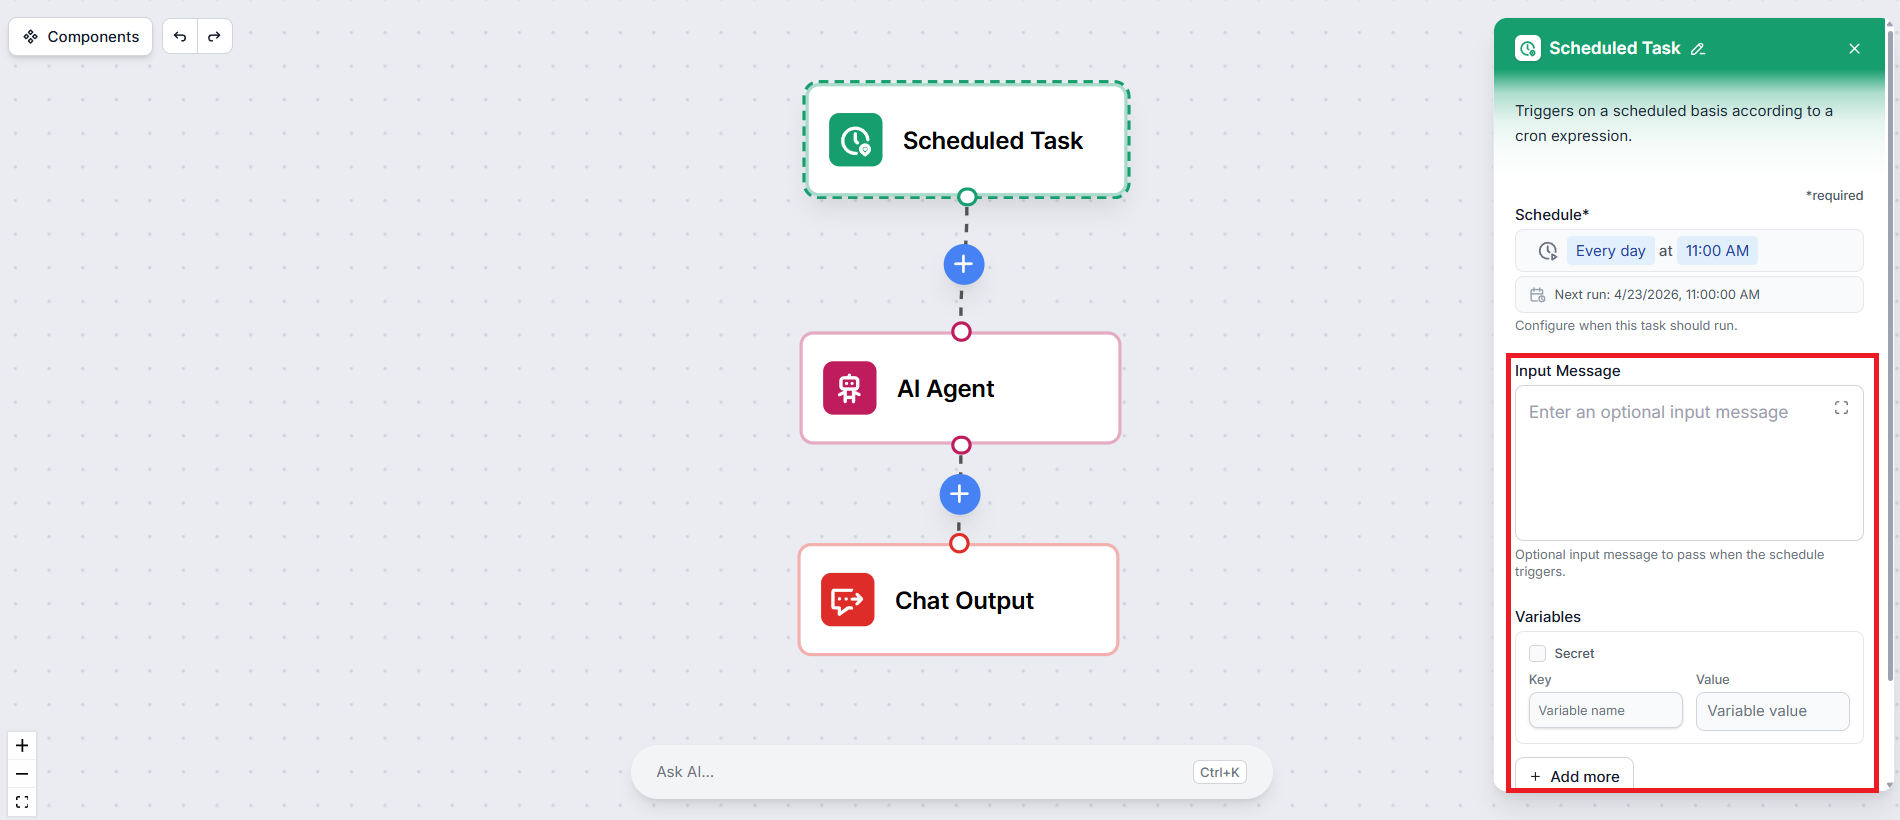
If your flow uses variables — such as a target URL, a recipient email address, or a topic — you can define them directly in the Scheduled Task settings. These variables will be injected into the flow on every run, so you don’t need to hardcode them elsewhere.
That’s it. Save your schedule, and don’t forget to hit publish. Your workflow will now run automatically at the interval you configured..
Start your free trial today and see results within days.
A Scheduled Task on its own is most powerful when the flow doesn’t end with a chat response. Since no one is sitting at a chat window waiting for a reply, the output should go somewhere useful automatically.
Good output pairings for scheduled flows include:
If you’re still using a Chat Output component in a scheduled flow, the results will be saved in the workspace history or session history of the flow, but no one will see them in real time. Consider replacing it with an integration that delivers the output where it’s actually needed.
Set up a Scheduled Task in FlowHunt and let your flows run themselves — no manual input needed.
Integrate FlowHunt with Google Tasks to automate your task management. Effortlessly list, search, create, update, and delete tasks, enabling seamless productivi...
Integrate FlowHunt with Asana to automate project and task management, track work with AI, sync data in real time, and deploy intelligent team workflows—no codi...
Integrate FlowHunt with Google Calendar to automate scheduling, create and manage events with AI, find available times, and build intelligent calendar workflows...
Cookie Consent
We use cookies to enhance your browsing experience and analyze our traffic. See our privacy policy.