
Putting an AI assistant in Slack is one of the most useful things you can do with AI at work: instead of opening another tab, your team just messages a bot in the channel they already live in. But “add an AI assistant to Slack” can mean two very different amounts of effort depending on how you do it.
This guide walks through both, side by side:
- The no-code way: deploy an agent to Slack with FlowHunt, entirely in your browser.
- The self-hosted way: connect Slack to OpenClaw, a CLI assistant you run yourself.
Same end result (an assistant your team can talk to in Slack), very different paths to get there. We will do the easy one first, then the involved one, then compare them honestly so you can pick.
The Two Approaches at a Glance
| FlowHunt | OpenClaw | |
|---|---|---|
| Where it runs | Cloud-hosted, fully managed | Self-hosted, you run the gateway |
| How you set it up | Click deploy, authorize Slack | Slack app + tokens + config + gateway |
| Tools needed | A browser | Terminal, a Slack app, two tokens |
| Stays online | Always | Only while your gateway is running |
| Time to first reply | Minutes | A longer sit-down |
Both genuinely work. The difference is how much plumbing you own. Let us start with the version that has almost none.
Option 1: Add an AI Assistant to Slack with FlowHunt (No-Code)
FlowHunt is a cloud-hosted, no-code platform for building and running AI agents. Because it is managed, getting one into Slack is a connect step, not an install: as FlowHunt puts it, “connecting Slack to FlowHunt takes a single OAuth click, no API keys or manual configuration required.” There is nothing to host and no tokens to copy by hand. Here is the whole flow.
Step 1: Connect your Slack workspace in one click
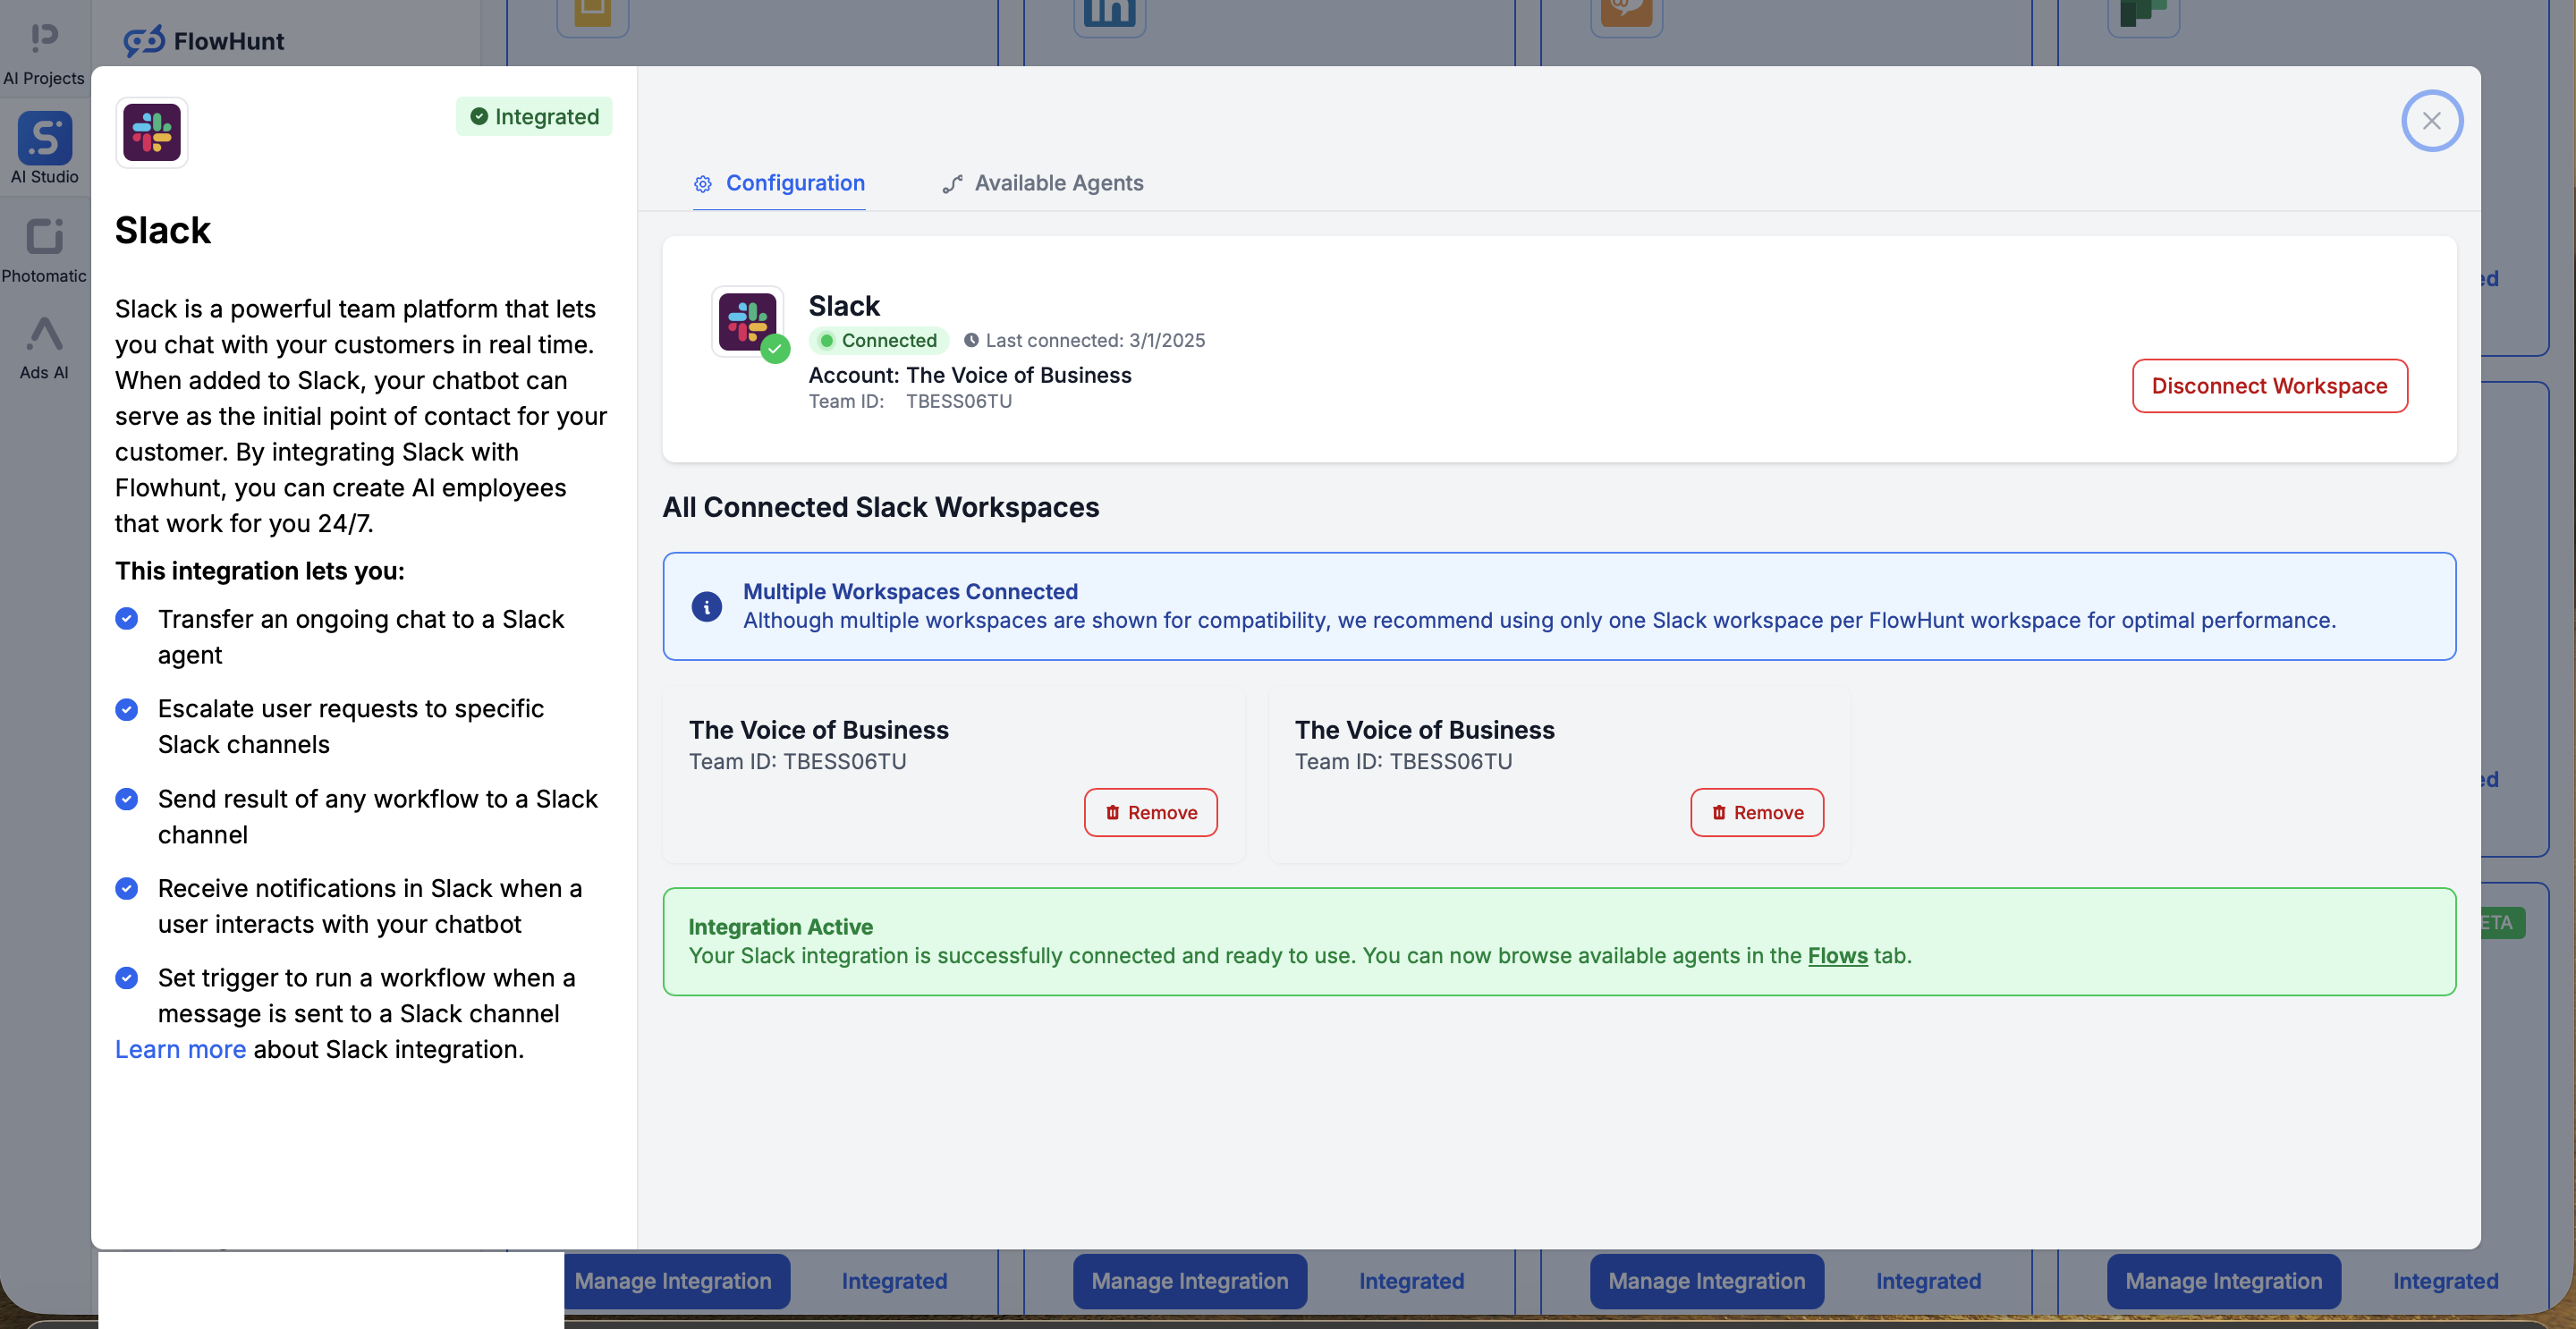
In FlowHunt, open the Integrations section. You will see the full catalog of services FlowHunt connects to, Slack among them, each a click away with no setup files to edit.
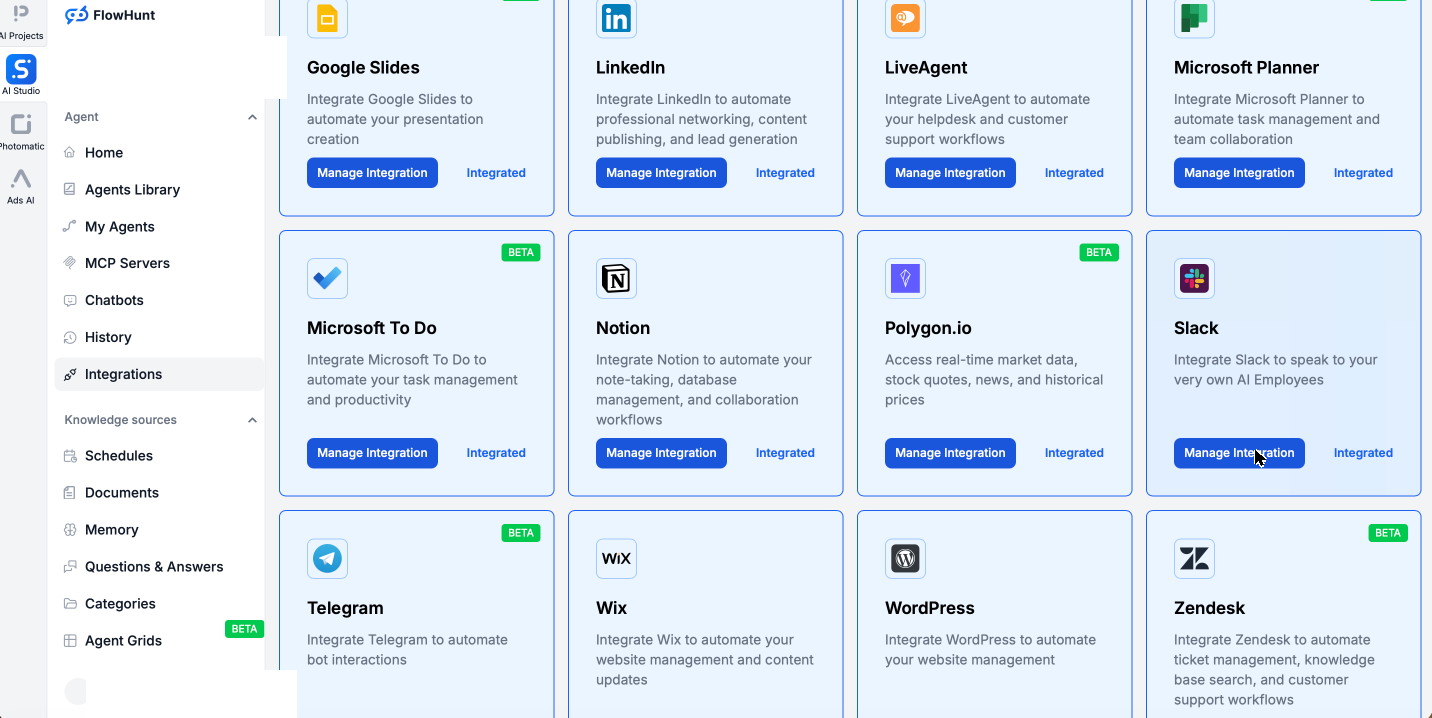
Search for Slack and click Manage Integration to open the connection dialog. Click Connect Slack Workspace, approve the standard permission screen on Slack, and you are redirected back to FlowHunt with your workspace connected and ready to use. That is the entire authentication: one OAuth click, no app to build, no tokens to copy.
Step 2: Pick or build your agent
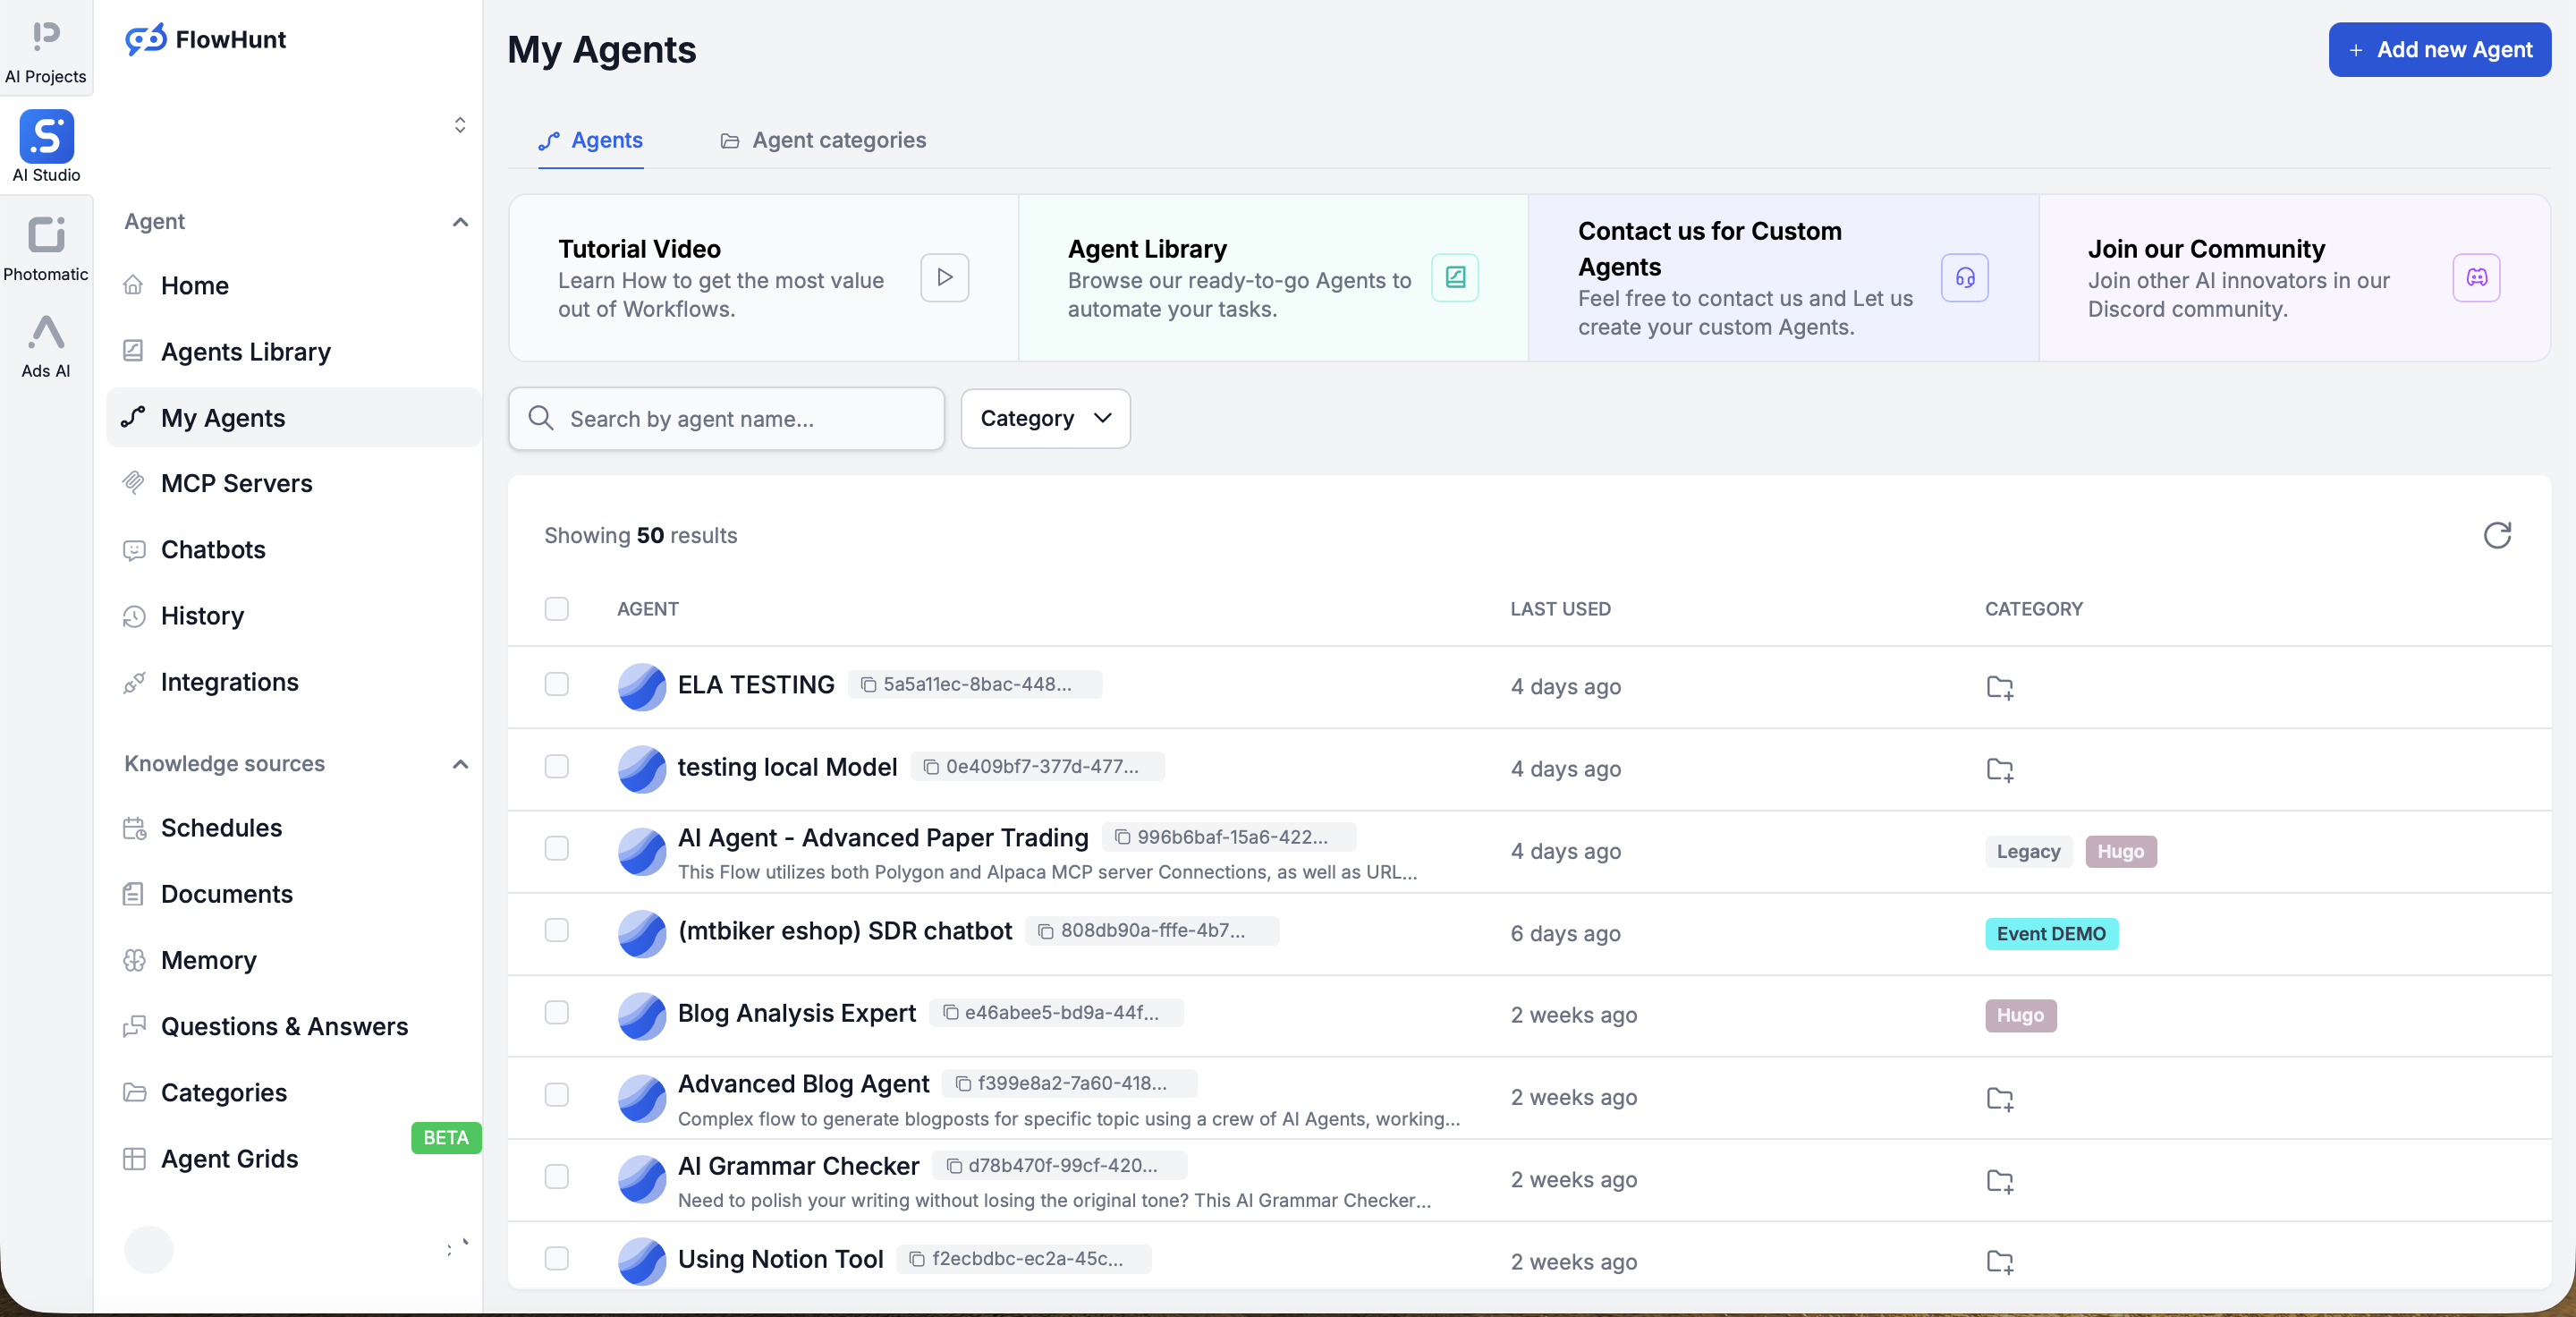
Now choose the assistant that will live in Slack. You rarely start from scratch: FlowHunt ships nearly 500 prebuilt agents, with around 30 covering the majority of everyday jobs, so most people pick a ready-made one from My Agents and tweak it.
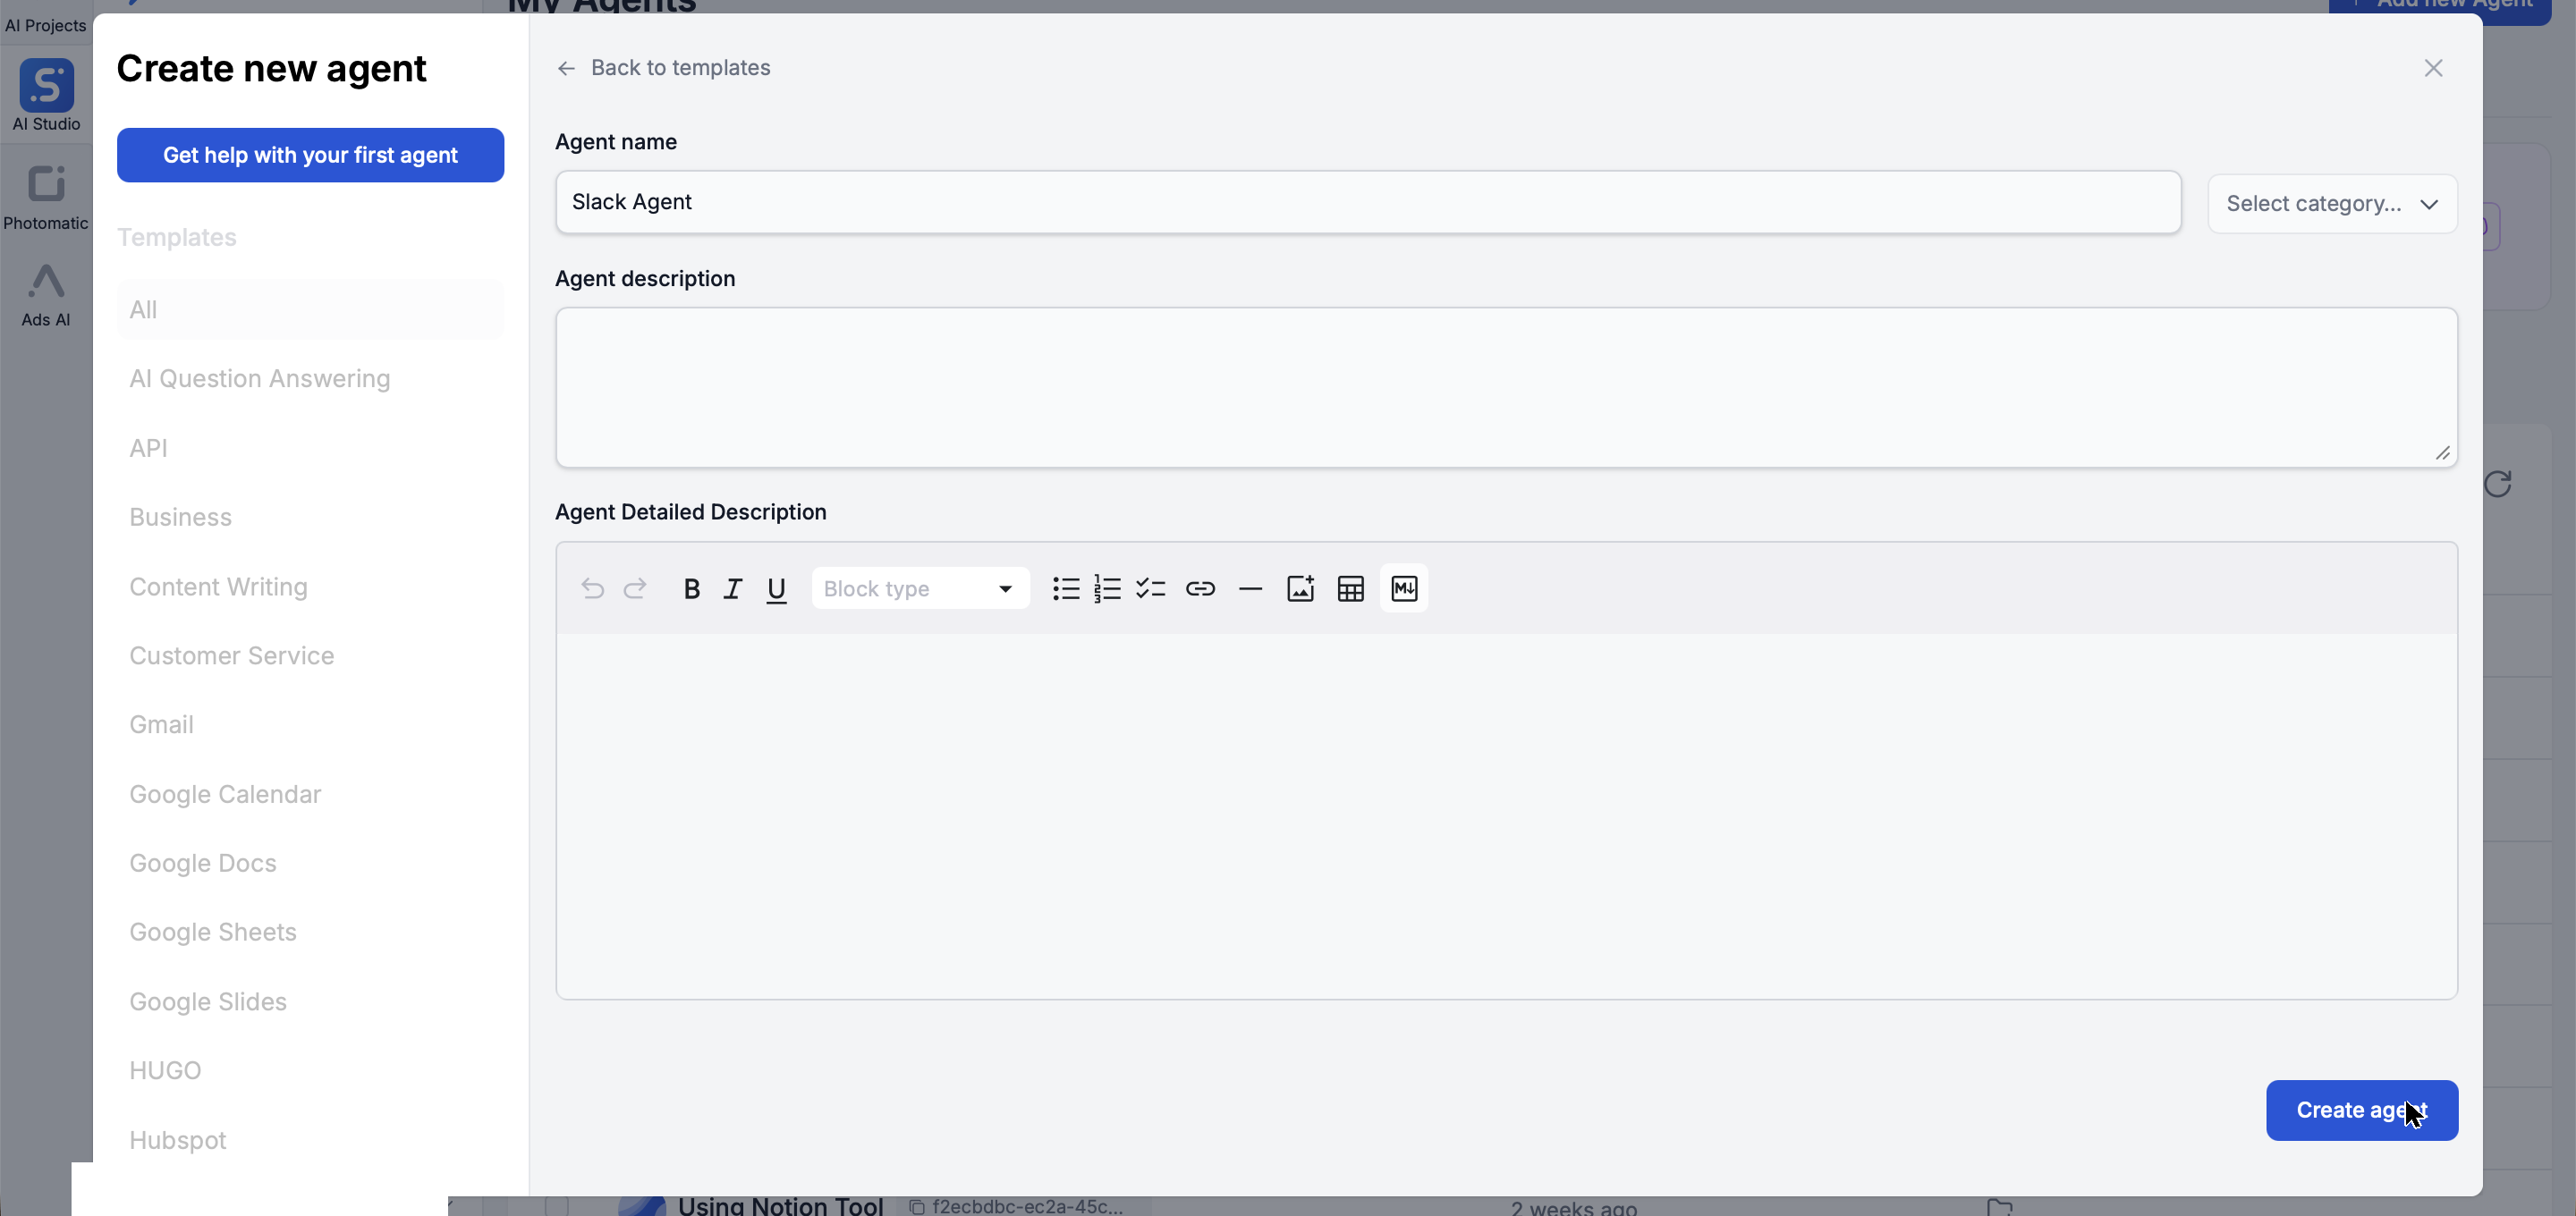
Prefer to build your own? Click Add new agent, give it a name and description, and FlowHunt scaffolds a fresh agent for you, no code required.
Either way, your agent opens in the visual Flow Builder: a trigger, the AI Agent itself, and an output, all wired together on a canvas you can edit by dragging. Click any node to configure it on the right — here the Slack Message trigger that fires when a message arrives.
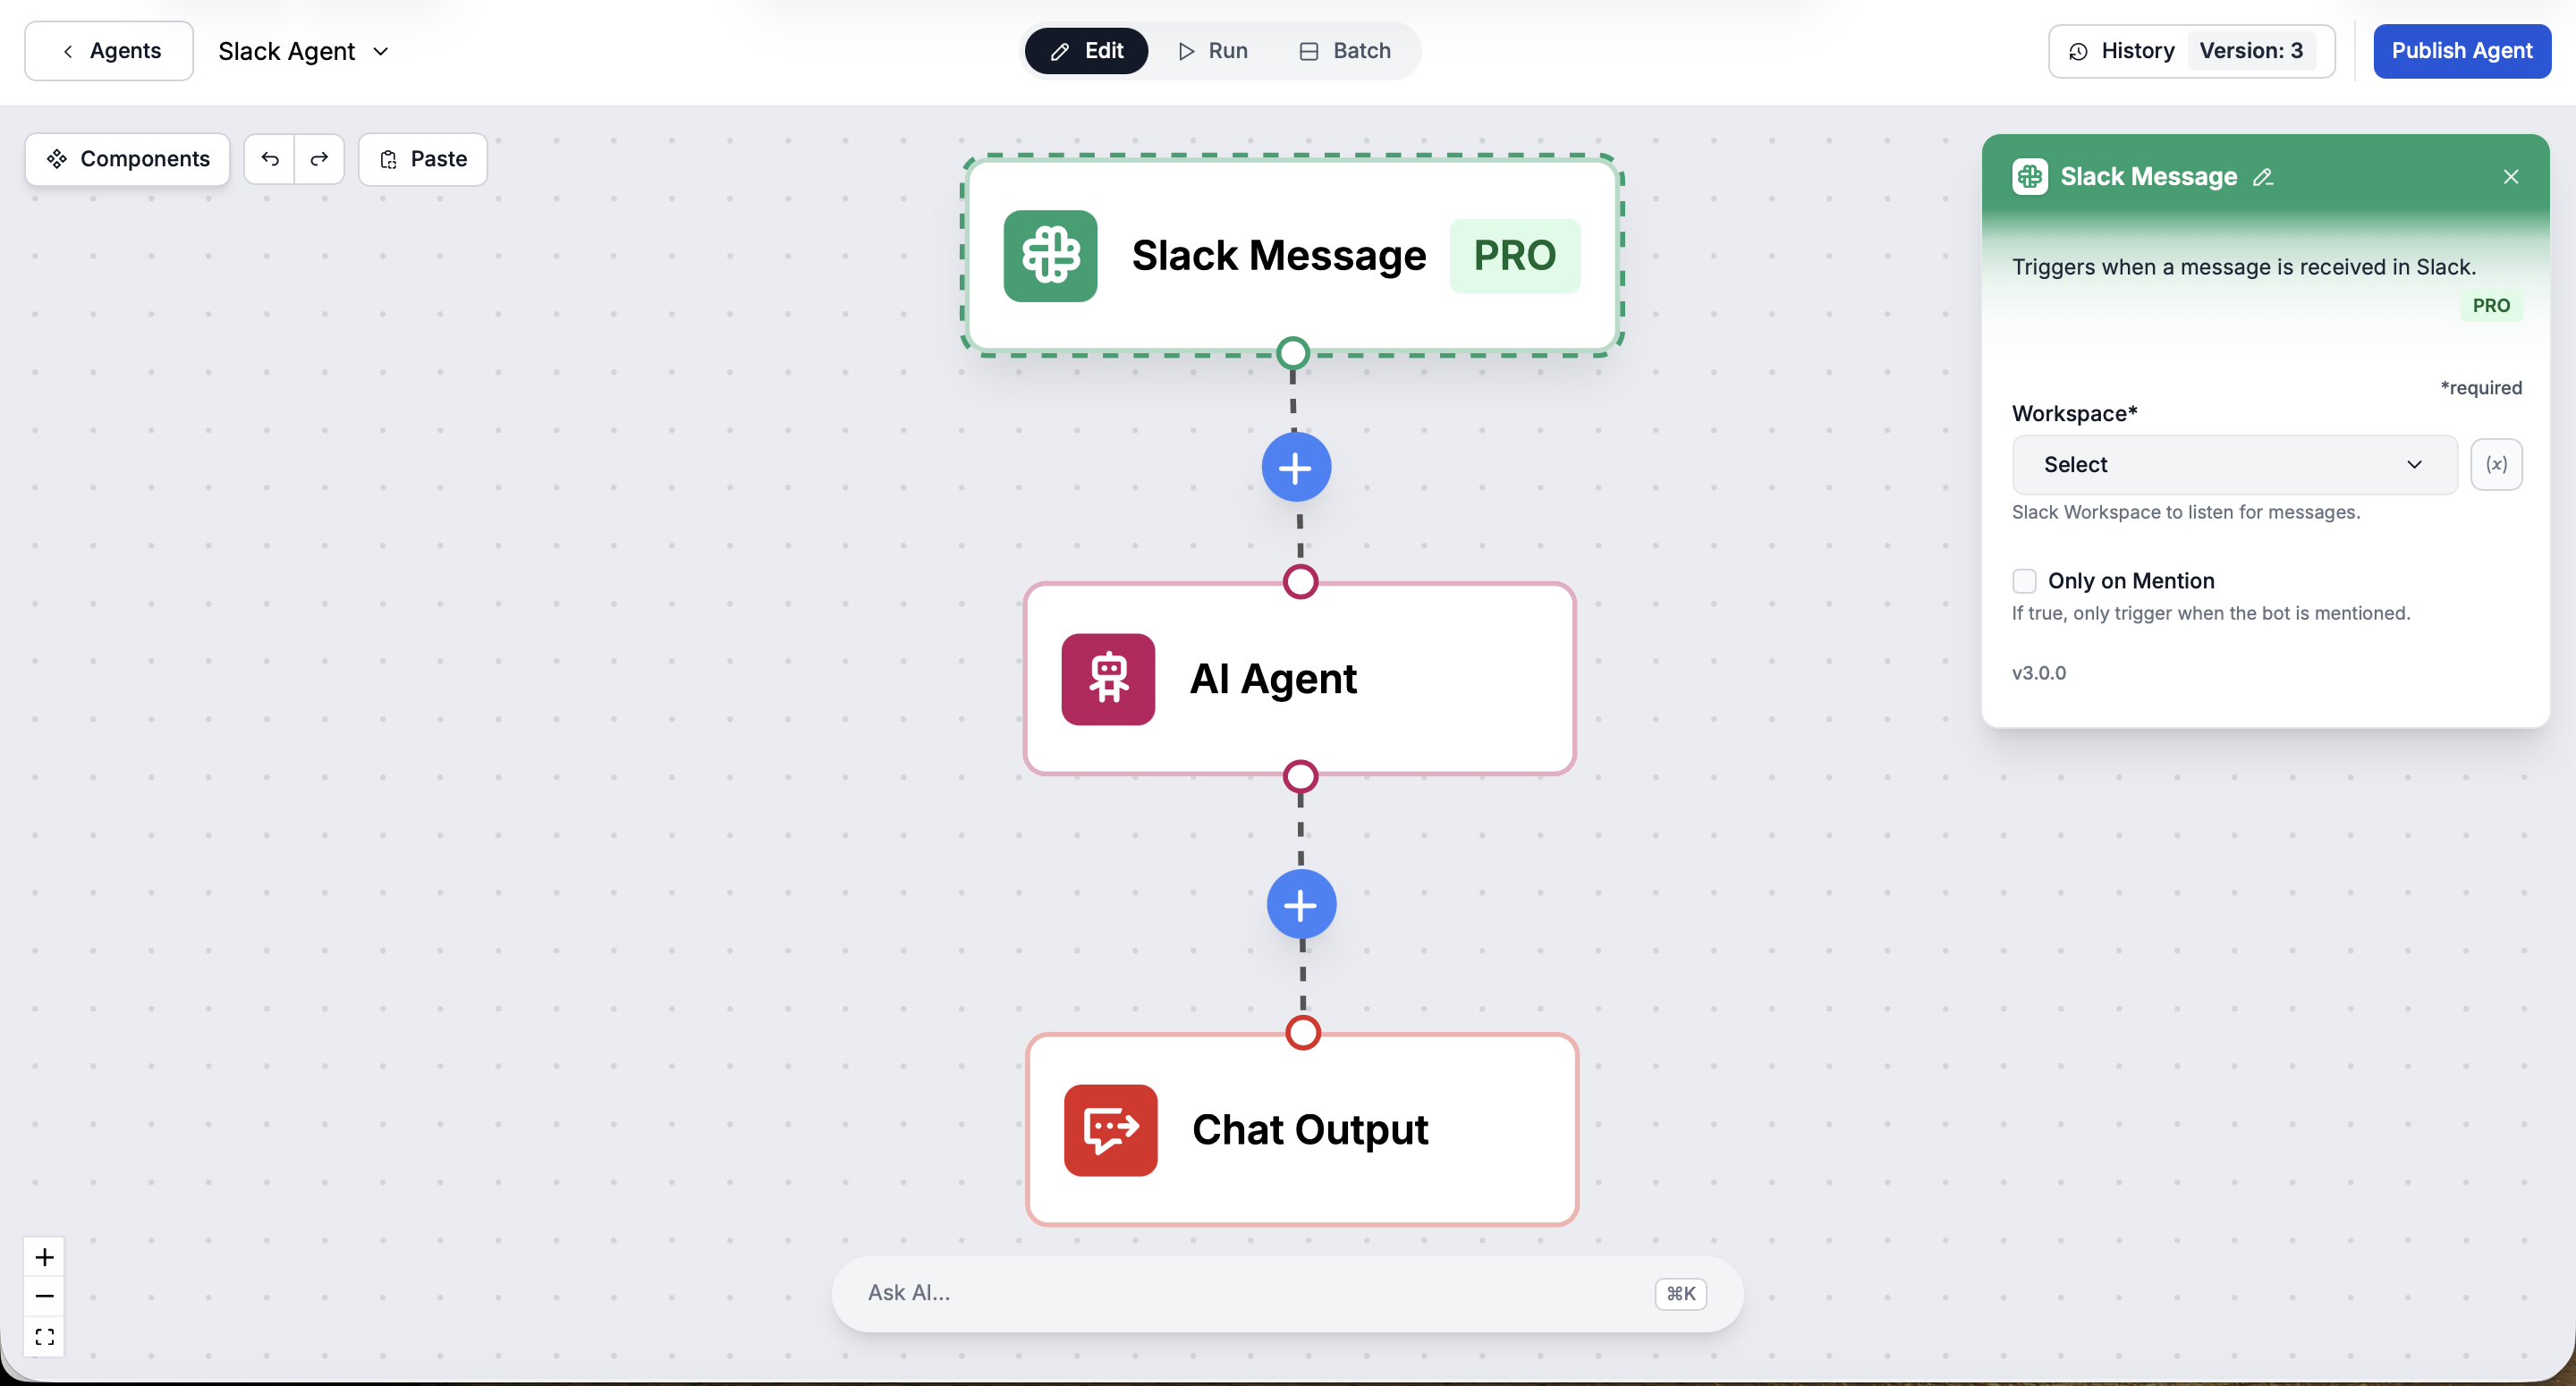
Step 3: Give the agent its Slack abilities
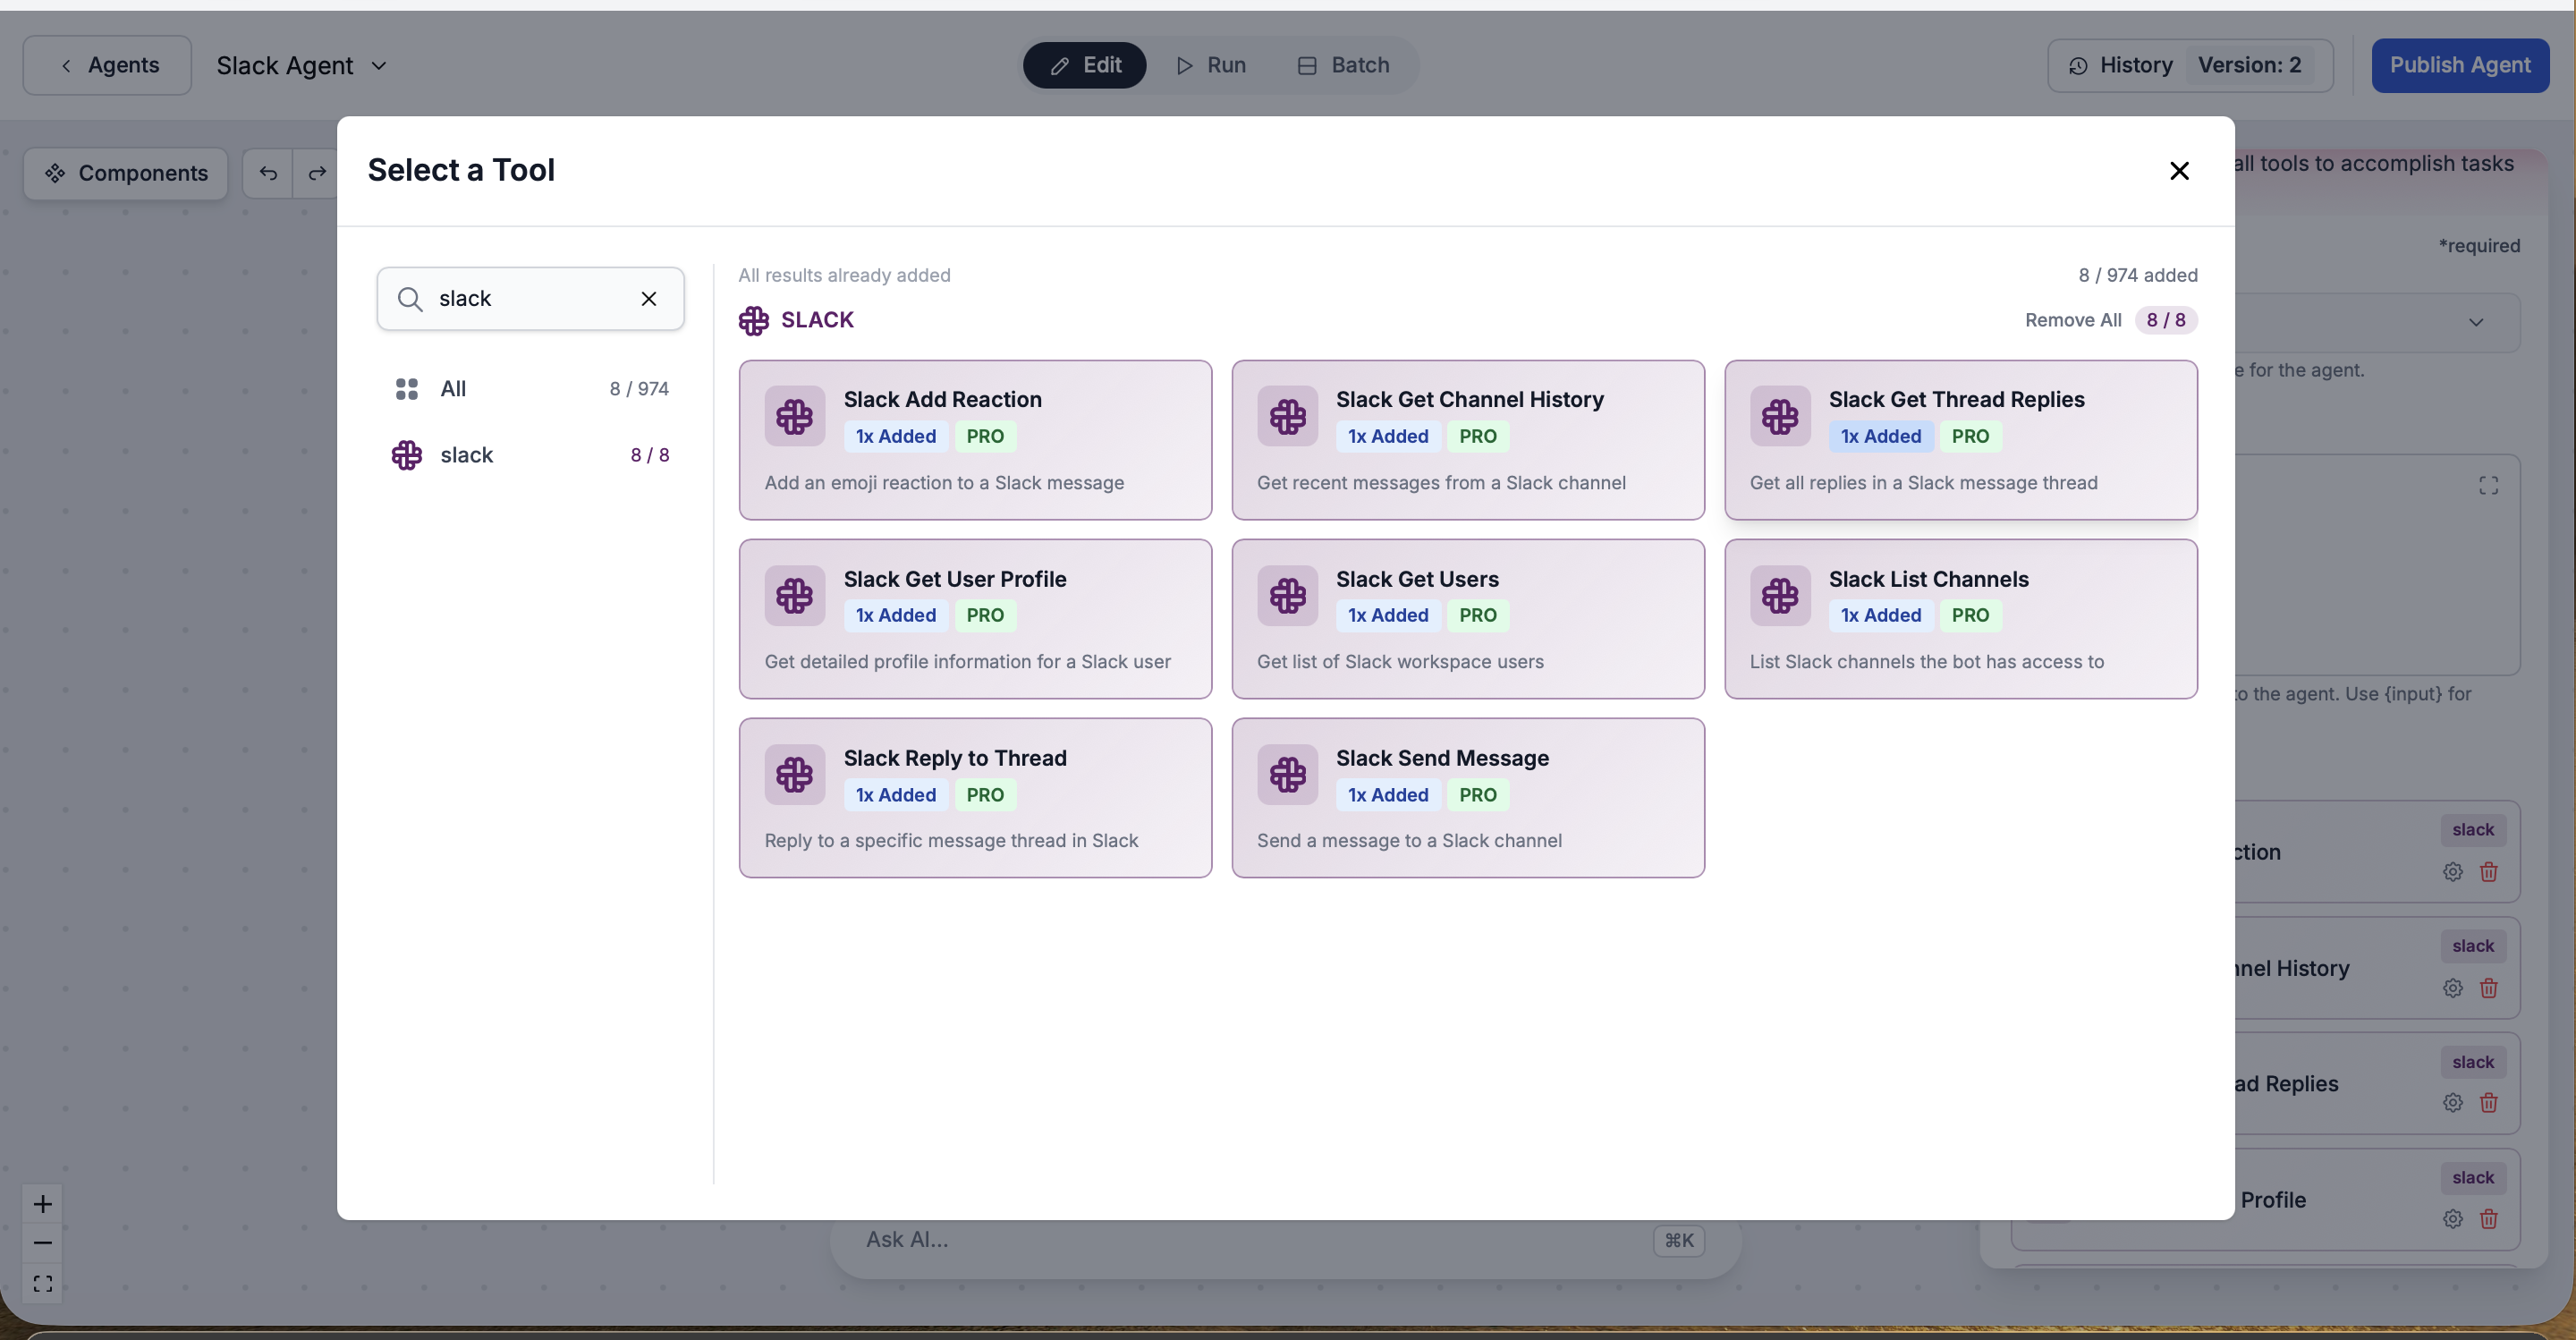
In the Flow Builder, add the Slack tools to your agent with a few clicks. These are the actions it can take in Slack: send messages to channels, reply to threads, add emoji reactions, retrieve channel history, get thread replies, look up user profiles, list workspace users, and list accessible channels. No code, just pick the tools you want.
Step 4: Test it, then deploy to Slack
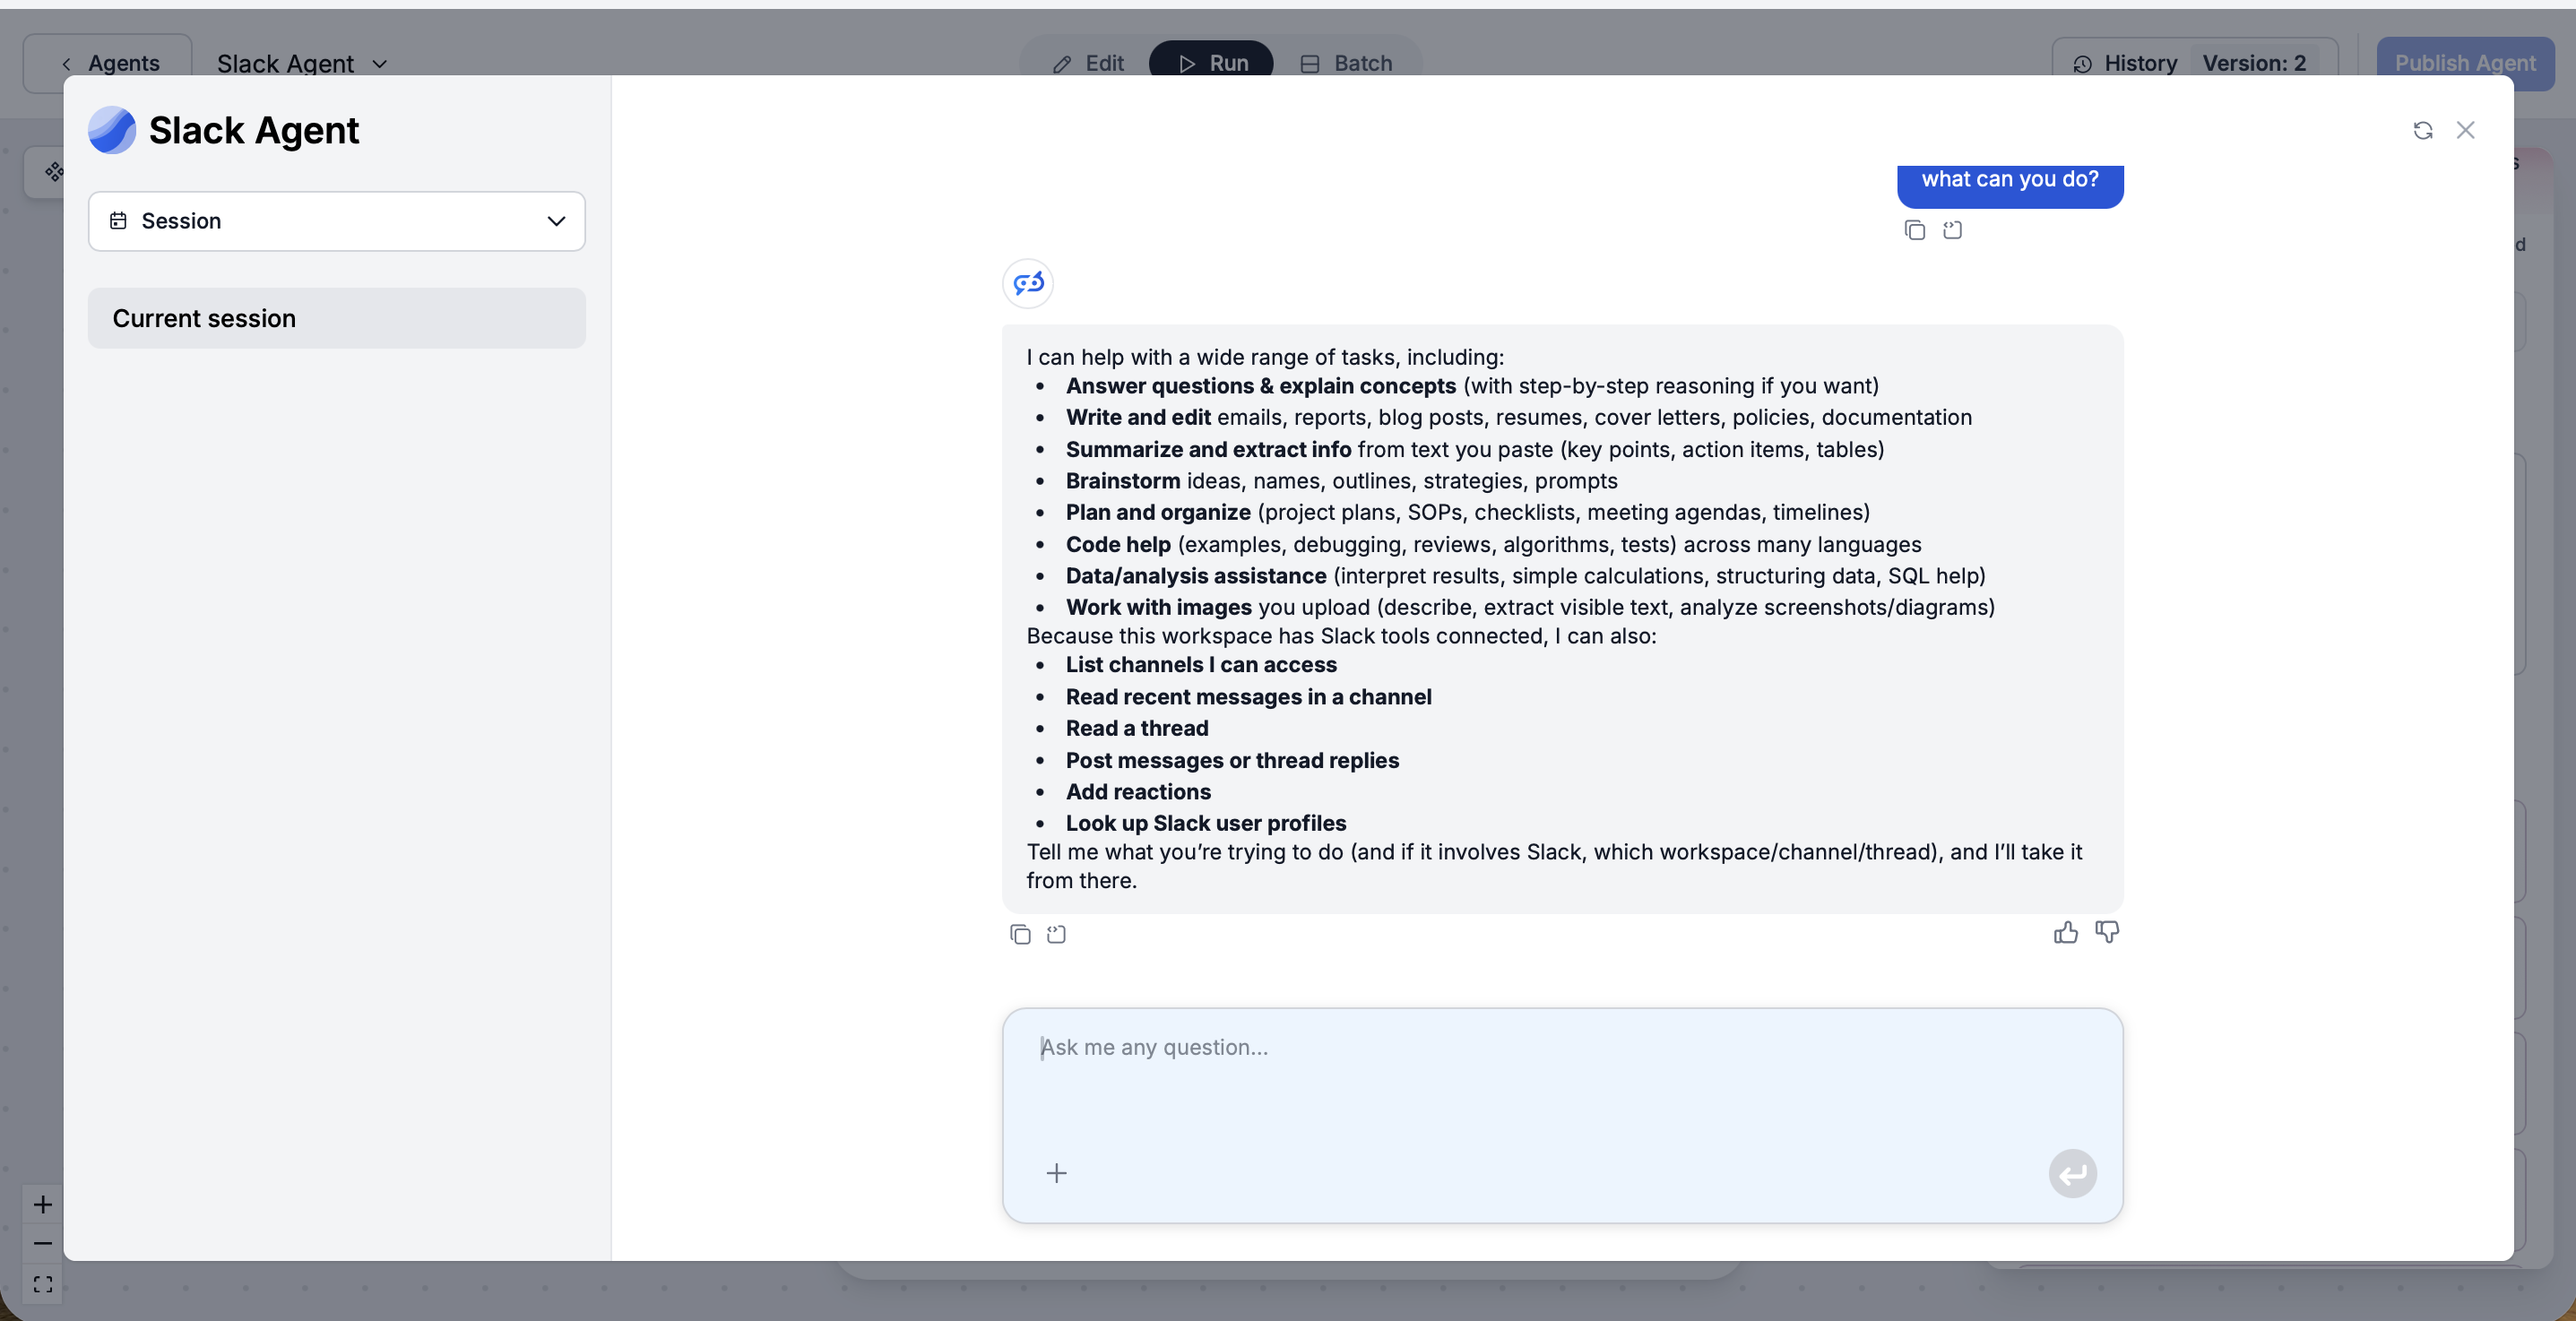
Before you ship it, hit Run in the builder and ask the agent something. It confirms what it can do, including its new Slack powers: listing the channels it can access, reading recent messages and threads, posting messages and replies, adding reactions, and looking up users.
That is it: the agent is already live in Slack. Because you connected the workspace back in Step 1, it does not need any separate “deploy” step, it can already act in your Slack. It reads and posts in the channels you allow, replies in threads, and you can set it to run automatically whenever someone mentions it in a channel. And because FlowHunt is cloud-hosted, it stays online 24/7 whether your laptop is on or not, with nothing installed on anyone’s machine, so your team just messages it like any colleague. The same integration also lets it hand a conversation off to a human in Slack, escalate to specific channels, and post workflow results.
And since you built the agent once in FlowHunt, the same assistant can also be deployed to your website, LinkedIn, or your own app via API from the same place, with built-in scheduling and analytics behind it. Slack is just one of its faces.
Ready to grow your business?
Start your free trial today and see results within days.
Option 2: Connect Slack to a Self-Hosted OpenClaw
OpenClaw is a self-hosted personal AI assistant you run on your own machine. (If you have not installed it yet, see our OpenClaw install guide
.) It can absolutely talk to Slack, but here is the honest part: Slack is not something the openclaw onboard wizard sets up for you. Connecting it is a separate job with several moving parts. We will use Socket Mode, the default, because it needs no public URL and works behind a firewall.
Step 1: Install the Slack plugin
Slack support ships as a plugin. Install and enable it first:
openclaw plugins install @openclaw/slack
This registers the plugin, but it does nothing on its own yet. It needs a Slack app and tokens, which is the next part.

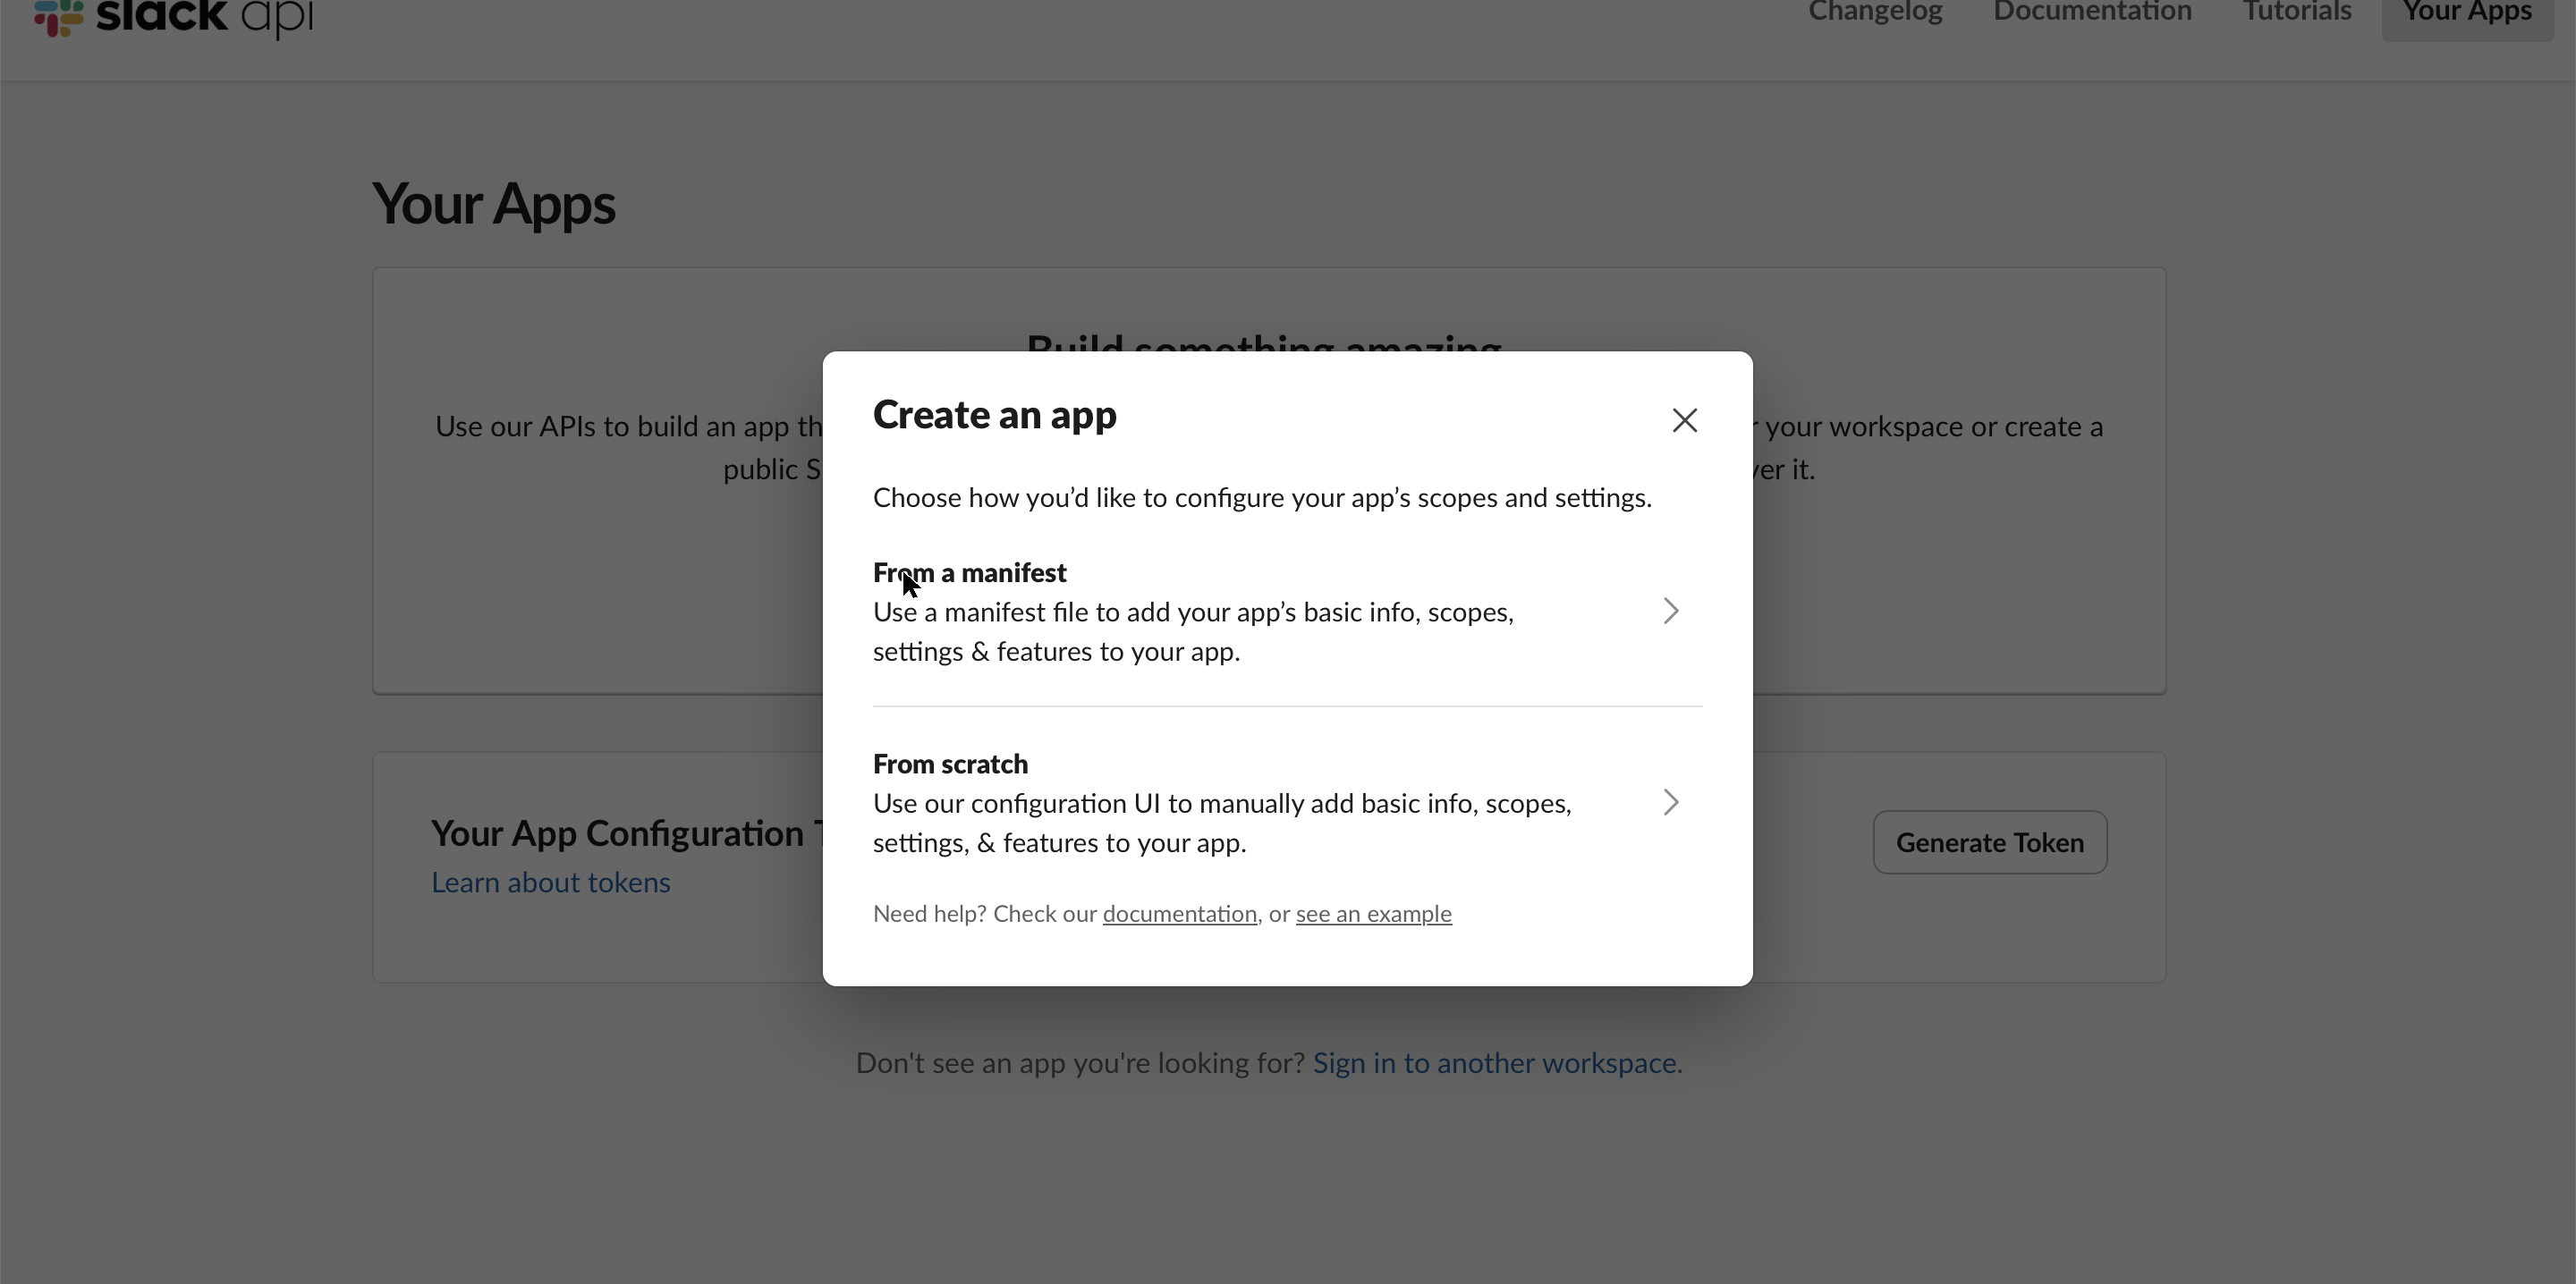
Step 2: Create a Slack app from the manifest
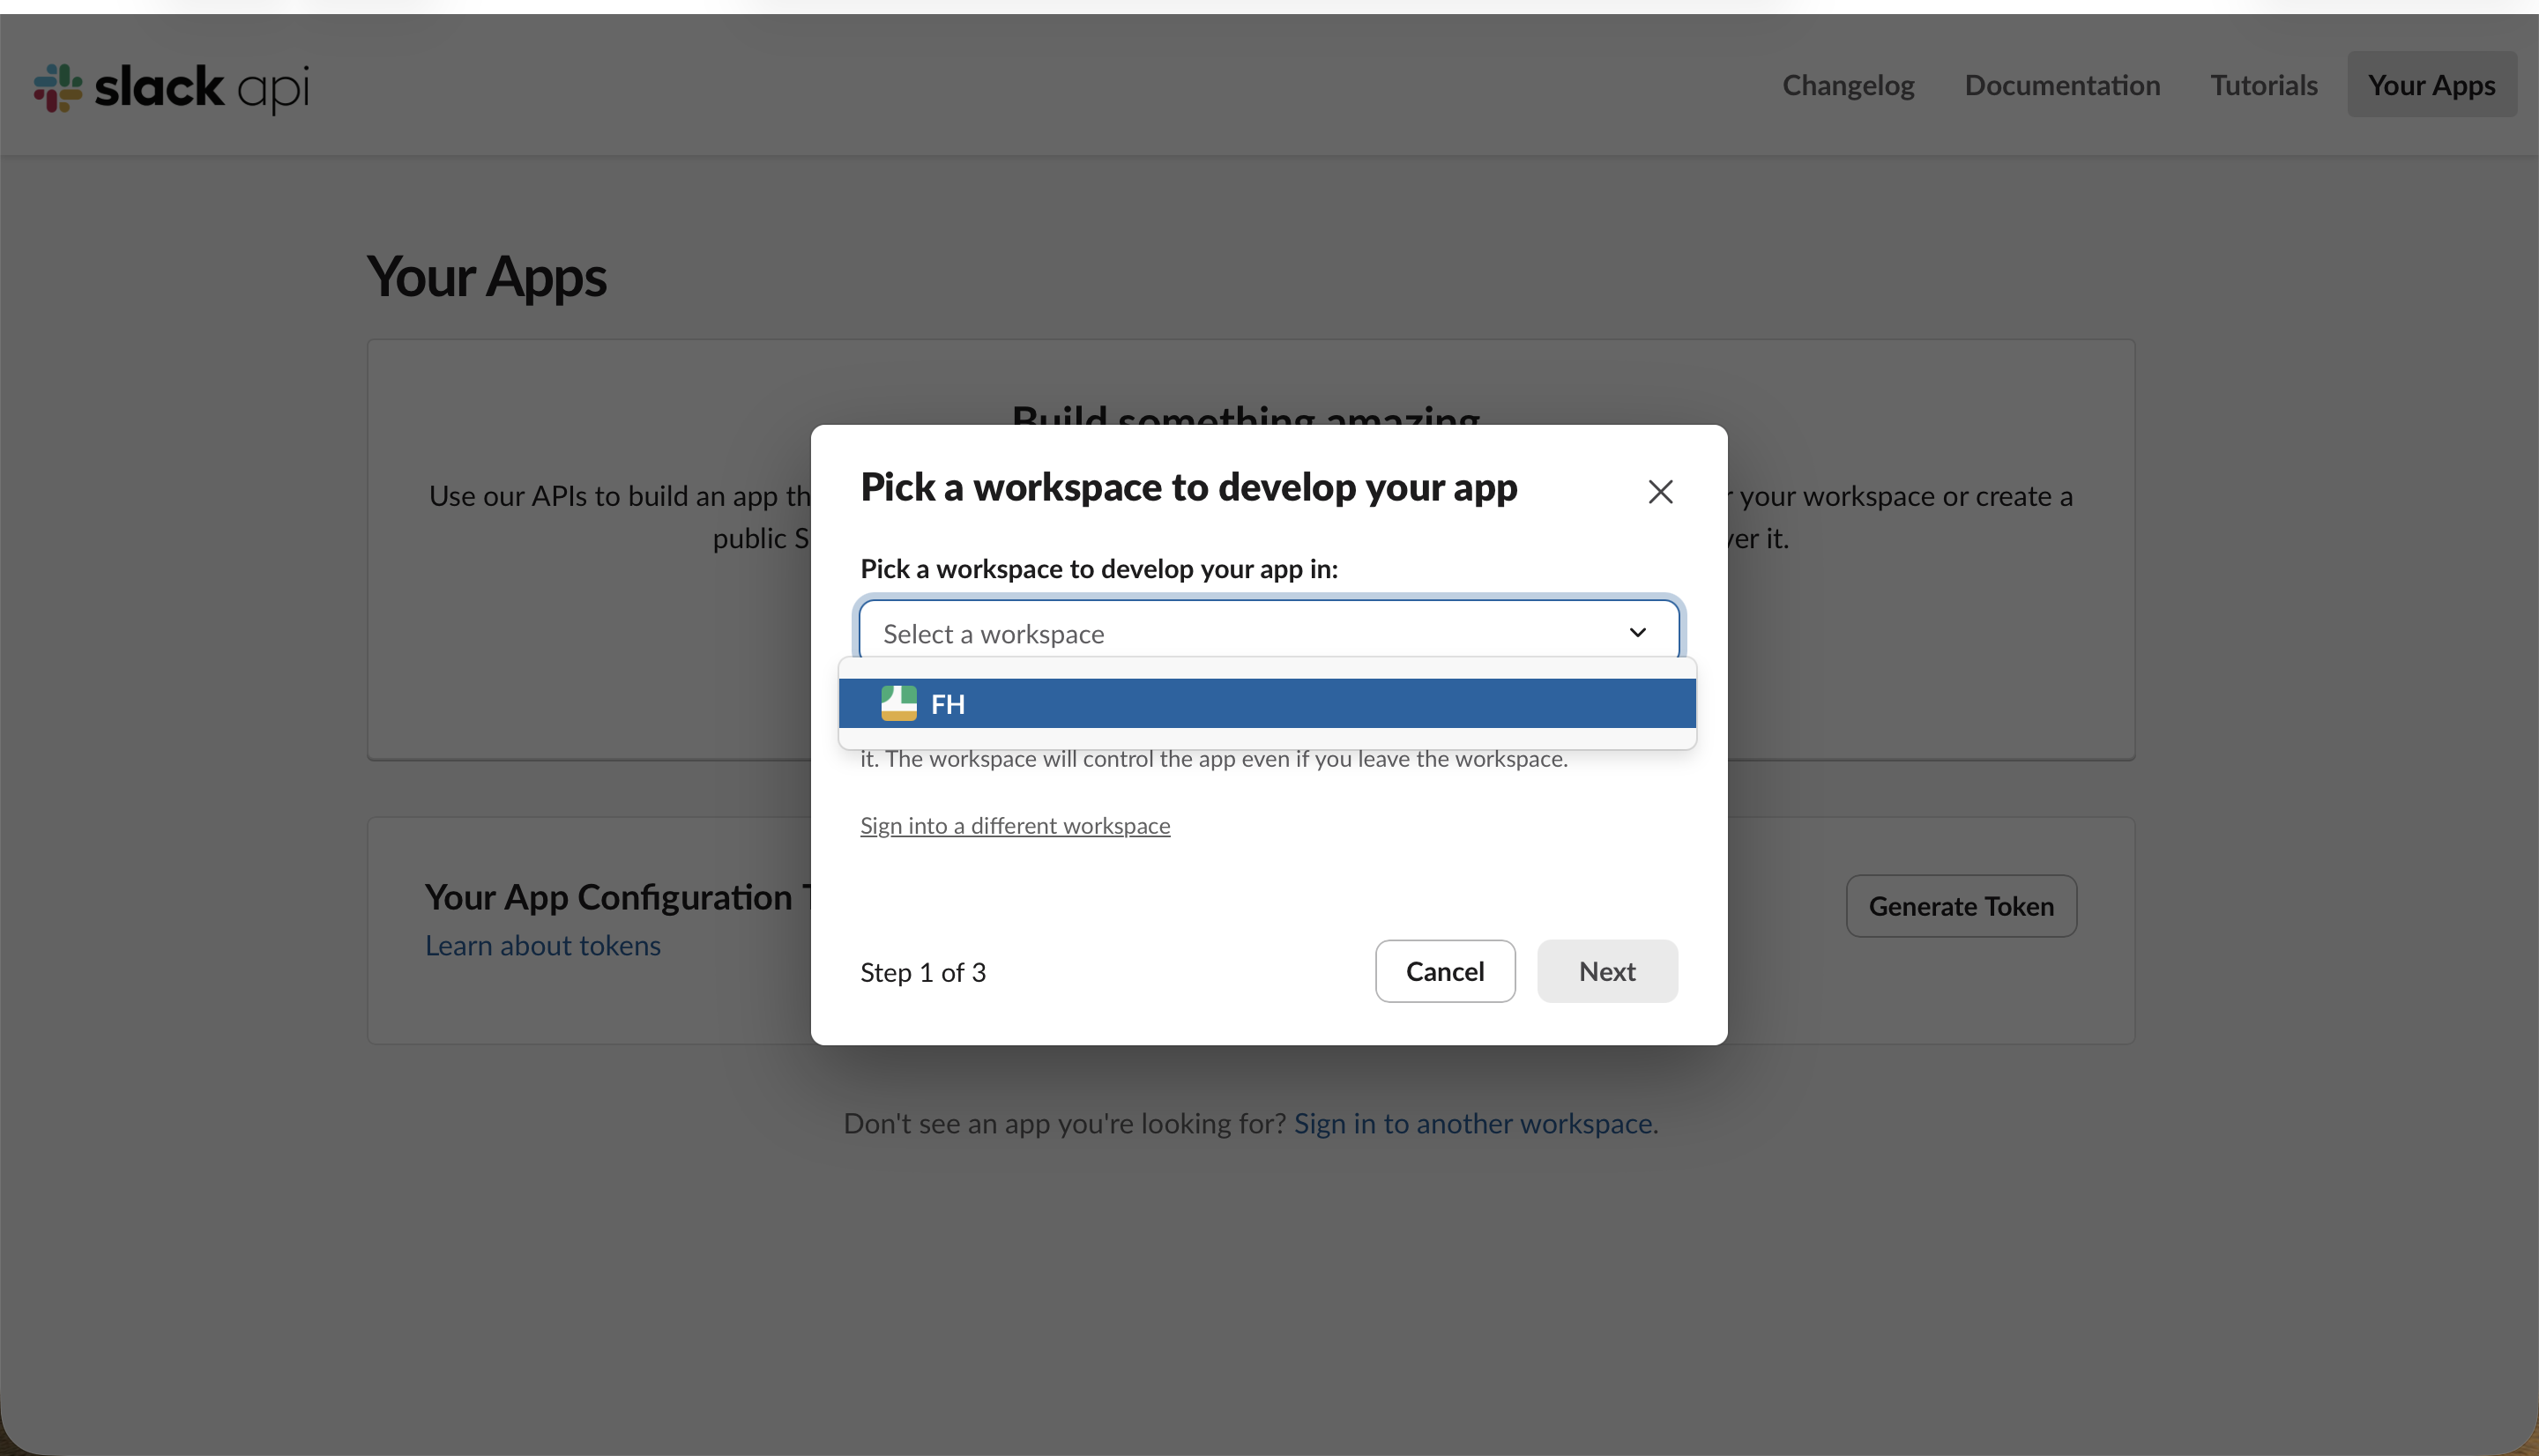
Go to api.slack.com/apps and choose Create New App. Slack asks how you want to configure it: pick From a manifest (the other option, From scratch, means clicking every setting by hand).
Select the workspace you want to develop the app in.
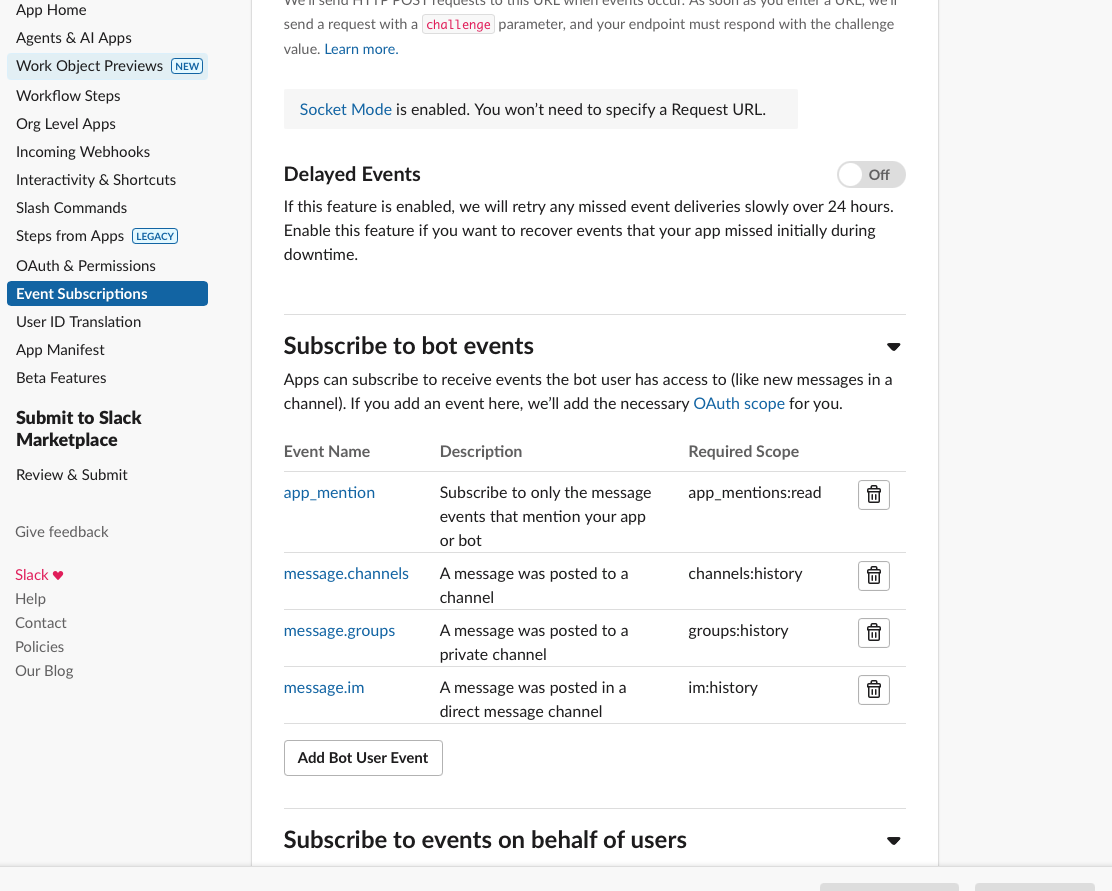
Now paste OpenClaw’s provided app manifest (the docs include a recommended and a minimal version). The manifest defines the bot user, the App Home, the /openclaw slash command, the event subscriptions, and the OAuth scopes the assistant needs, so you do not configure any of that by hand.
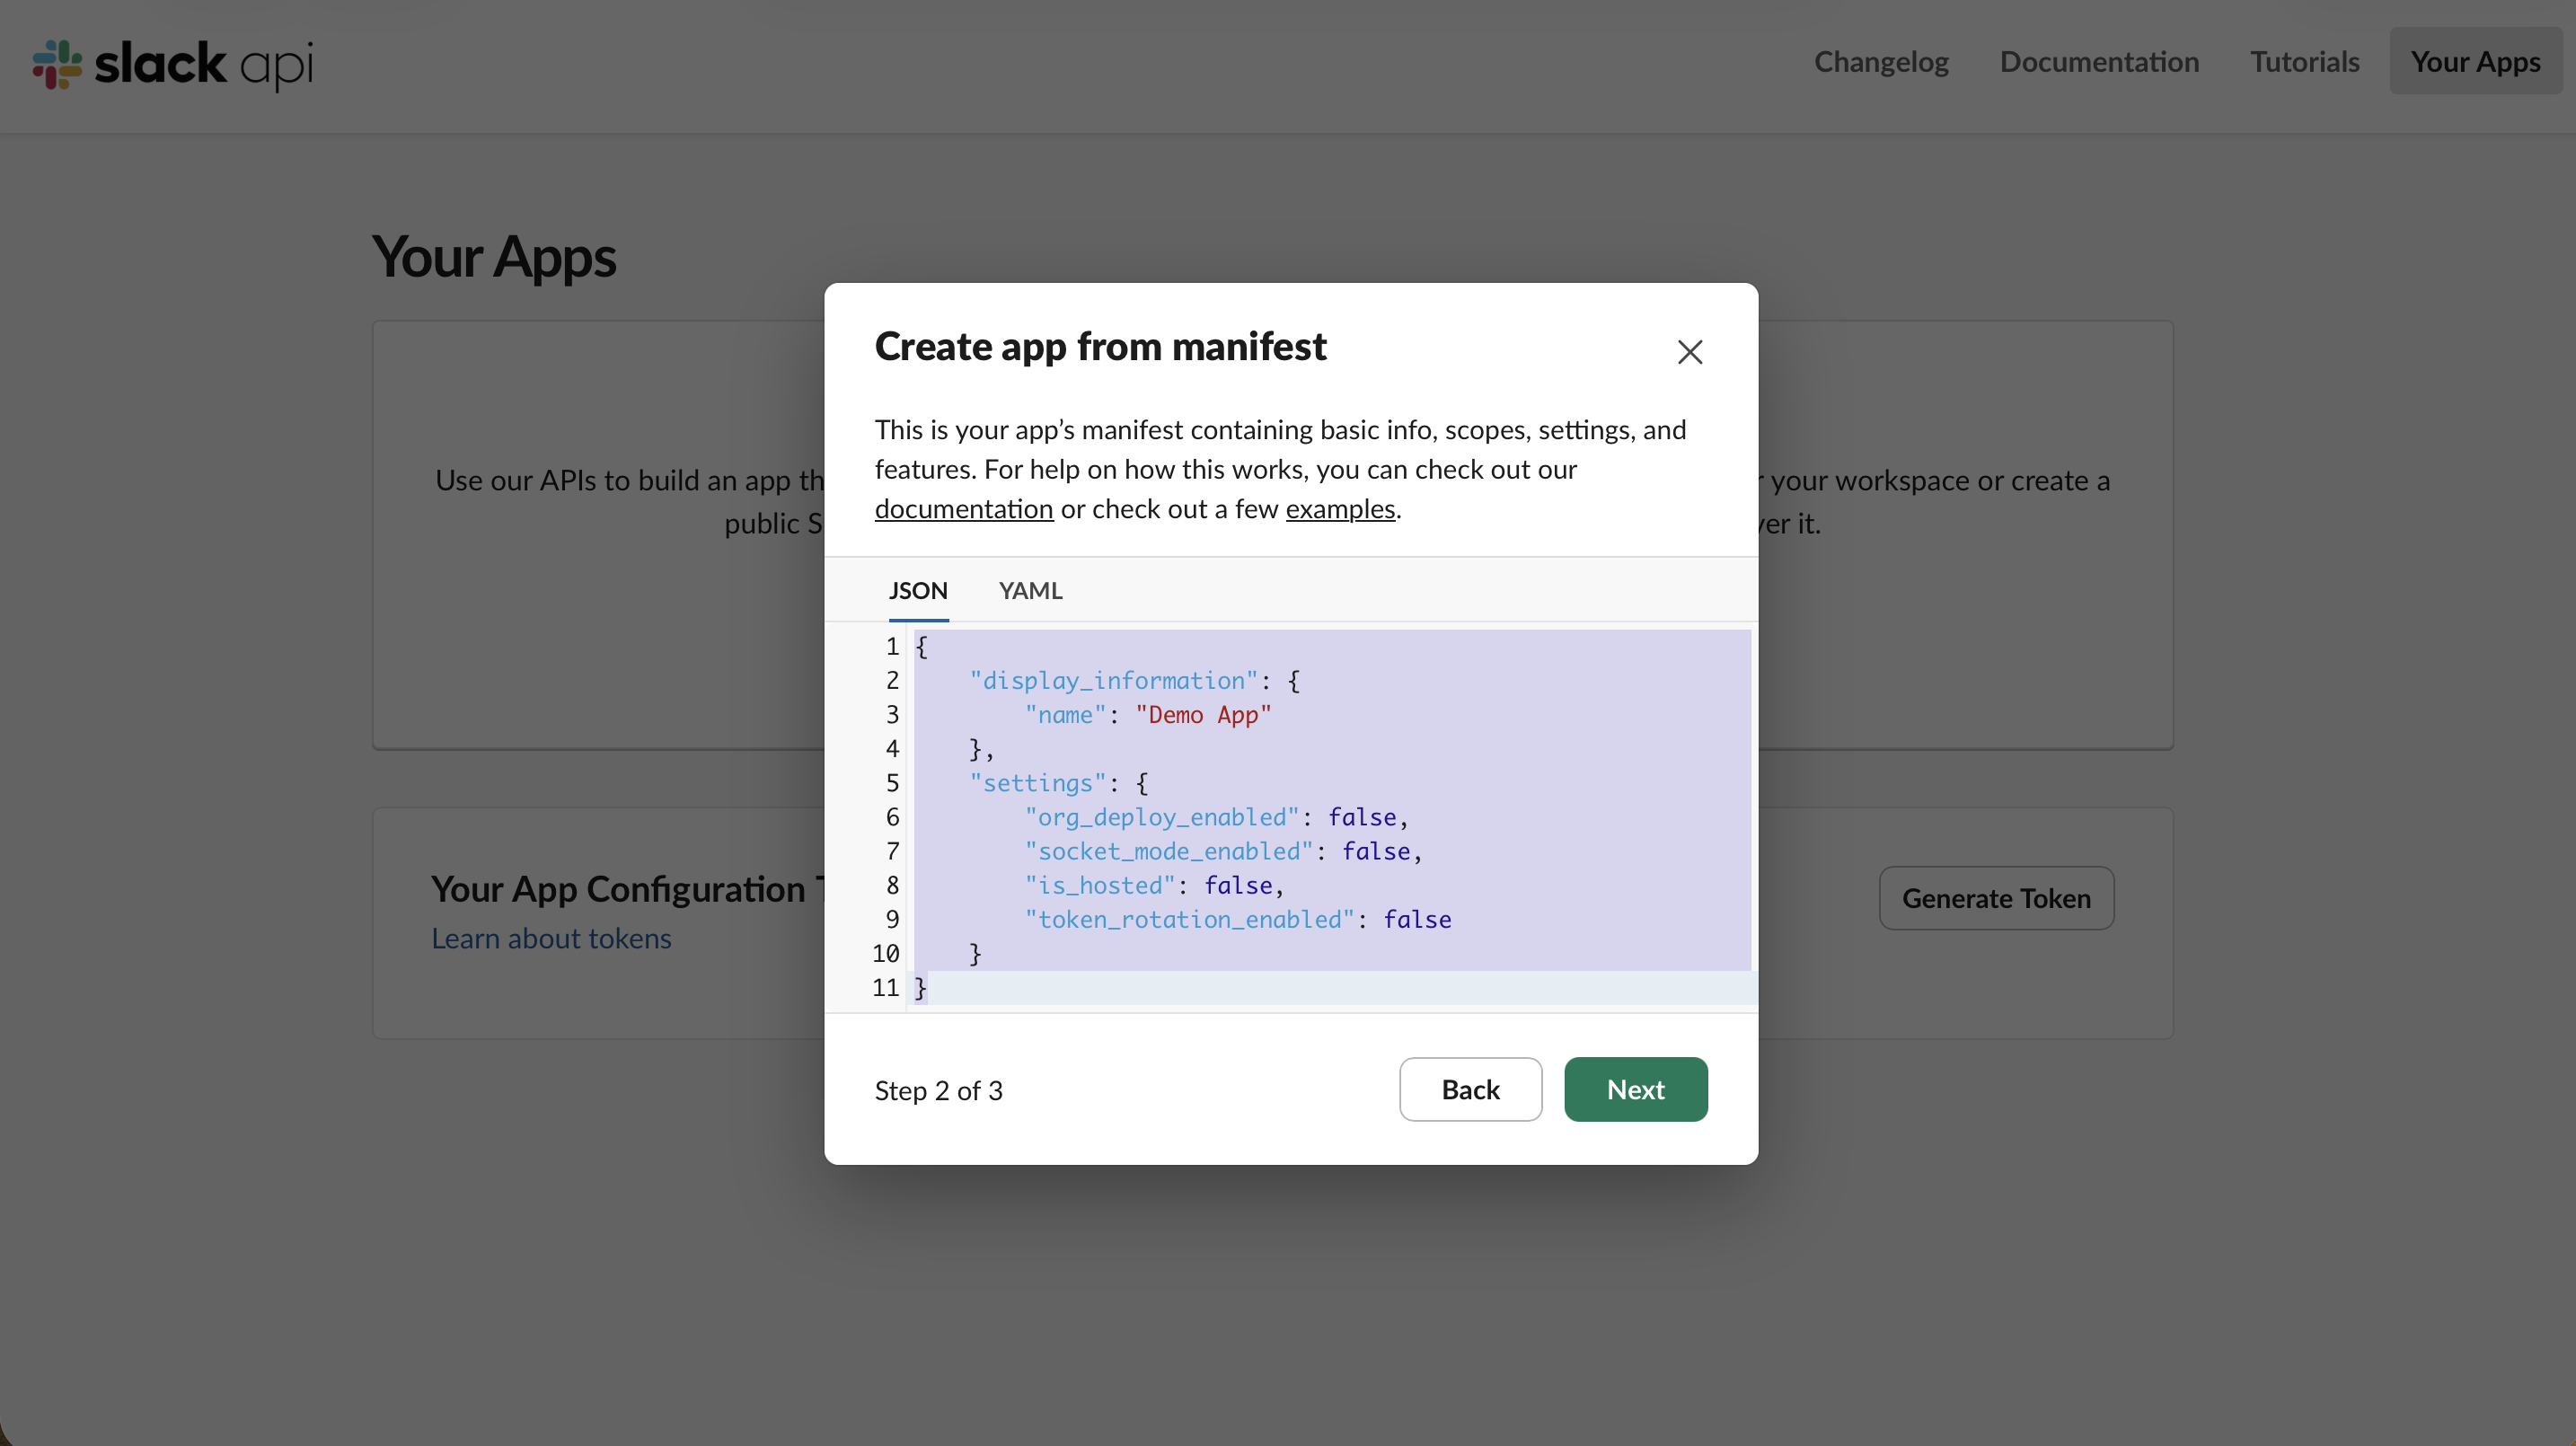
A bare manifest like the one shown above (just a name and socket_mode_enabled) is exactly what leads to the silent failures we hit later — no scopes, no events, no message tab. Save yourself the pain and paste this complete manifest instead. It pre-declares everything in one shot: Socket Mode, every bot scope the assistant needs, the four message events, and the DM (“messages”) tab. Each of these would otherwise be a separate manual step (and forgetting any one of them fails silently).
{
  "display_information": { "name": "Demo App" },
  "features": {
    "bot_user": { "display_name": "Demo App", "always_online": true },
    "app_home": {
      "home_tab_enabled": false,
      "messages_tab_enabled": true,
      "messages_tab_read_only_enabled": false
    }
  },
  "oauth_config": {
    "scopes": {
      "bot": [
        "app_mentions:read", "channels:history", "channels:read", "channels:join",
        "groups:history", "groups:read", "im:history", "im:read", "im:write",
        "mpim:history", "chat:write", "chat:write.public", "reactions:write", "users:read"
      ]
    }
  },
  "settings": {
    "event_subscriptions": {
      "bot_events": ["app_mention", "message.channels", "message.groups", "message.im"]
    },
    "interactivity": { "is_enabled": true },
    "socket_mode_enabled": true
  }
}
With this manifest, the Socket Mode, scopes, and event-subscription steps below are already done for you — treat them as a quick verification rather than fresh setup. What the manifest still cannot do for you, and what we had to do by hand anyway:
- Generate the App-Level Token. A manifest cannot mint the
xapp-token Socket Mode needs — you still create it manually under Basic Information → App-Level Tokens with theconnections:writescope (Step 4). - Install the app to issue the
xoxb-bot token (Step 6). - The OpenClaw side, which no Slack manifest touches: set
channels.slack.groupPolicytoopen(its default silently drops channel messages), setcommands.ownerAllowFromto your Slack user ID, and — the big one — make sure the assistant actually has a working model. OpenClaw’s default Claude-CLI login expires every few hours; we ended up pointing it at a free Nemotron model via OpenRouter (see the Reality Check below).
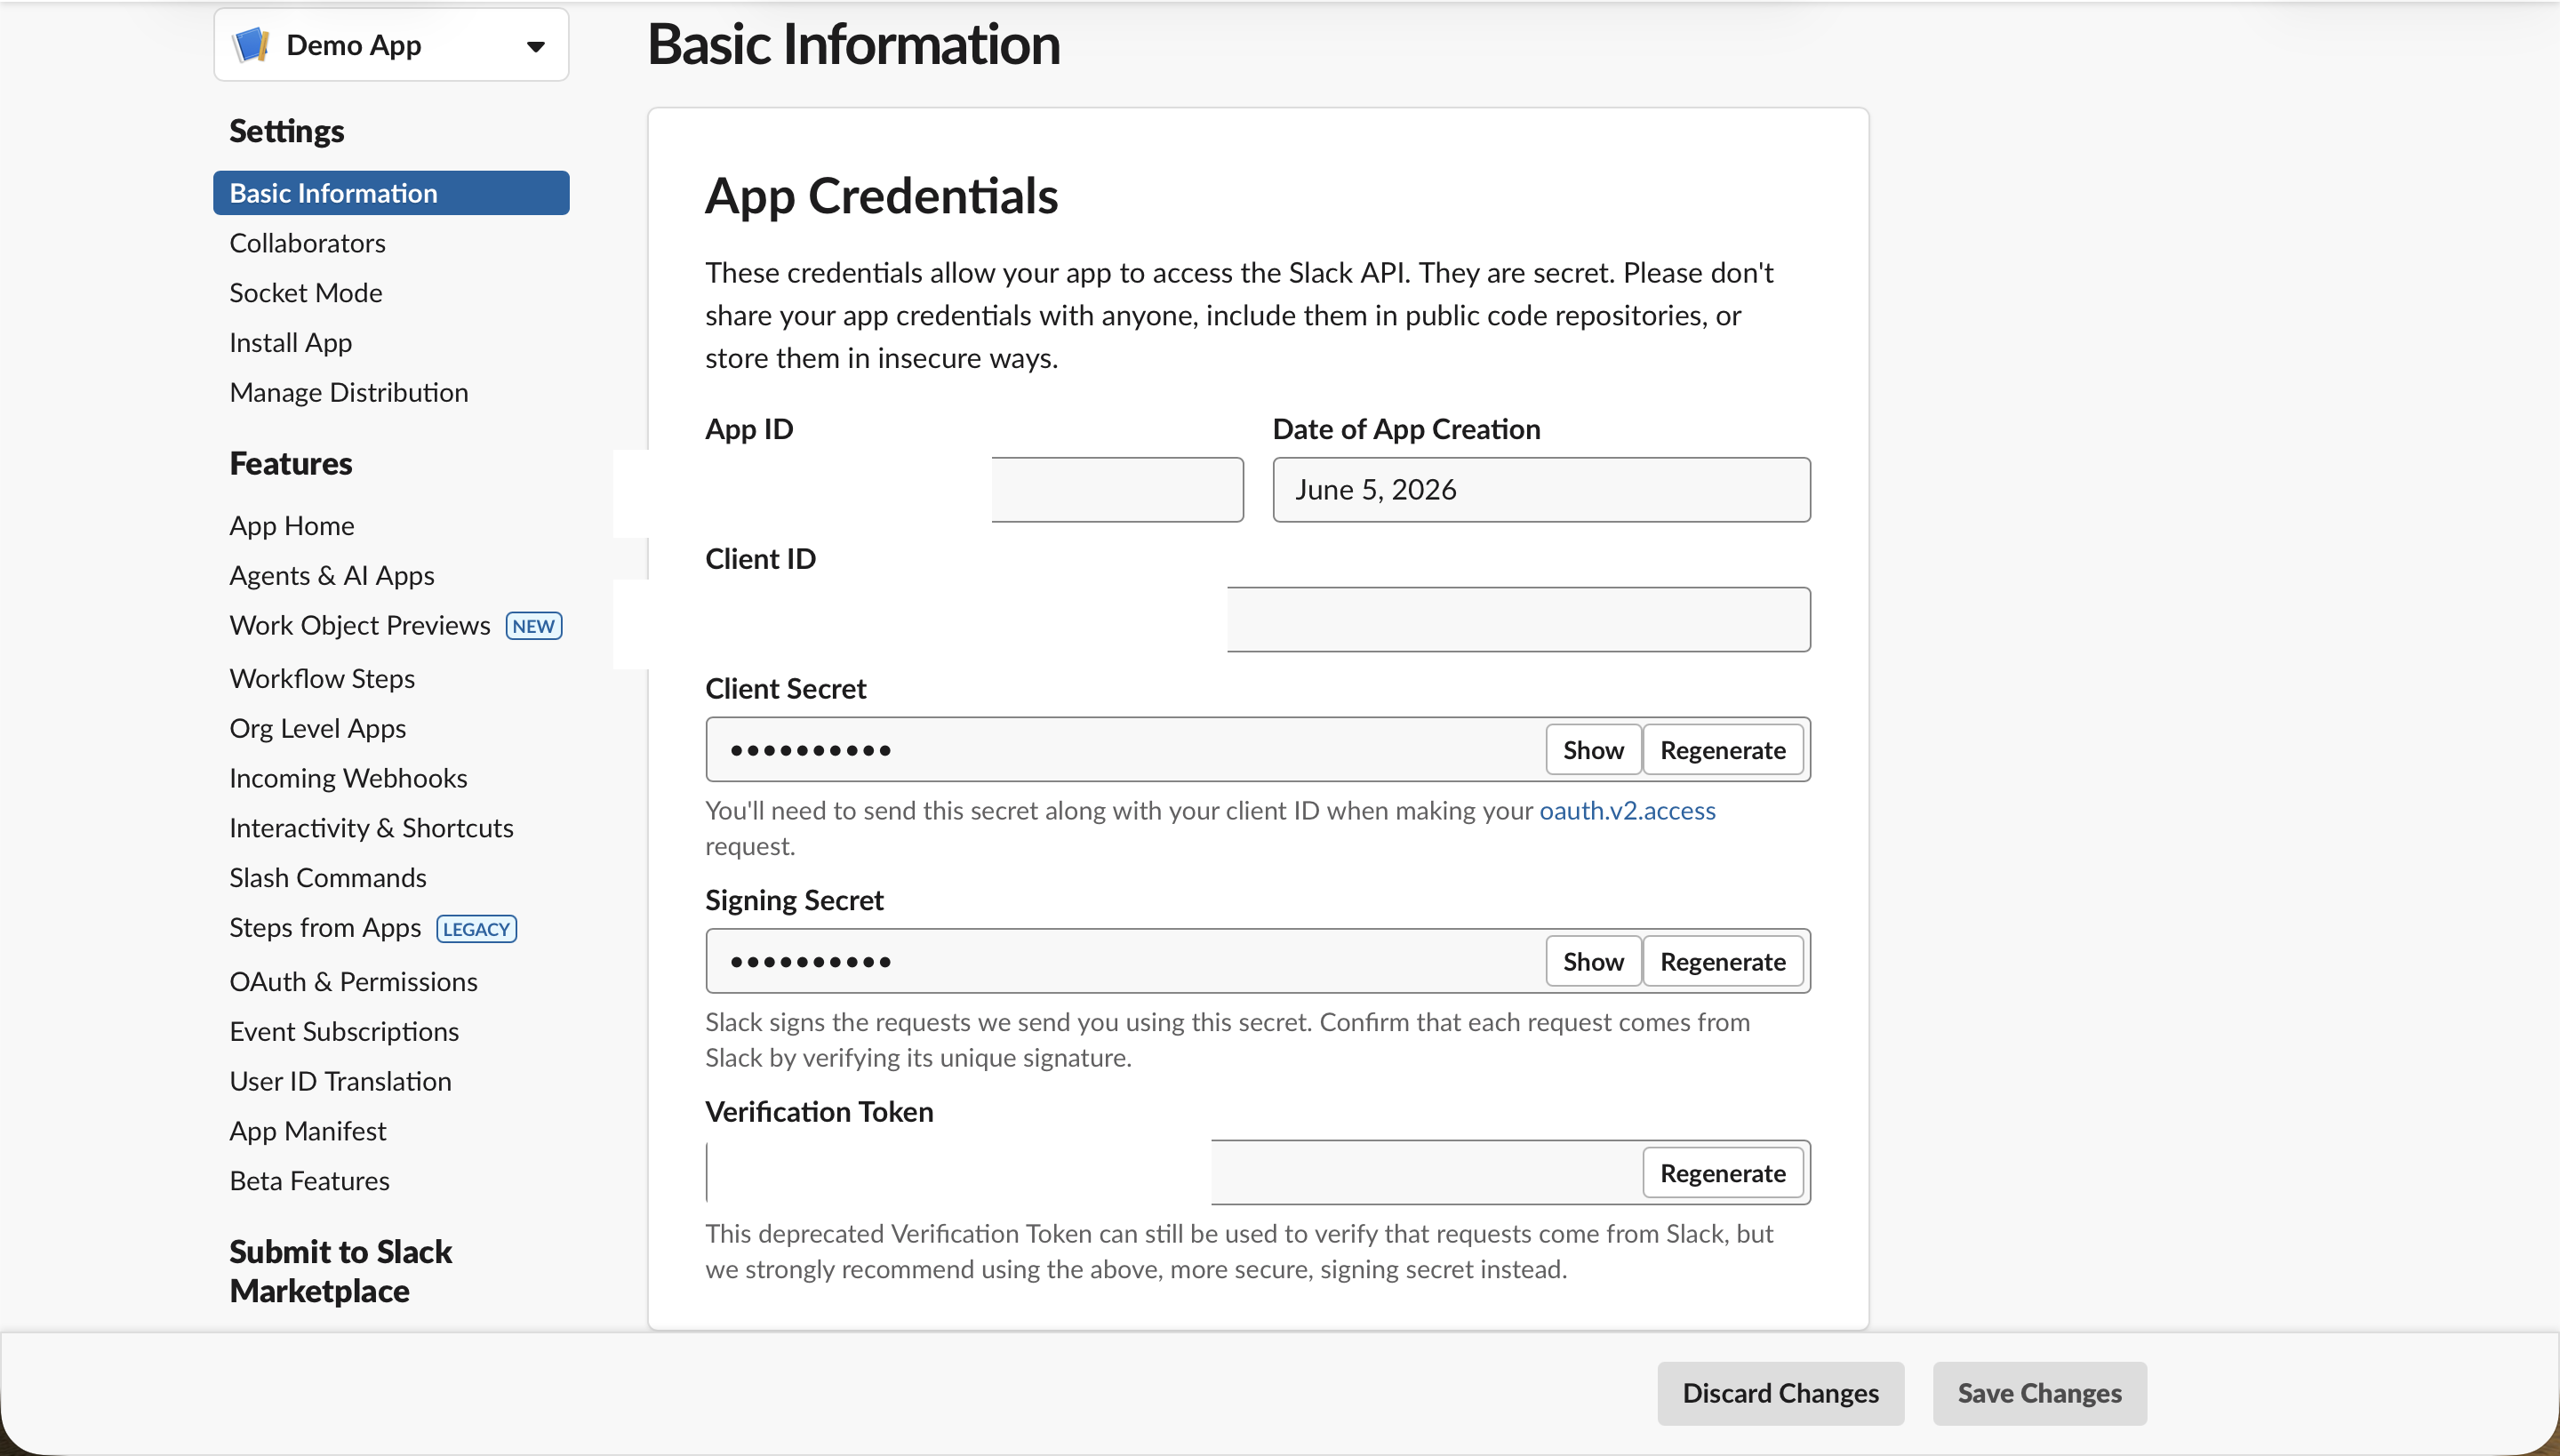
Once Slack creates the app, you land on Basic Information. This is the home base for everything that follows; the left sidebar is how you move between Socket Mode, App-Level Tokens, OAuth & Permissions, and Install App.
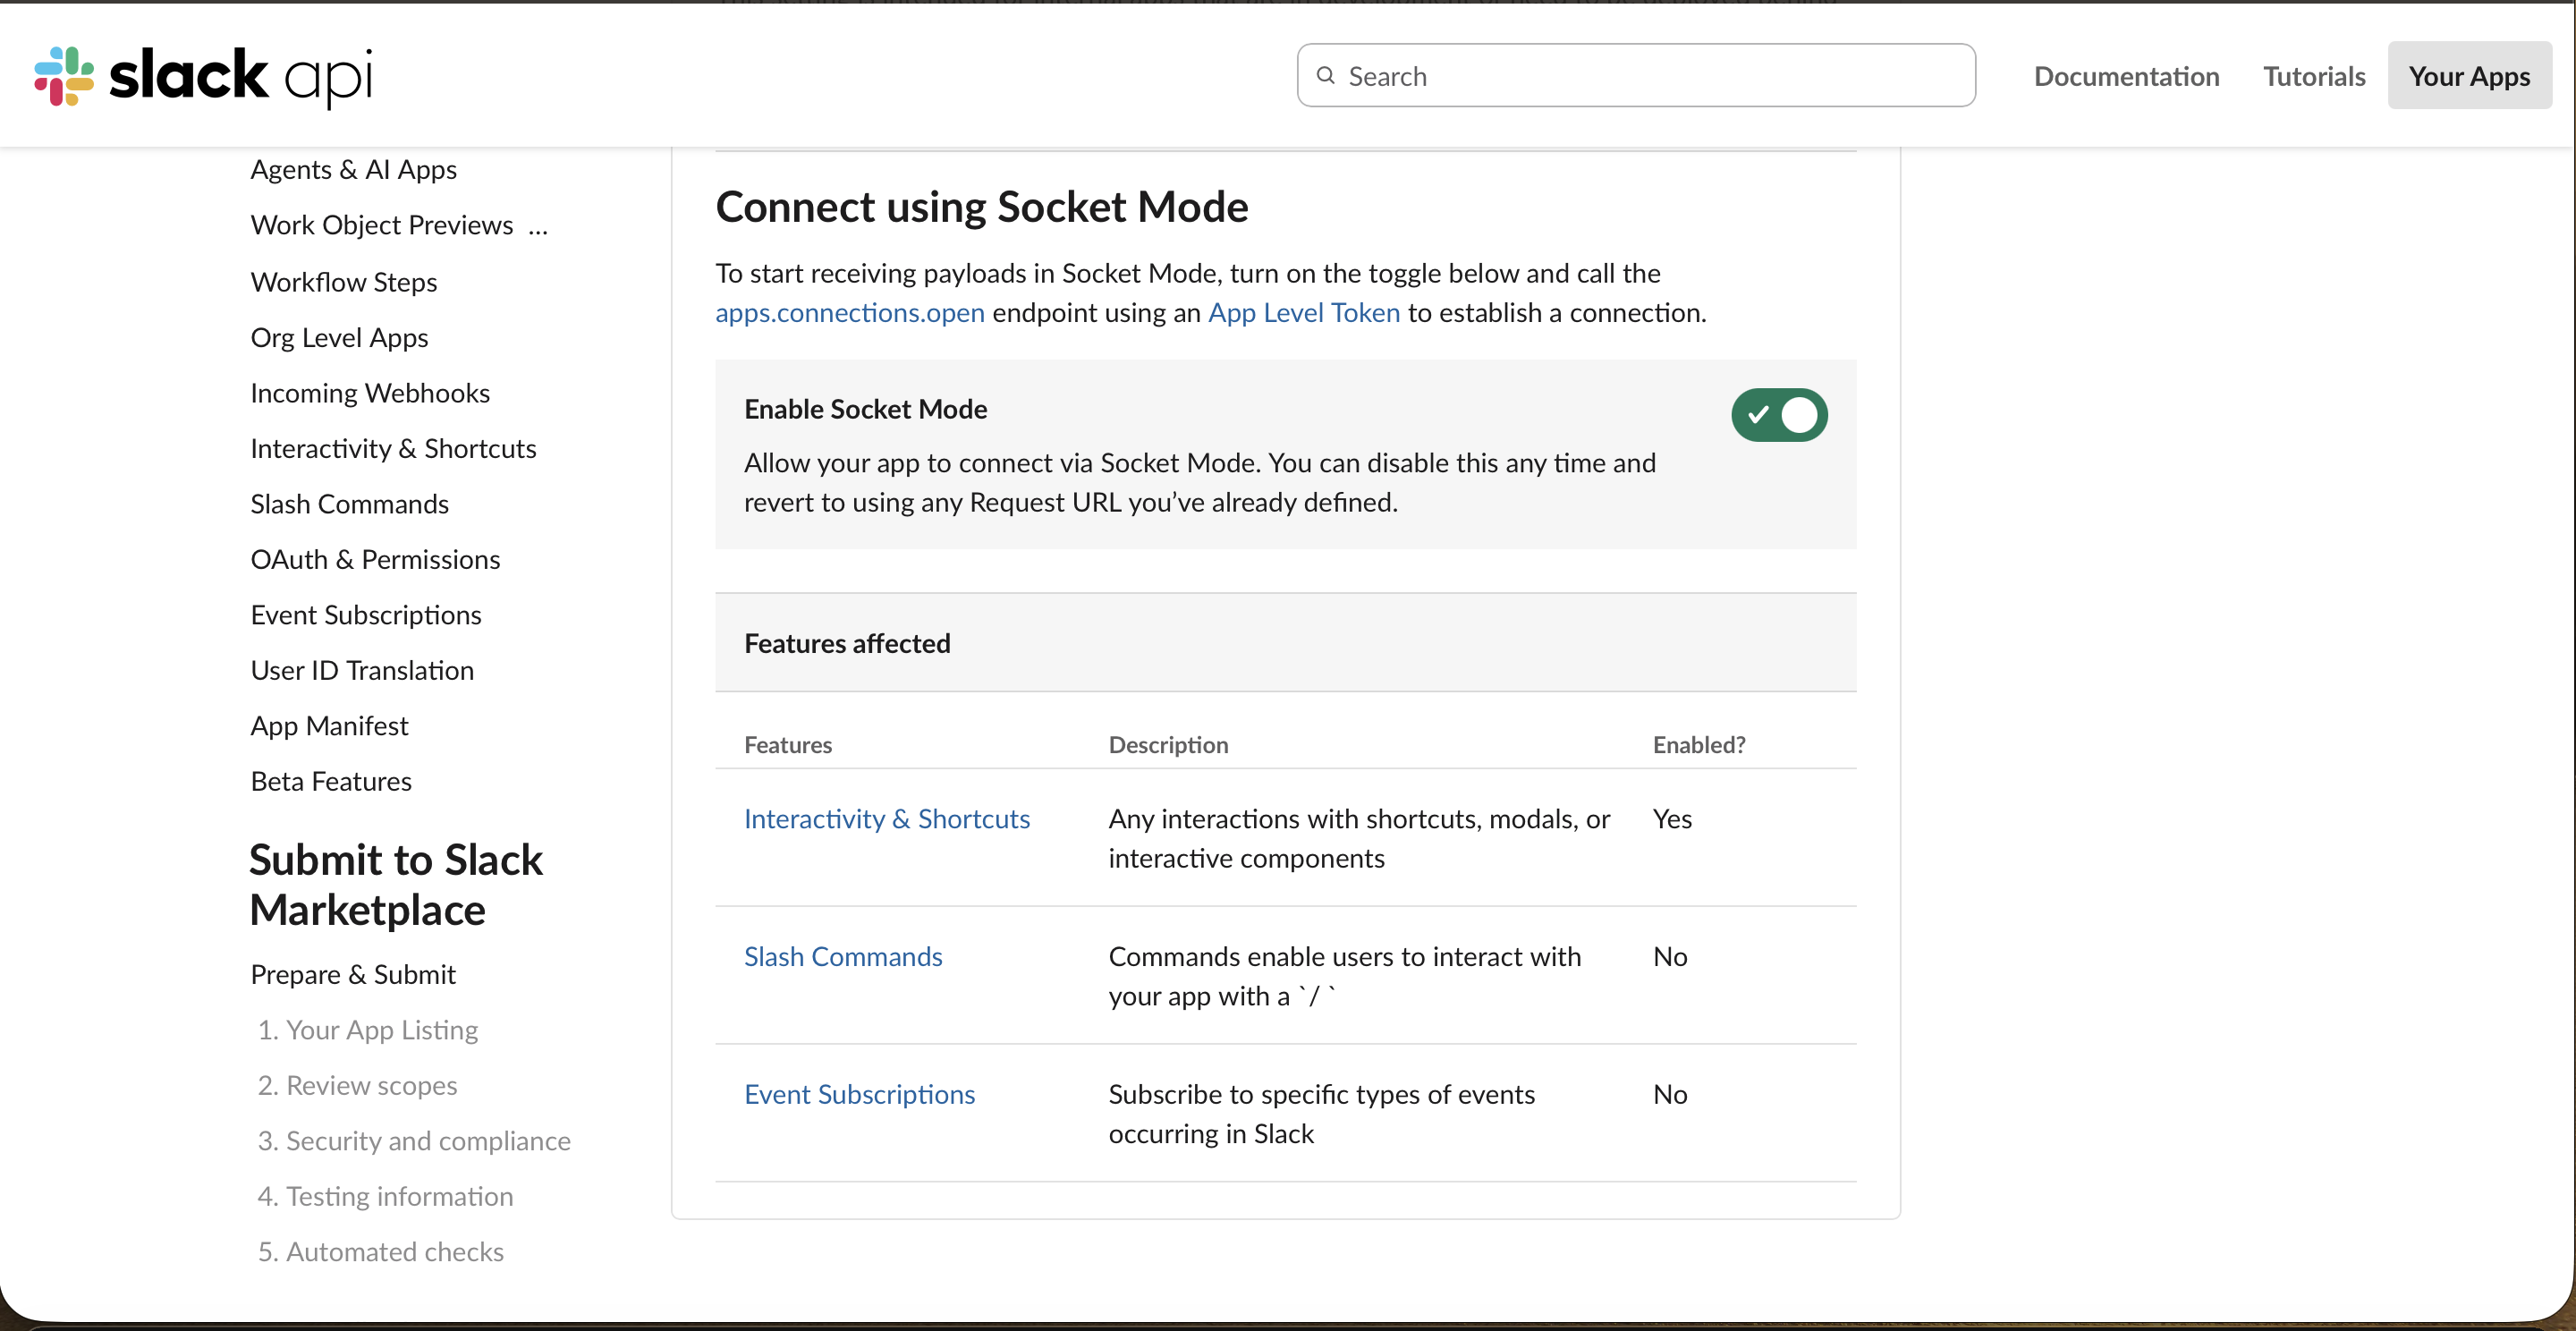
Step 3: Turn on Socket Mode
In the sidebar, open Socket Mode and flip Enable Socket Mode on. This is what lets OpenClaw receive Slack events over a WebSocket instead of needing a public URL, which is exactly why it works behind a firewall.
Step 4: Generate the App-Level Token
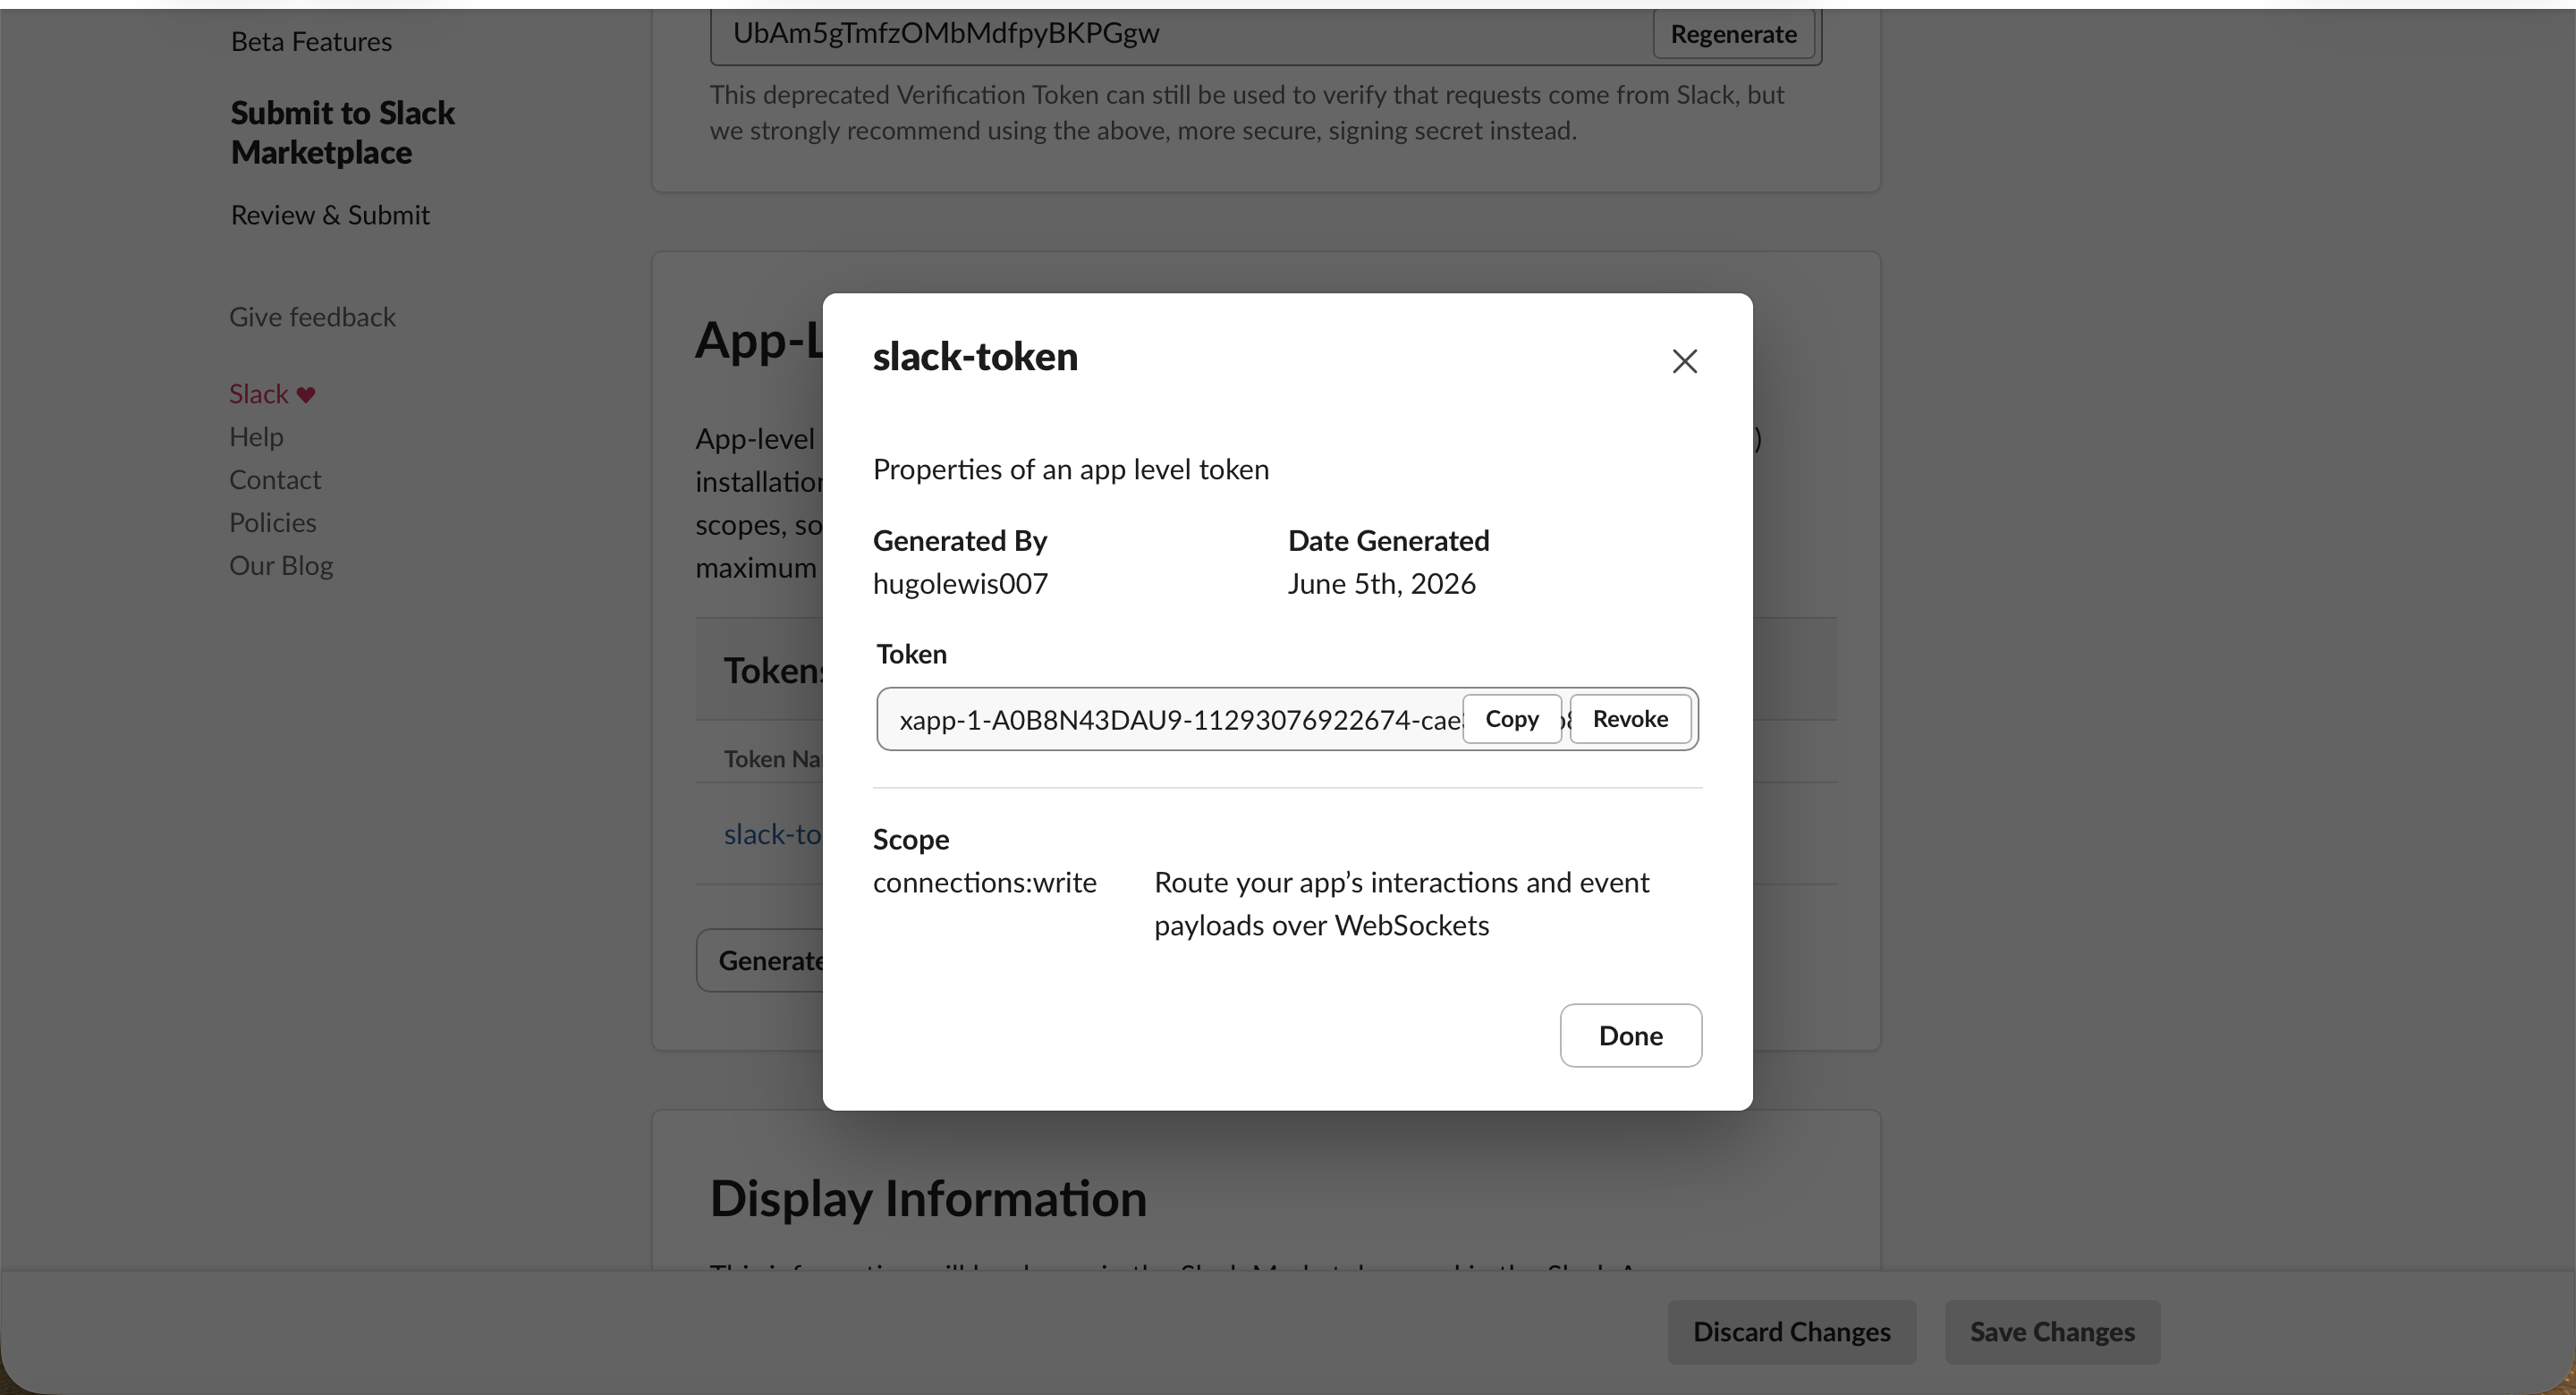
Socket Mode needs an App-Level Token. Under Basic Information → App-Level Tokens, click Generate, name it, and give it the single scope connections:write.
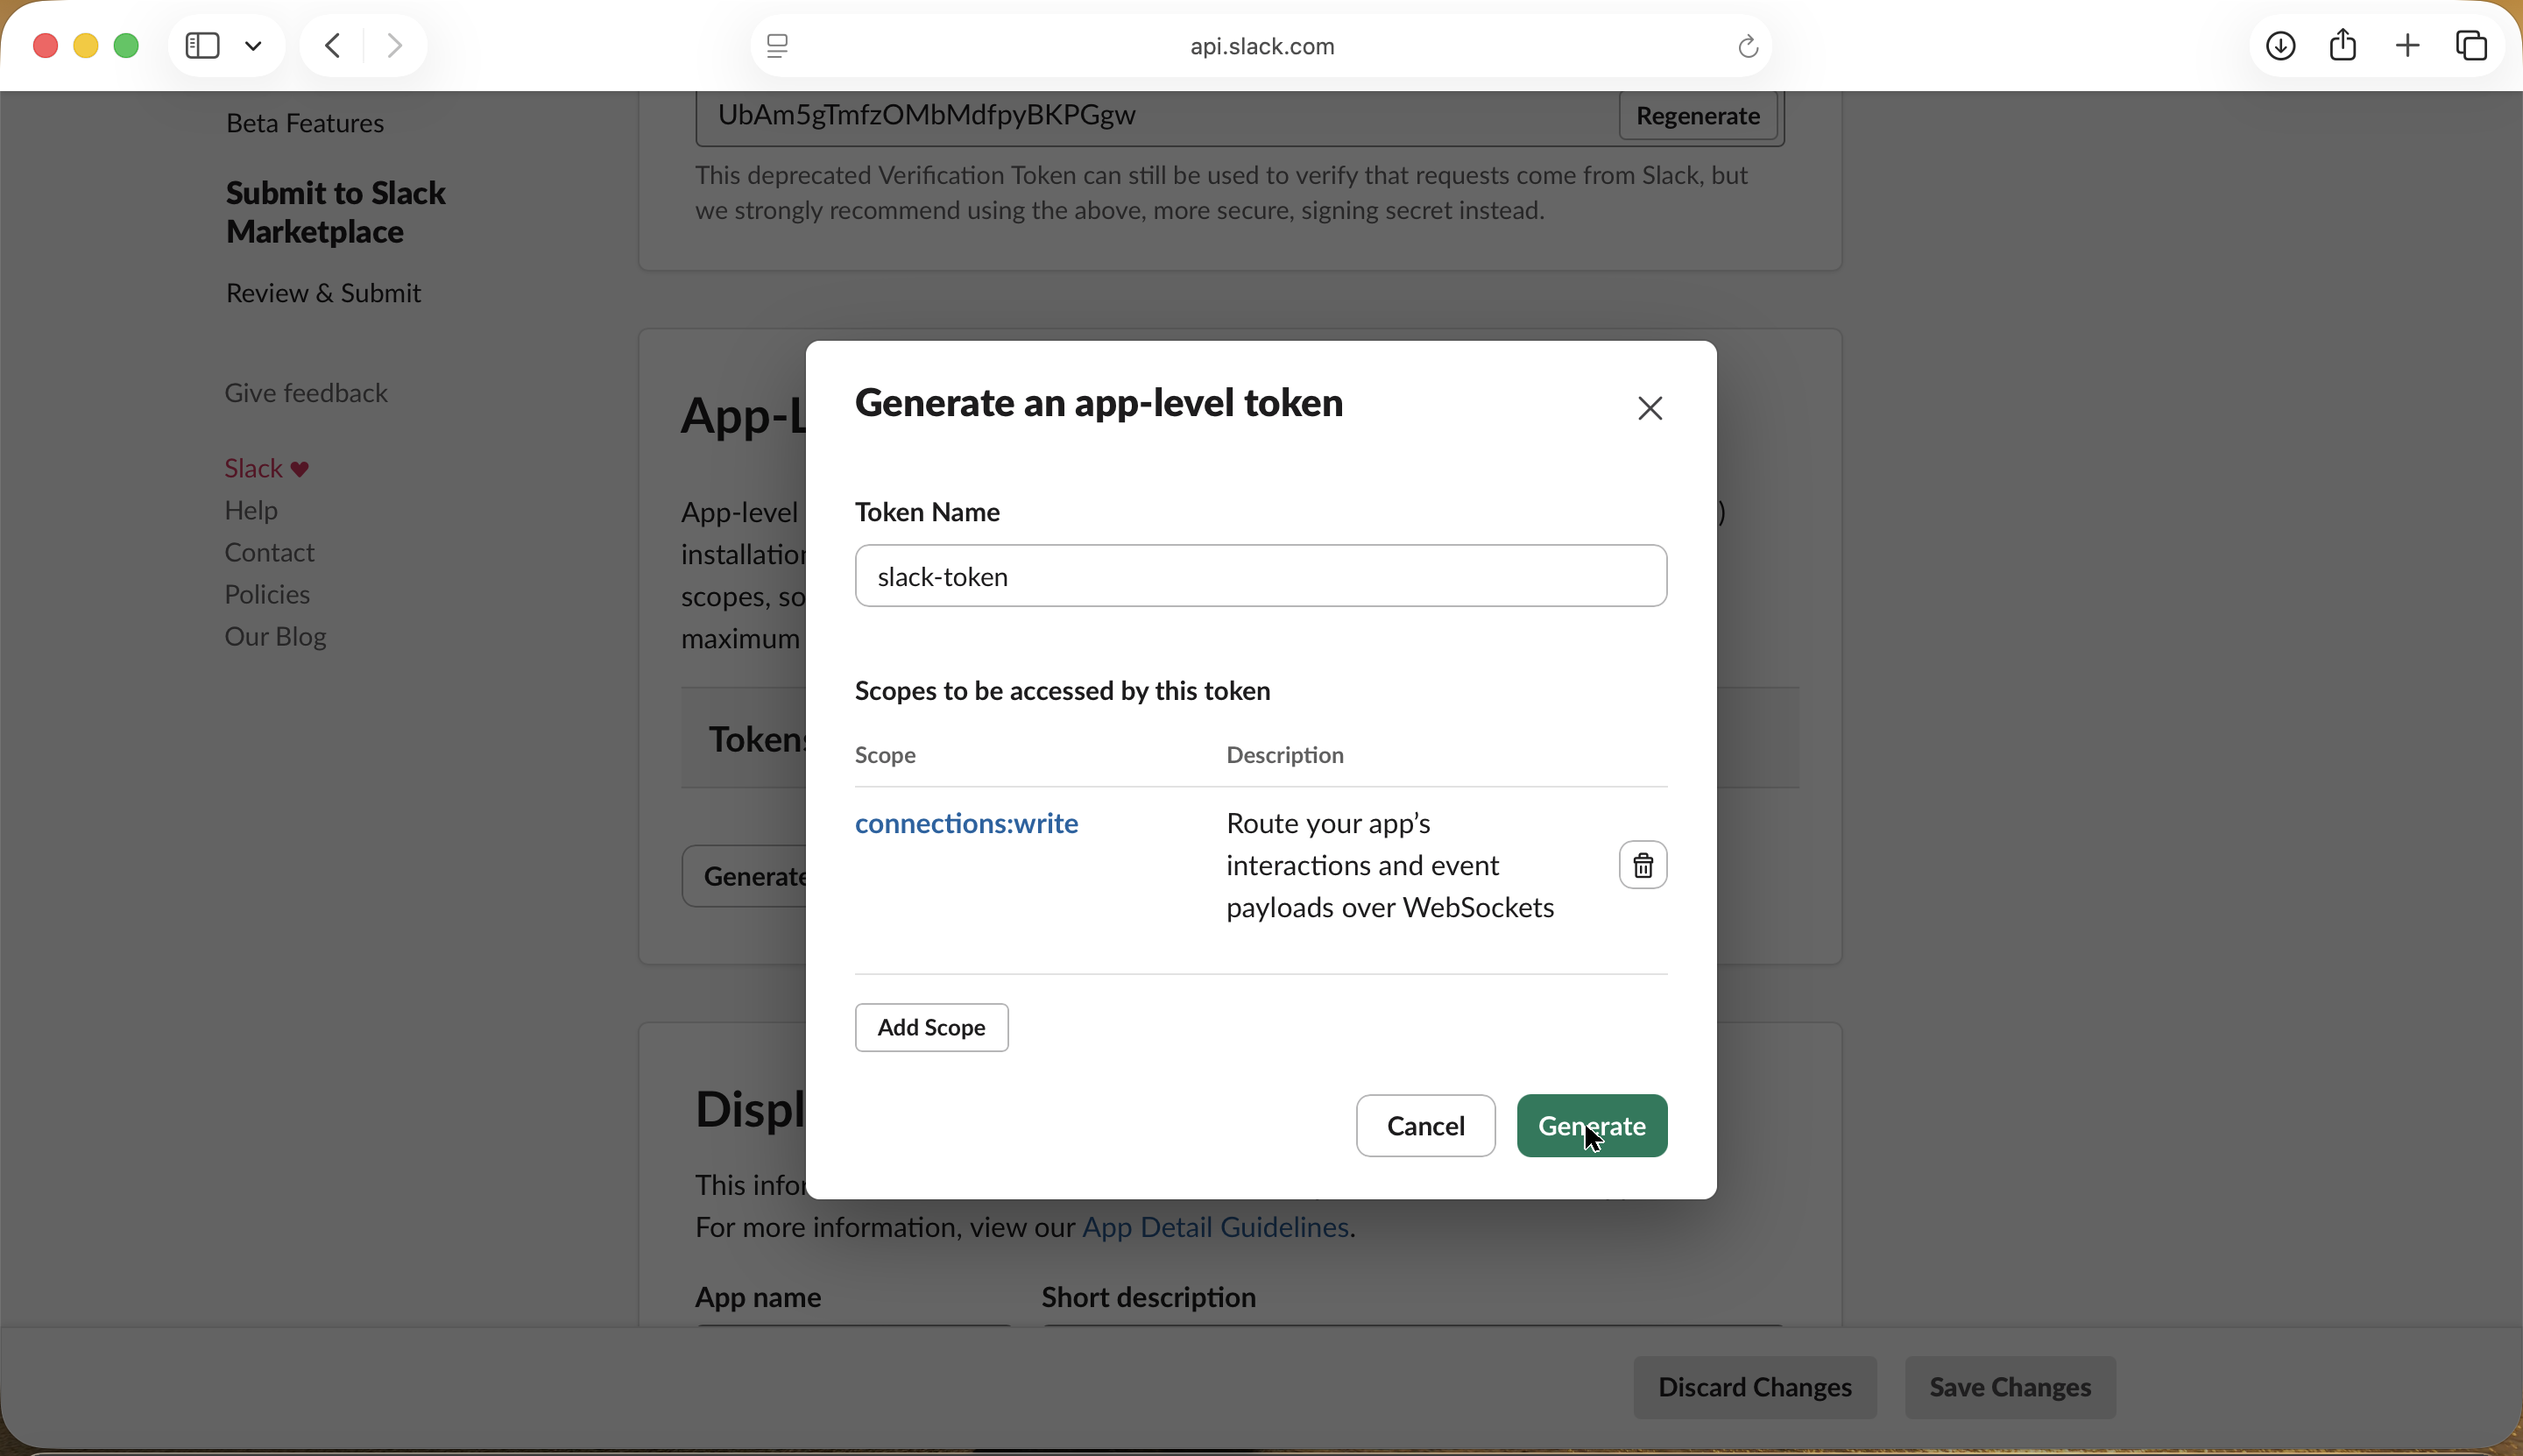
Generate it and Slack shows you the token, which starts with xapp-. Copy it somewhere safe and treat it like a password.
Step 5: Add the bot scopes
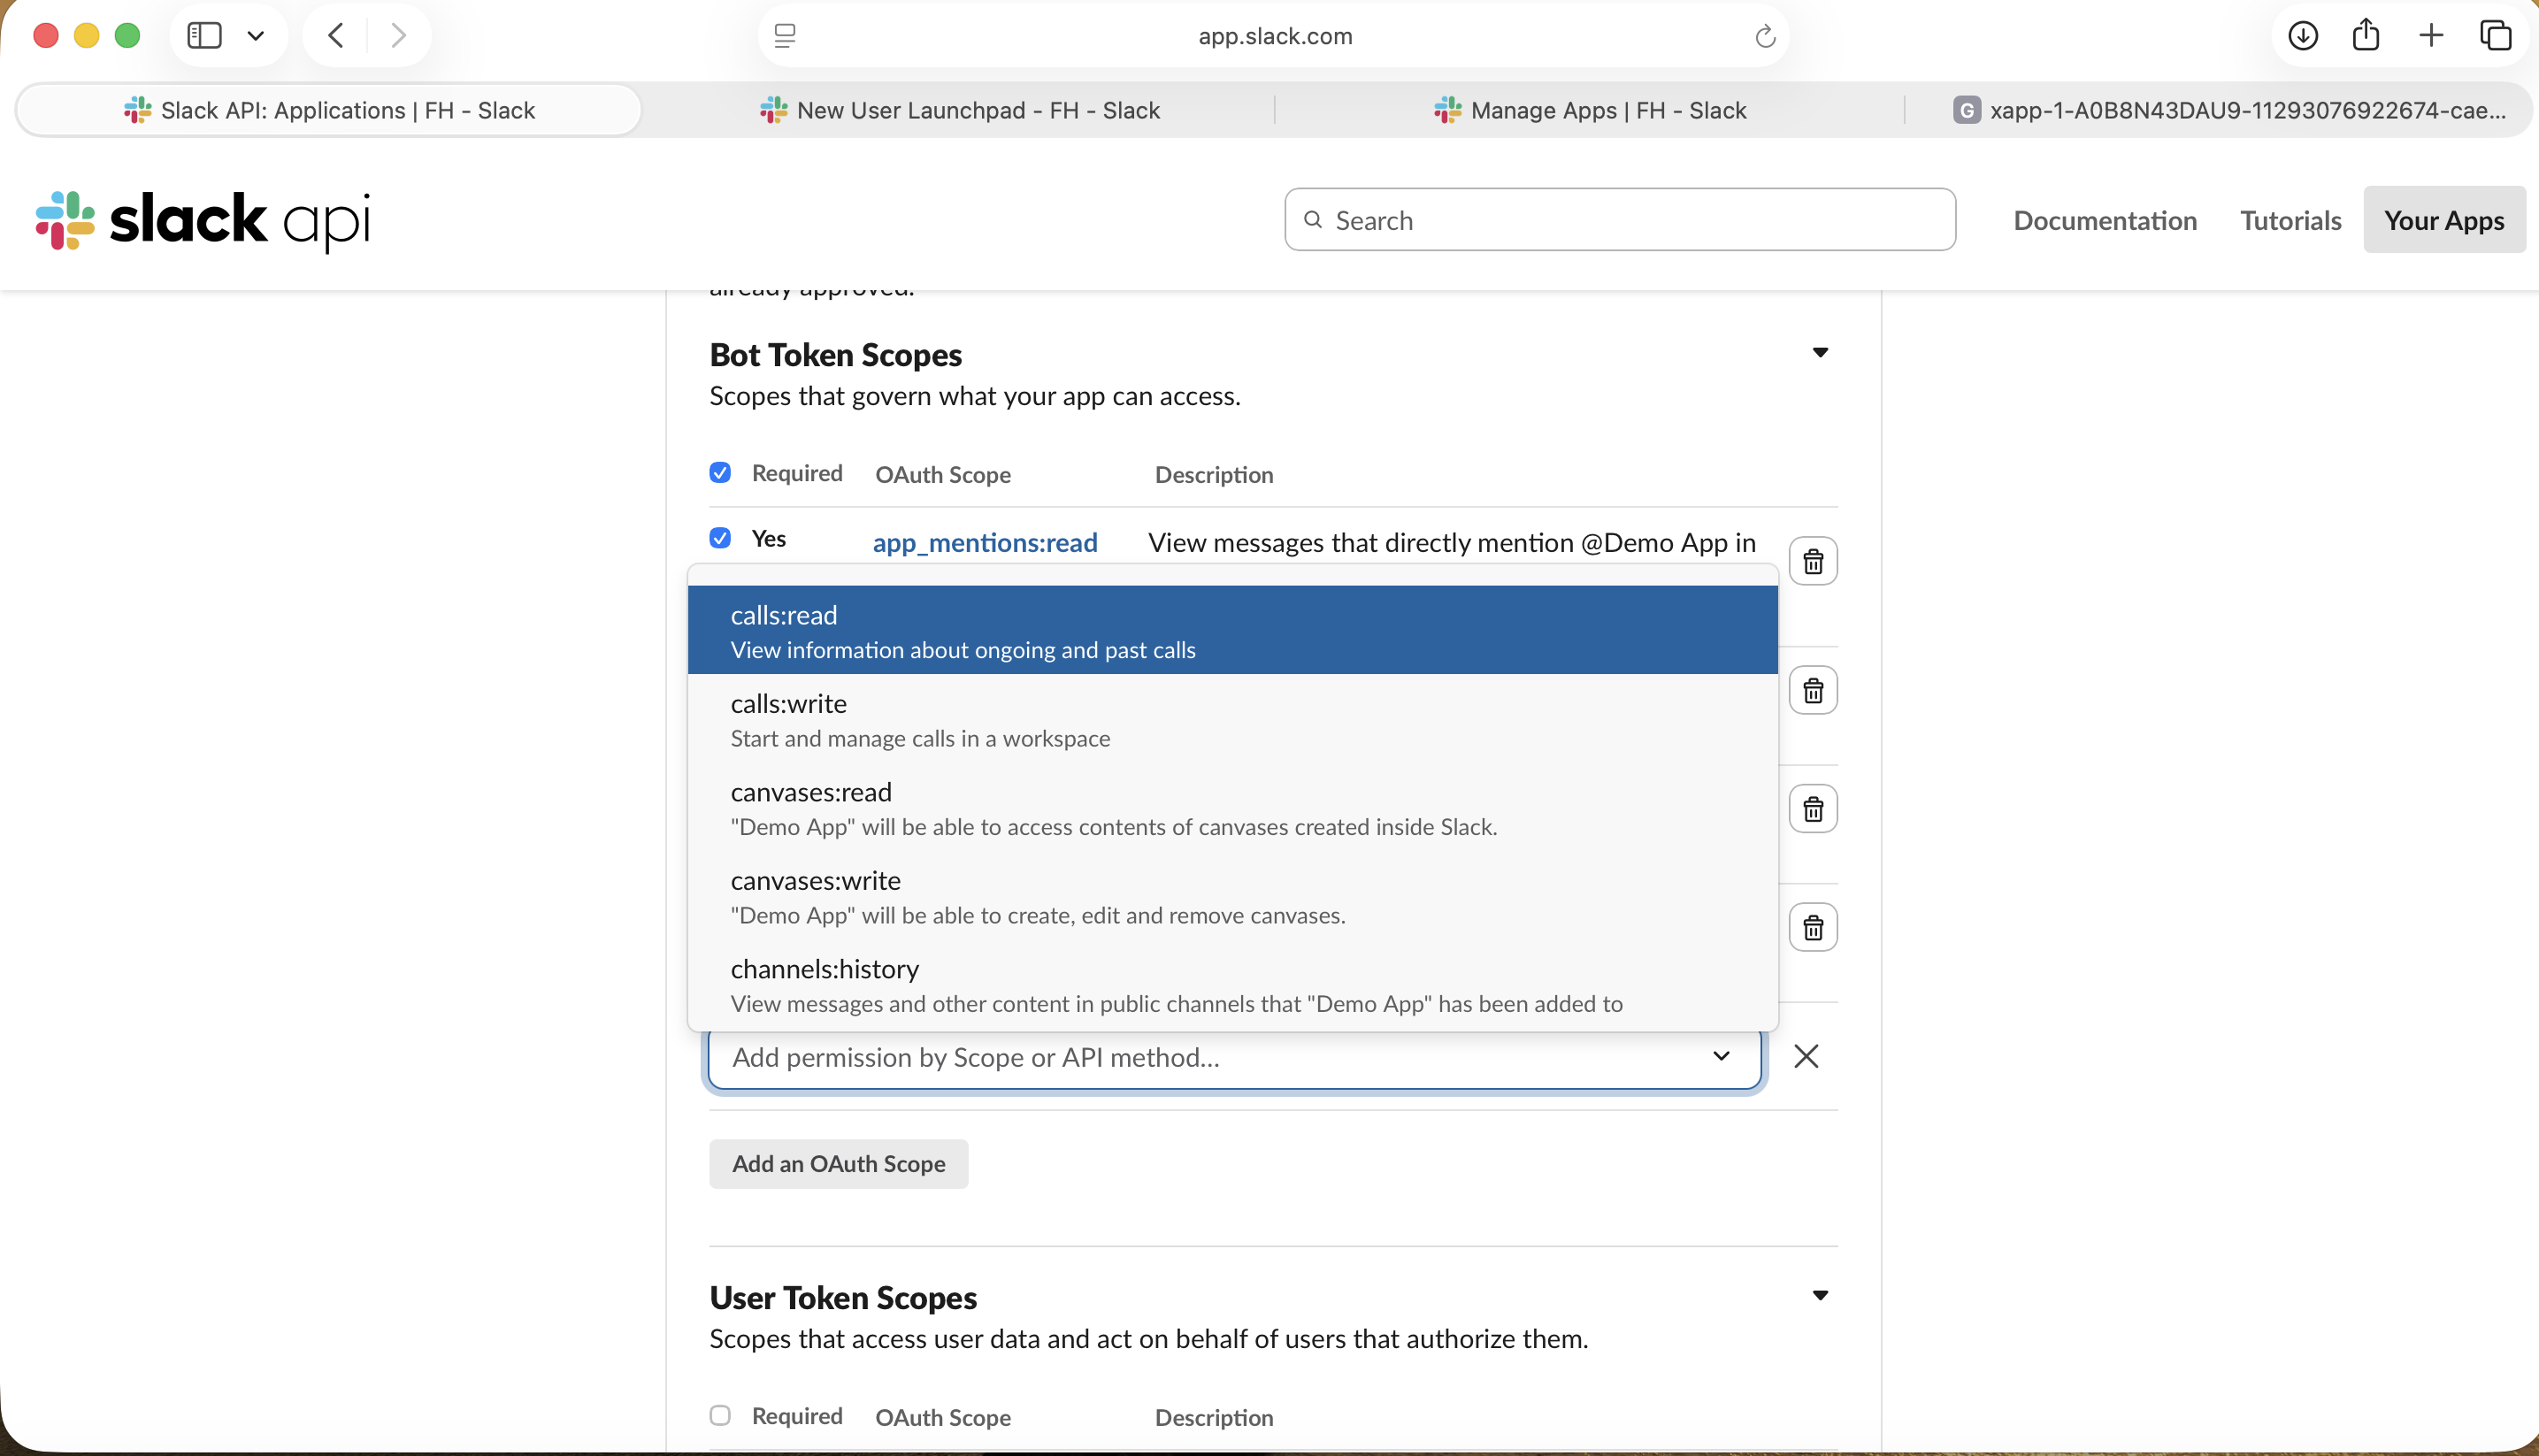
Open OAuth & Permissions and scroll to Bot Token Scopes. If you pasted the manifest, the core scopes (like app_mentions:read and chat:write) are already here.
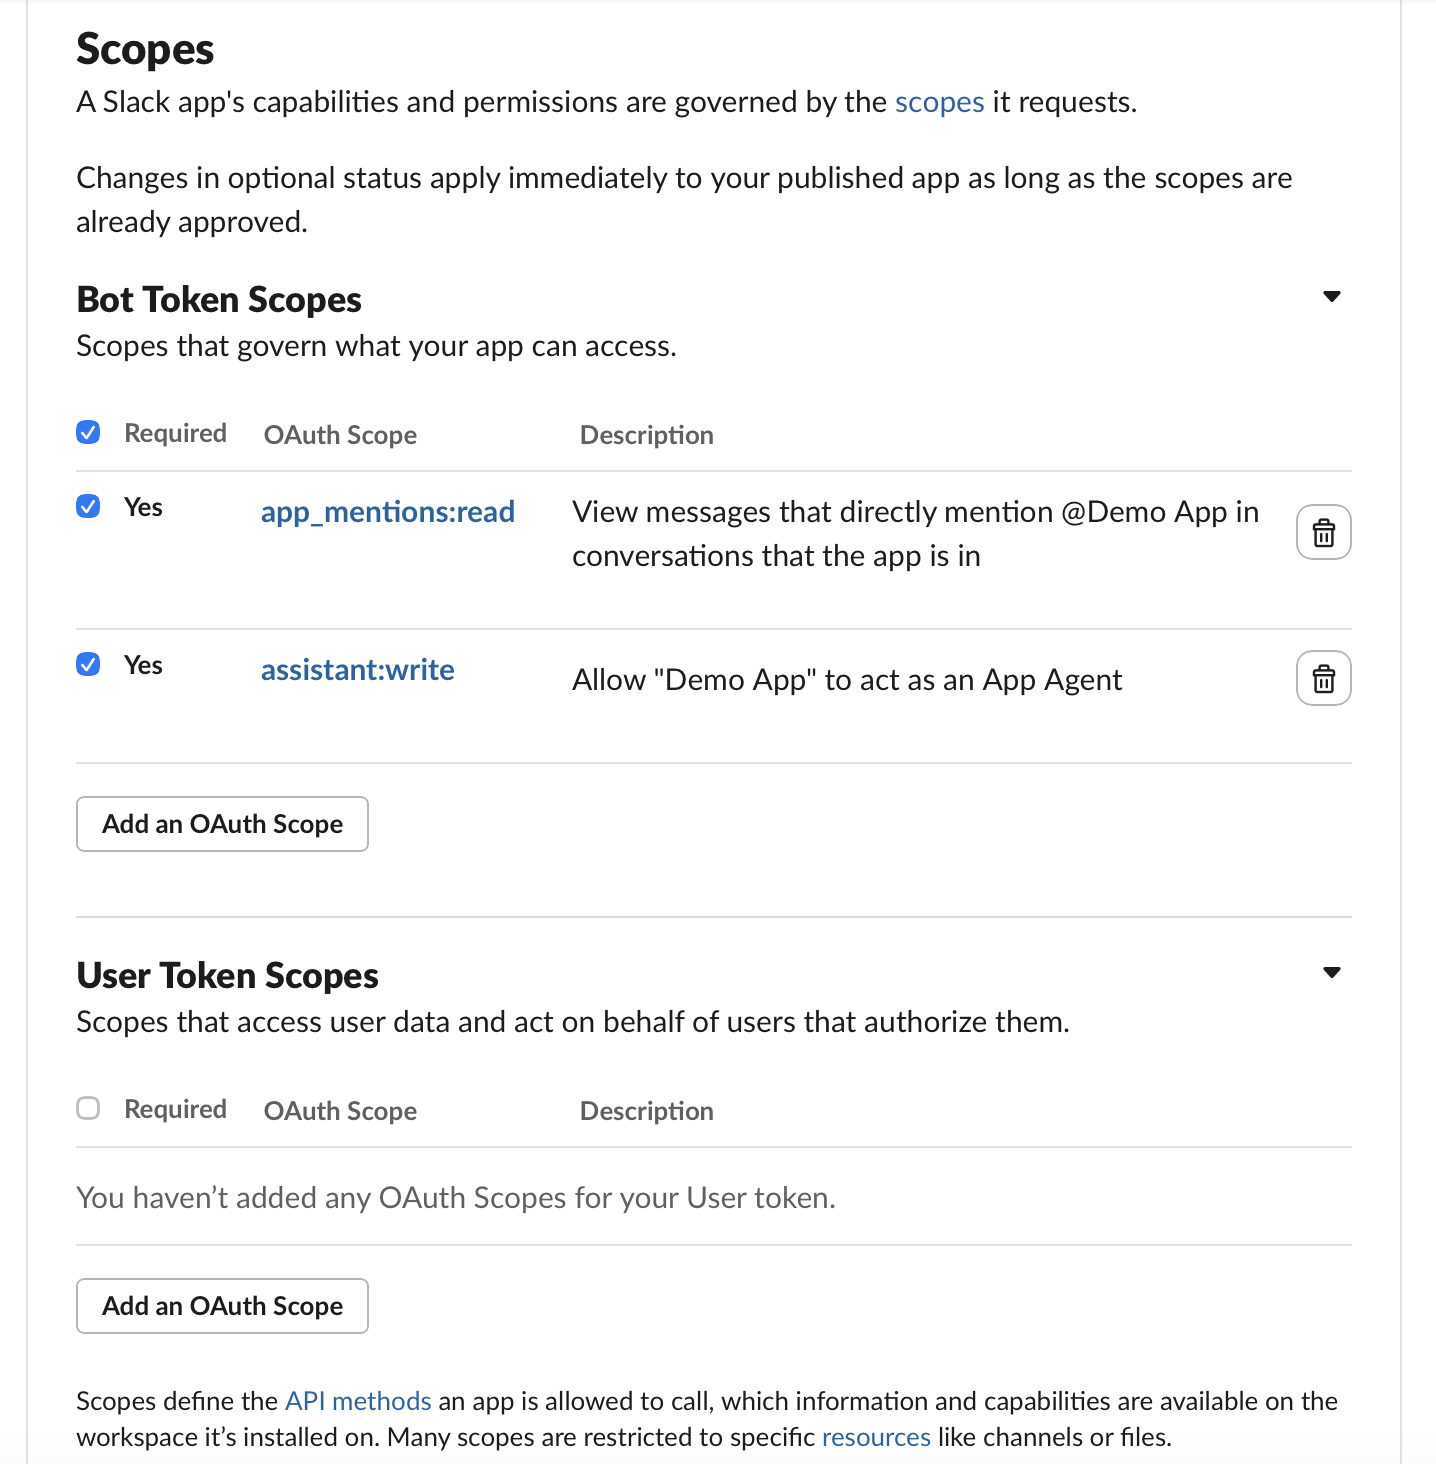
Need to add one the manifest did not include? Click Add an OAuth Scope and pick it from the list.
Step 6: Install the app and copy the Bot Token
Open Install App. Until the app has at least one scope, the install button is greyed out (the scopes from Step 5 are what unlock it).
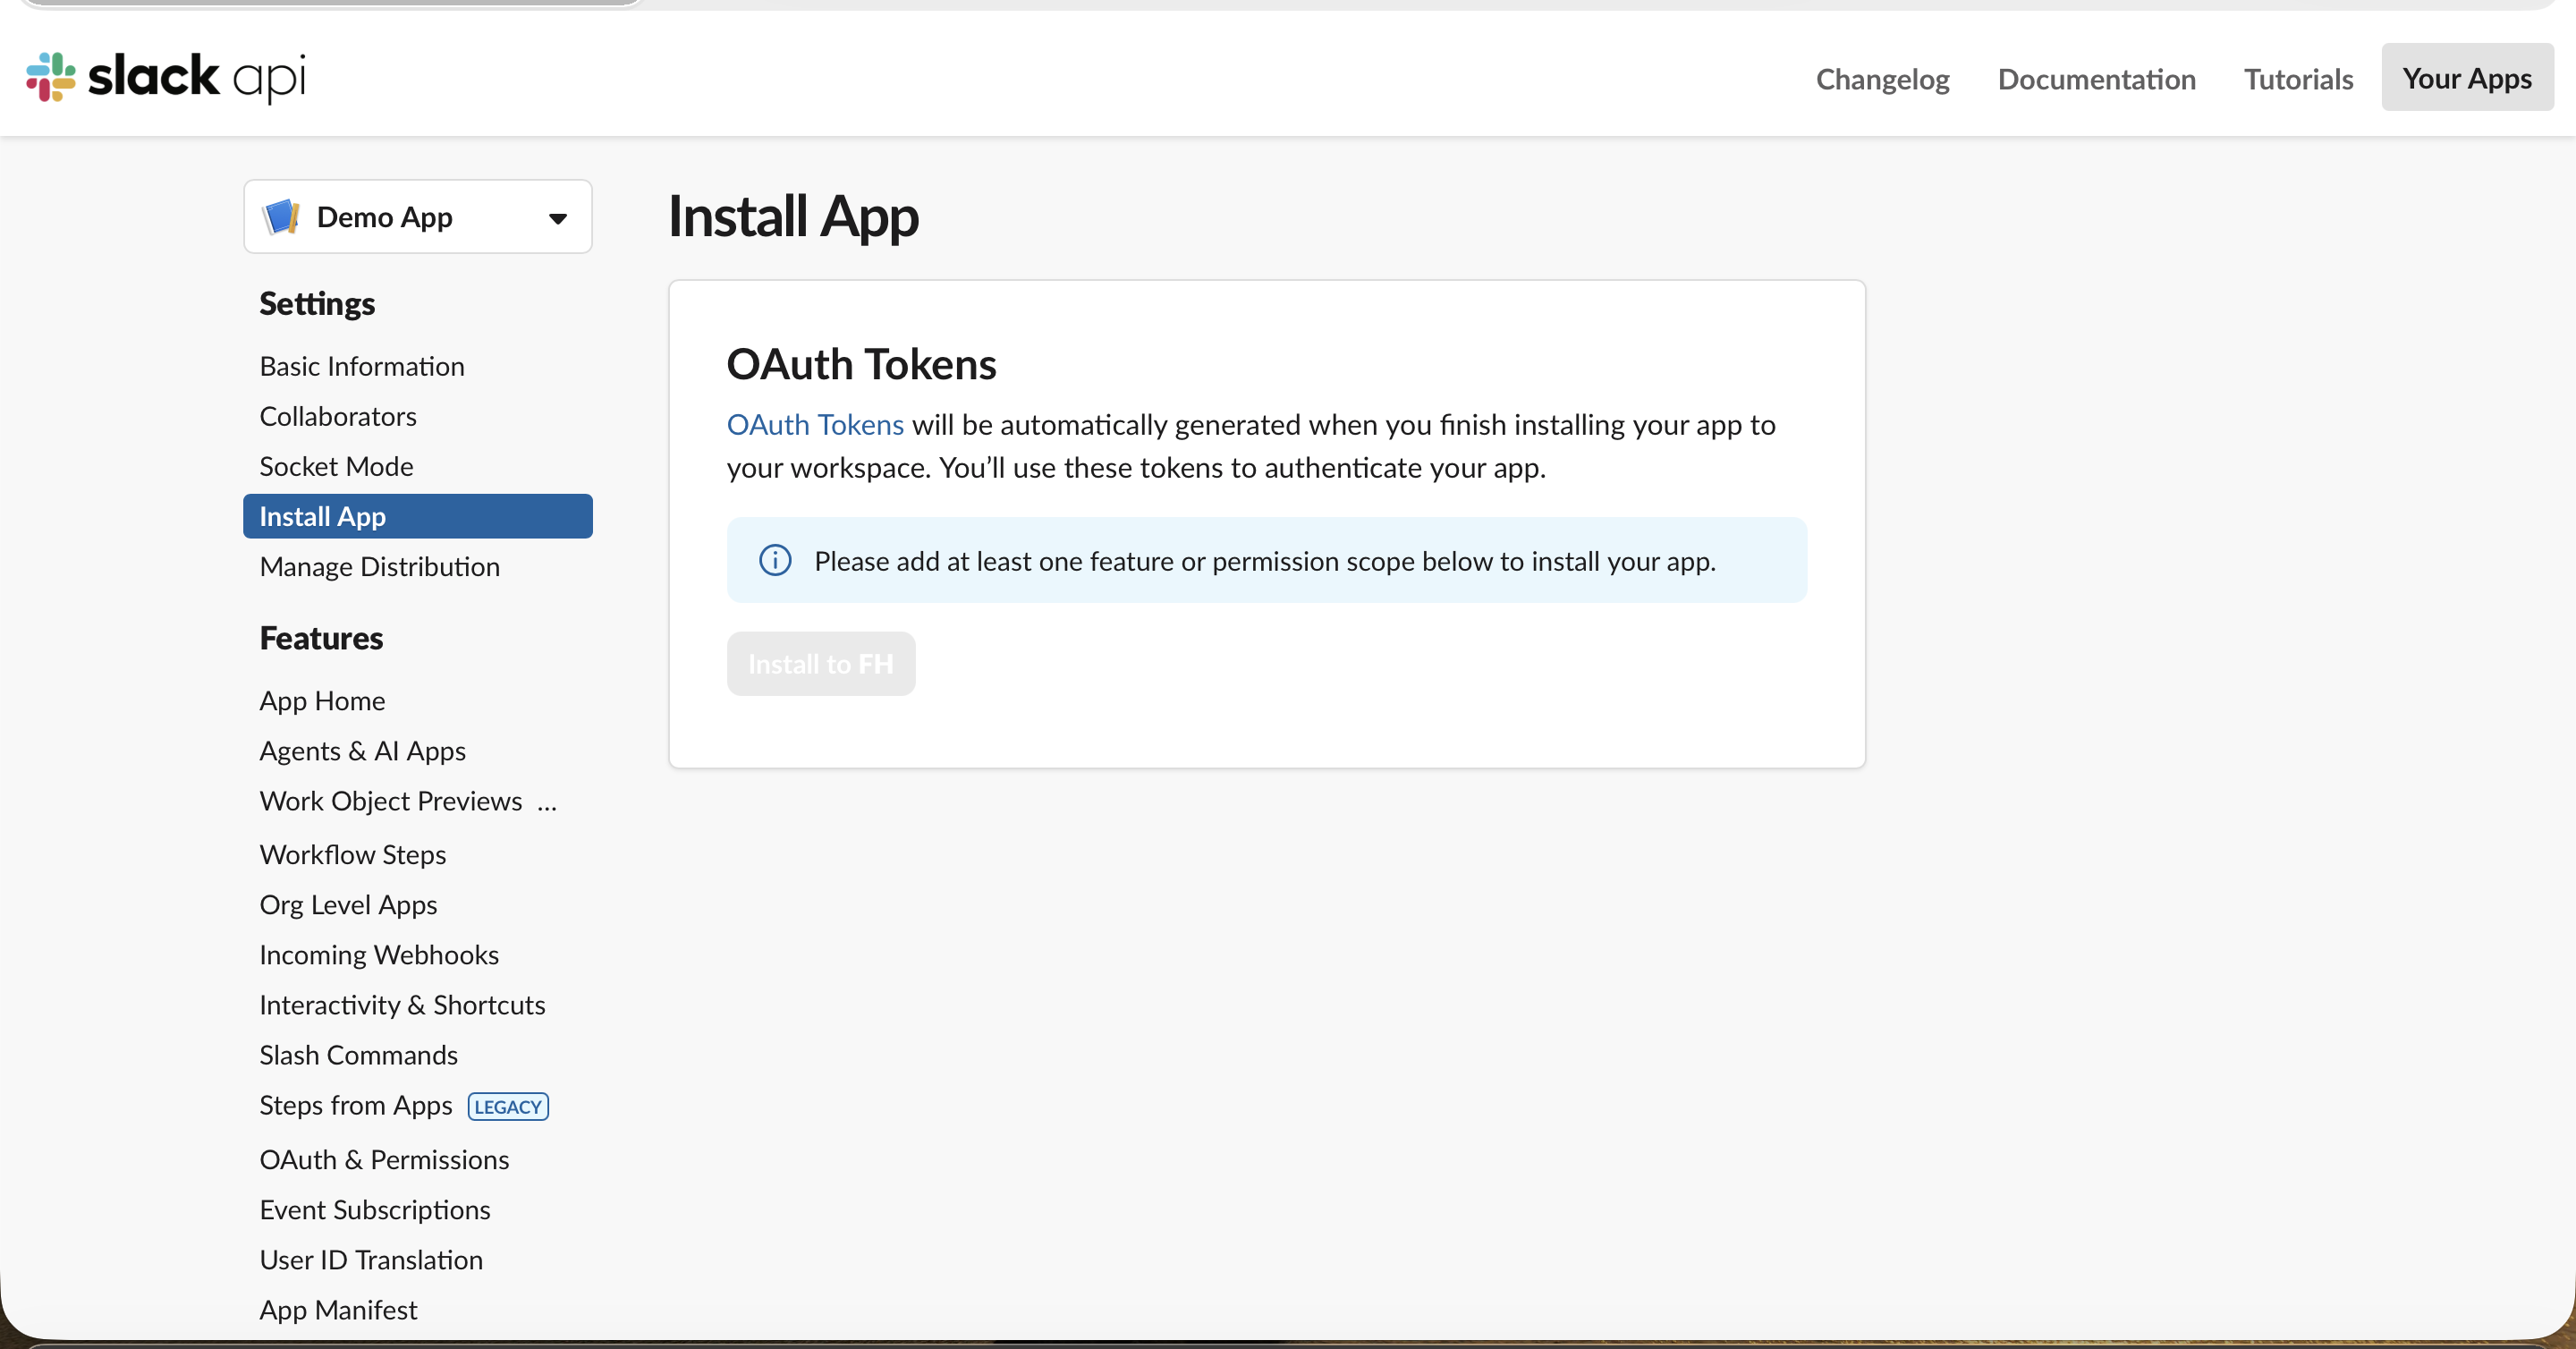
With scopes in place, Install to your workspace becomes available.
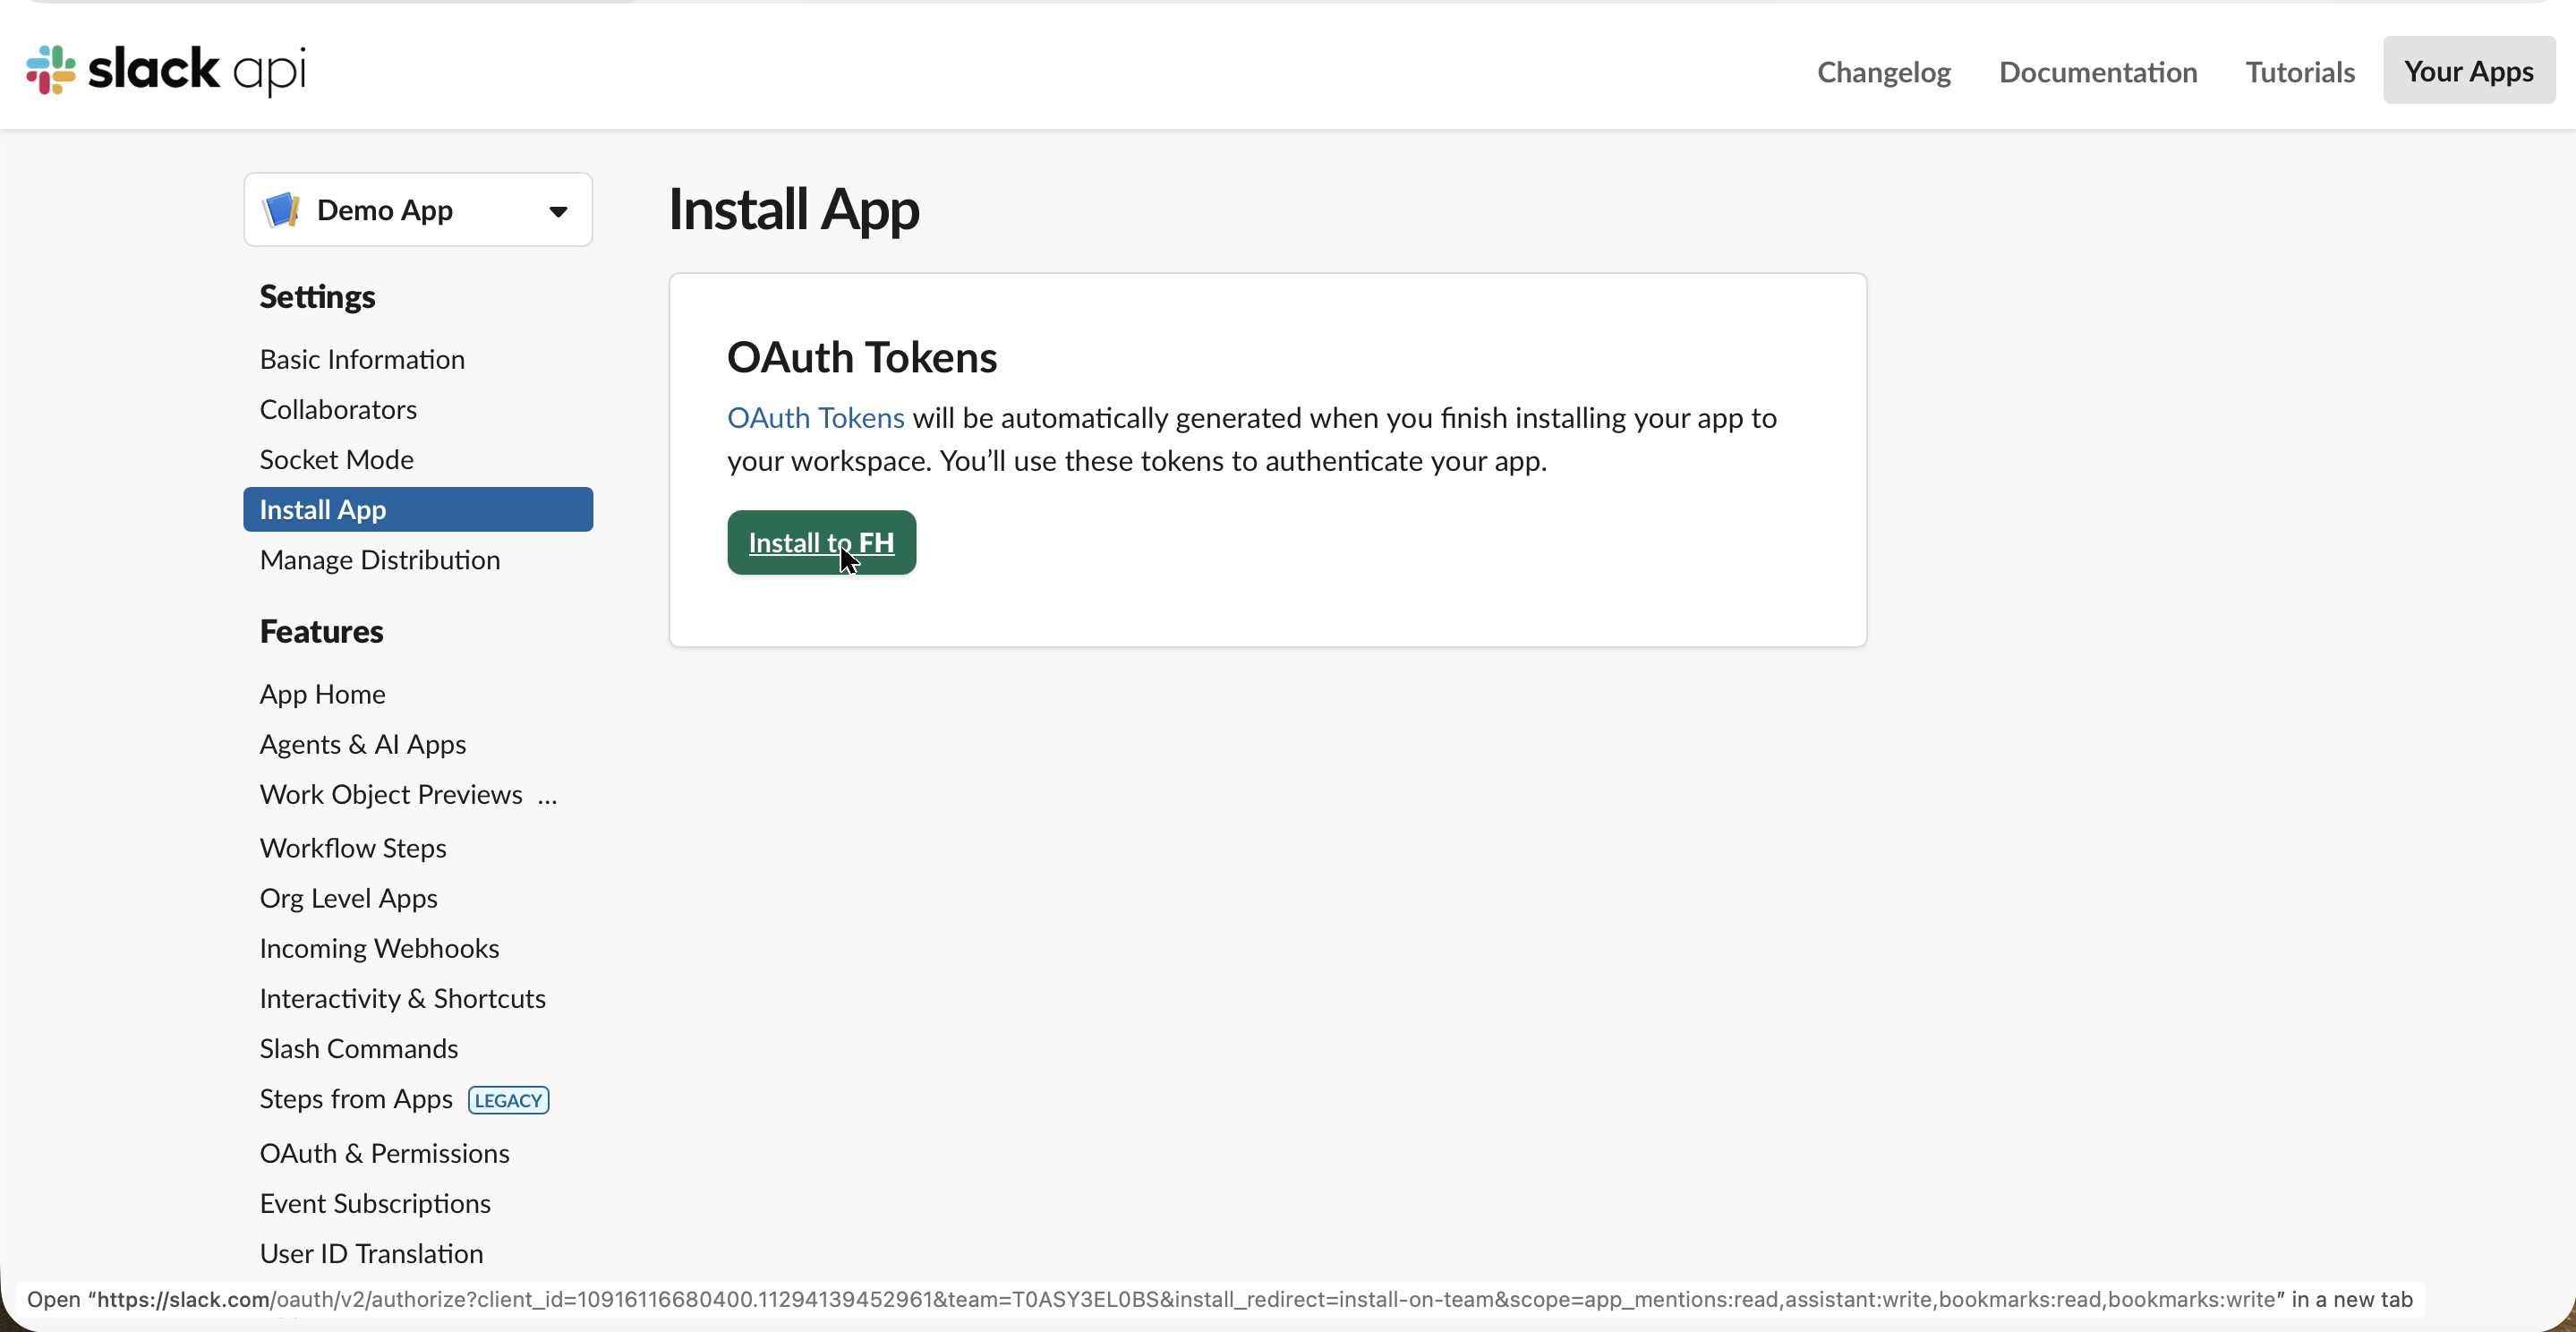
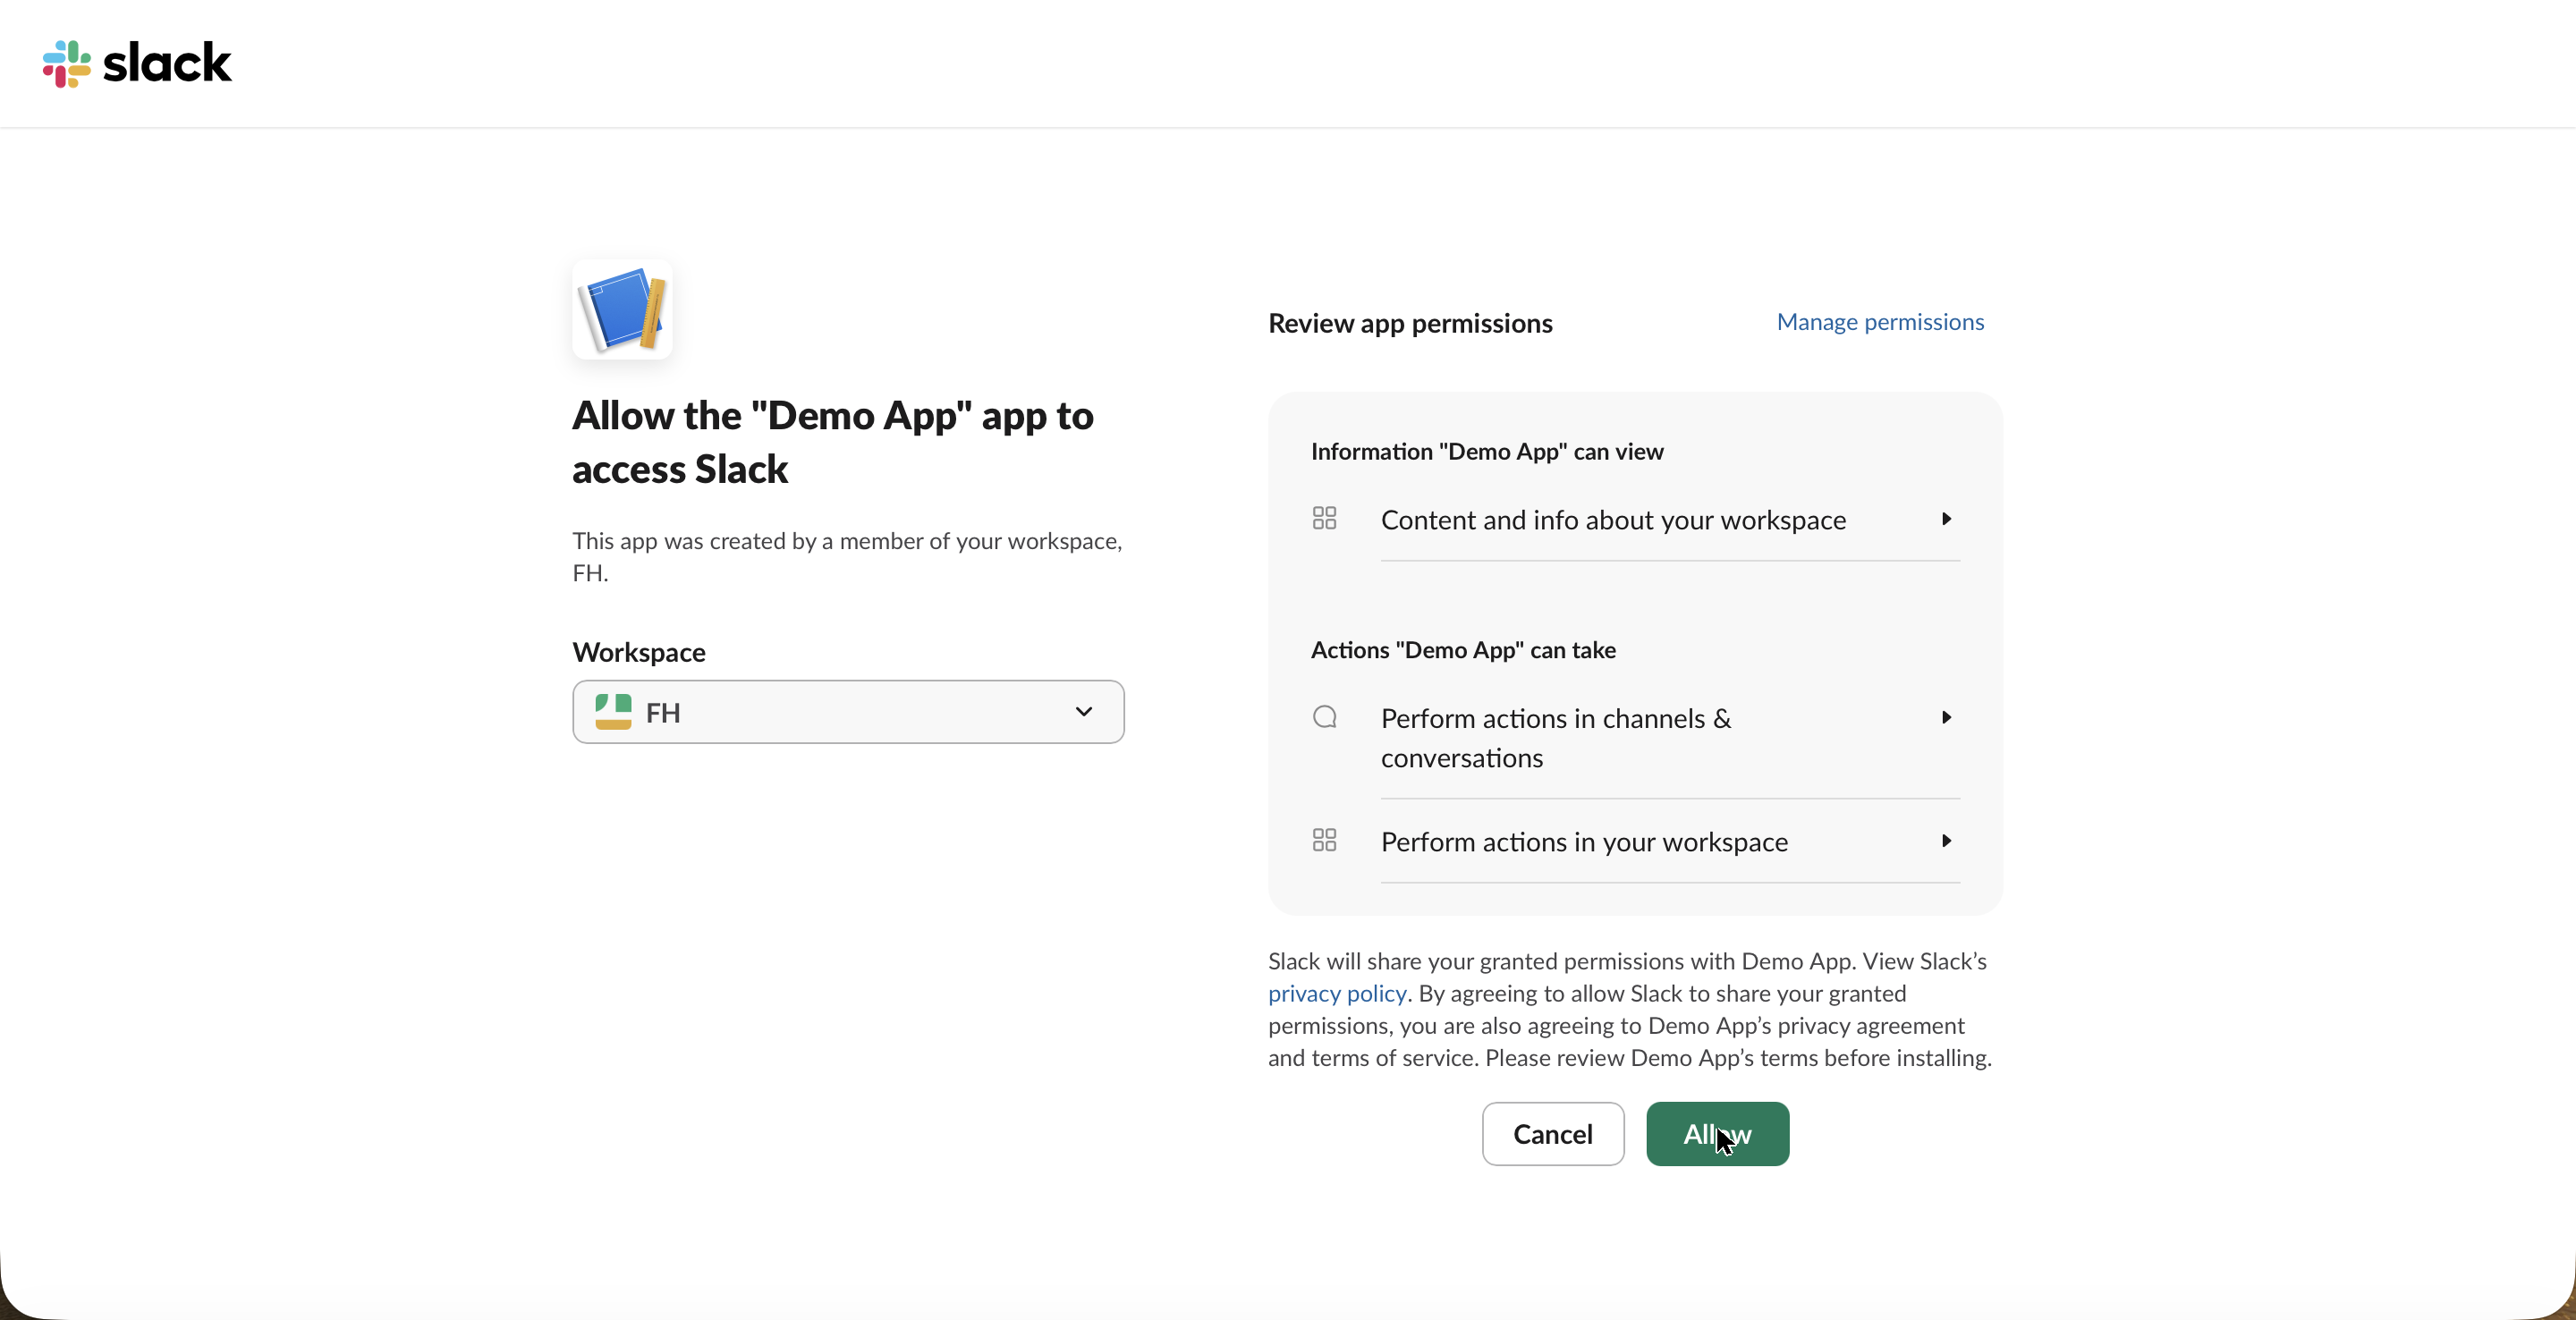
Slack shows the standard permission screen, the same one any Slack app uses. Click Allow.
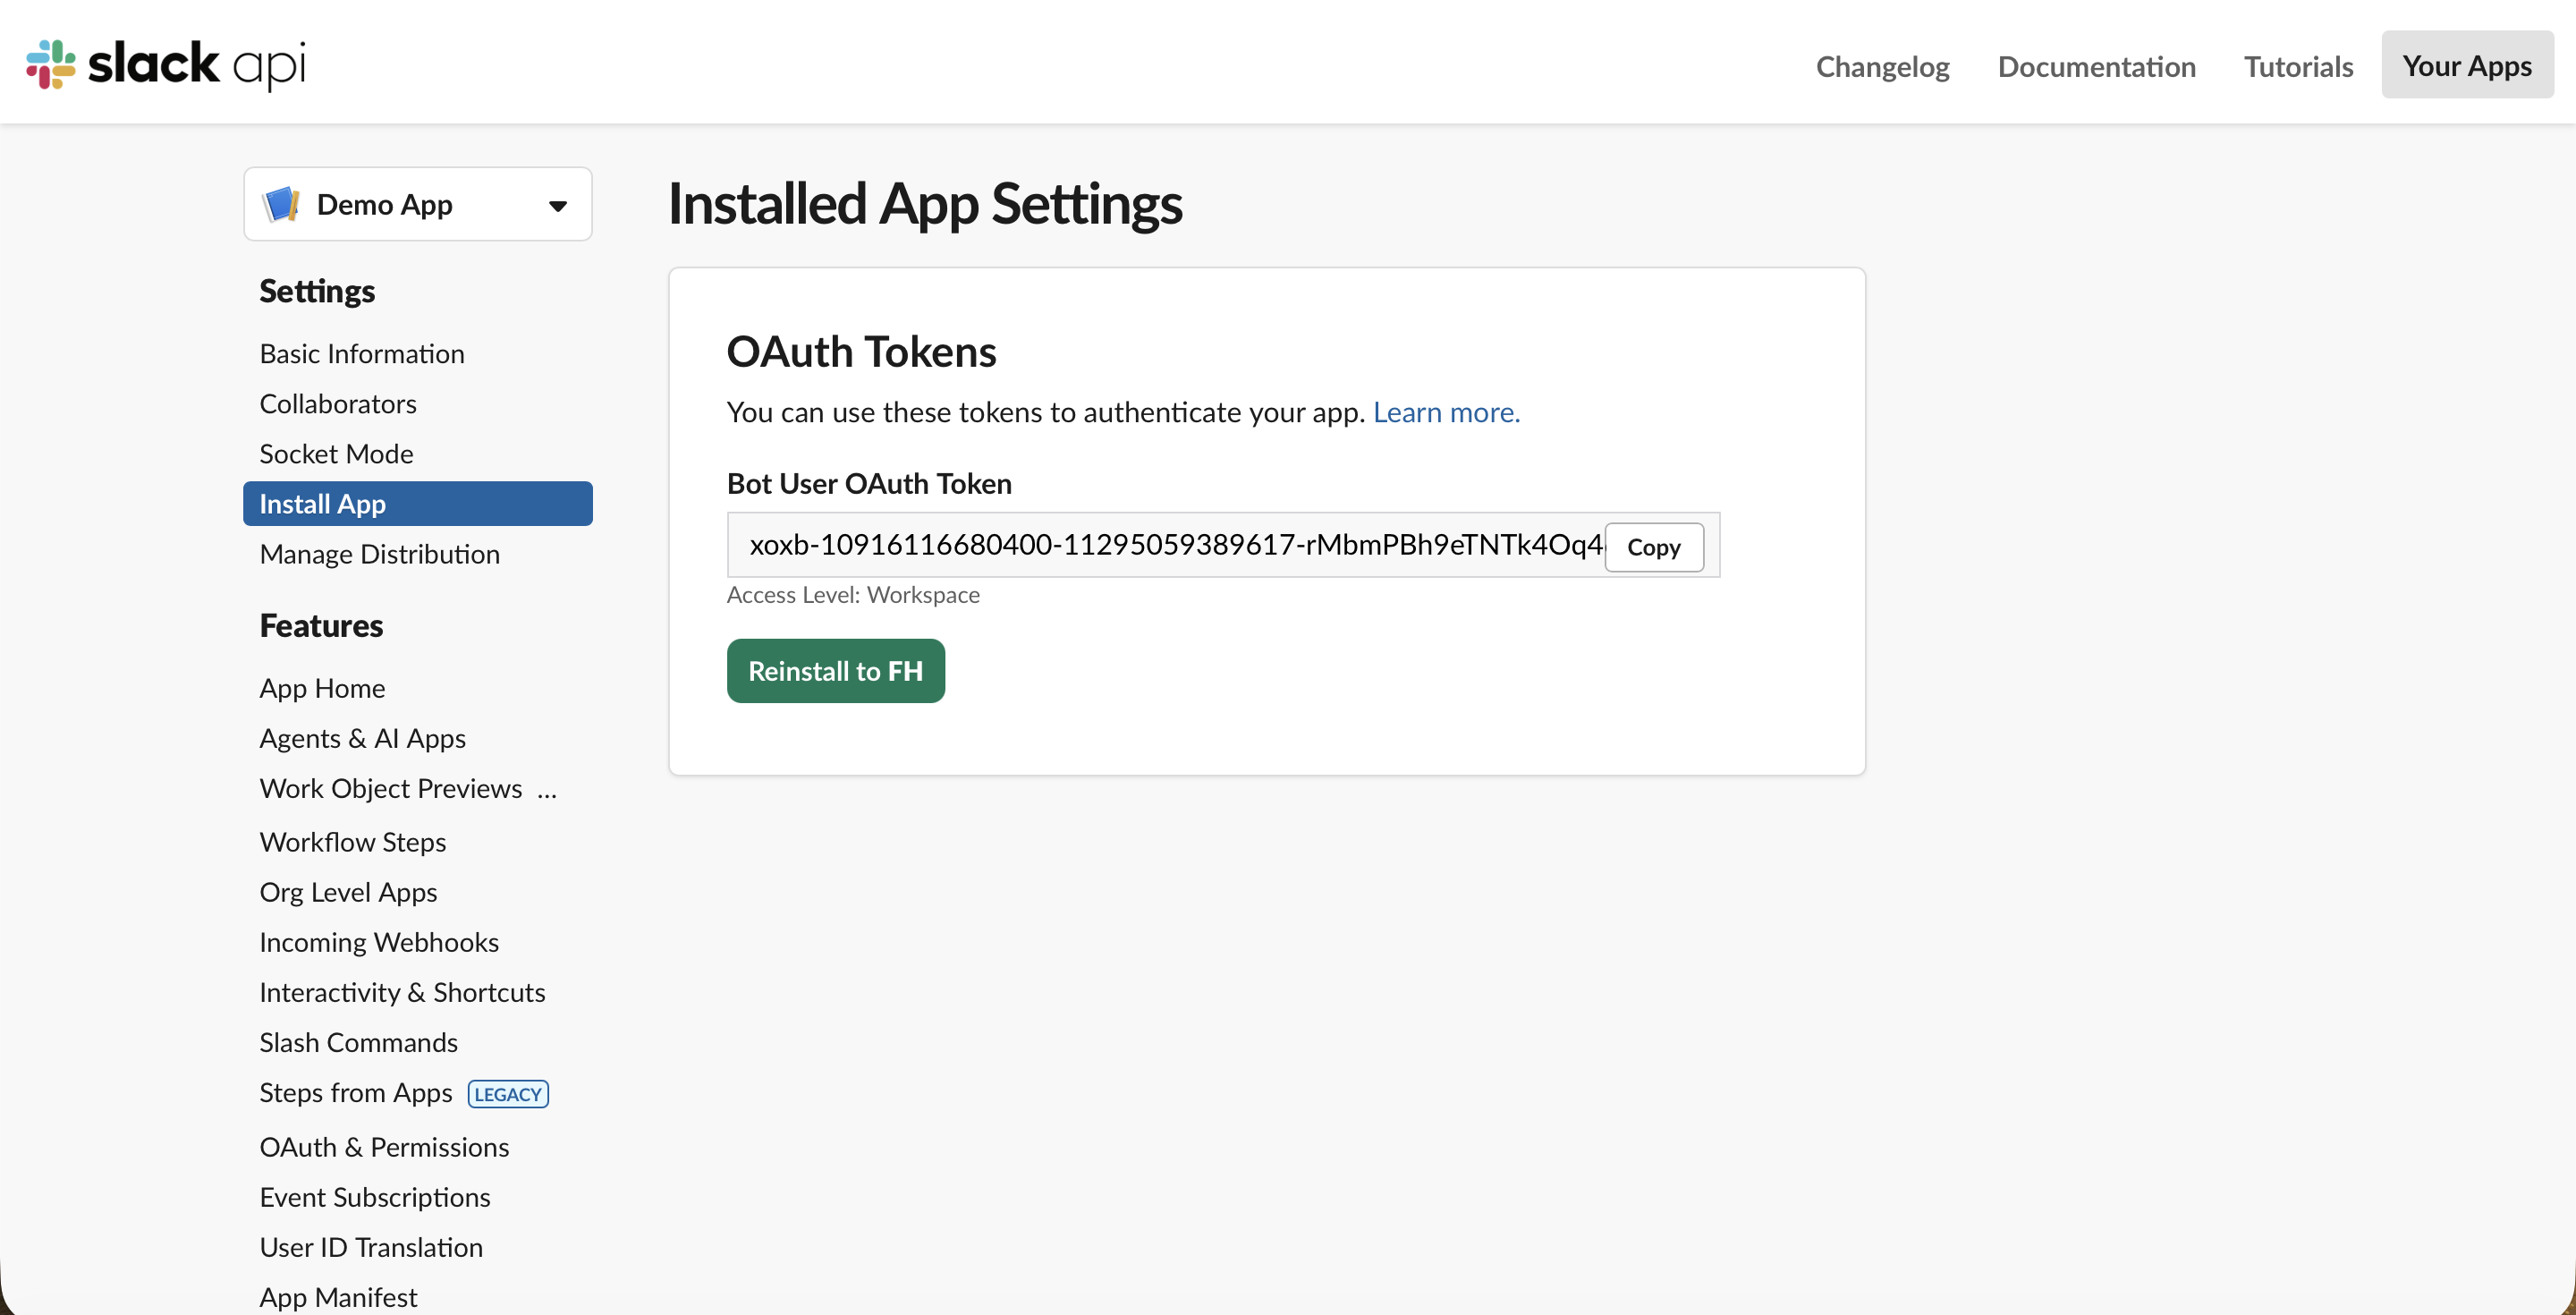
Back on the Install App page, copy the Bot User OAuth Token. It starts with xoxb-. That, plus the xapp- token from Step 4, is everything OpenClaw needs.
Step 7: Write the tokens into OpenClaw and start the gateway
Write your two tokens straight into the config, then apply it and restart the gateway:
cat > ~/slack.socket.patch.json5 <<'JSON5'
{ channels: { slack: { enabled: true, mode: "socket",
  appToken: "xapp-your-app-level-token",
  botToken: "xoxb-your-bot-token" } } }
JSON5

openclaw config patch --file ~/slack.socket.patch.json5
openclaw gateway restart
Your tokens are never saved. The swap happens right here in your browser — nothing is sent anywhere, stored, or remembered. Paste your two tokens, copy the whole block, and run it in your terminal: it writes the config file and restarts the gateway for you. Refresh the page and it's gone.
Shortcut — paste your tokens, copy the whole block. Drop your two Slack tokens into the box above and they’re filled straight into the commands. Copy the filled block and run it in your terminal — it writes the config file, applies it, and restarts the gateway. Nothing is sent anywhere; the swap happens in your browser.
Why inline, and not environment variables? OpenClaw’s gateway runs as a background service (a LaunchAgent on macOS), and a background service does not inherit variables you
exportin your terminal. If you store the tokens as env-var references, the gateway boots, cannot find them, and refuses to start. Putting the values directly in the config is what actually works.
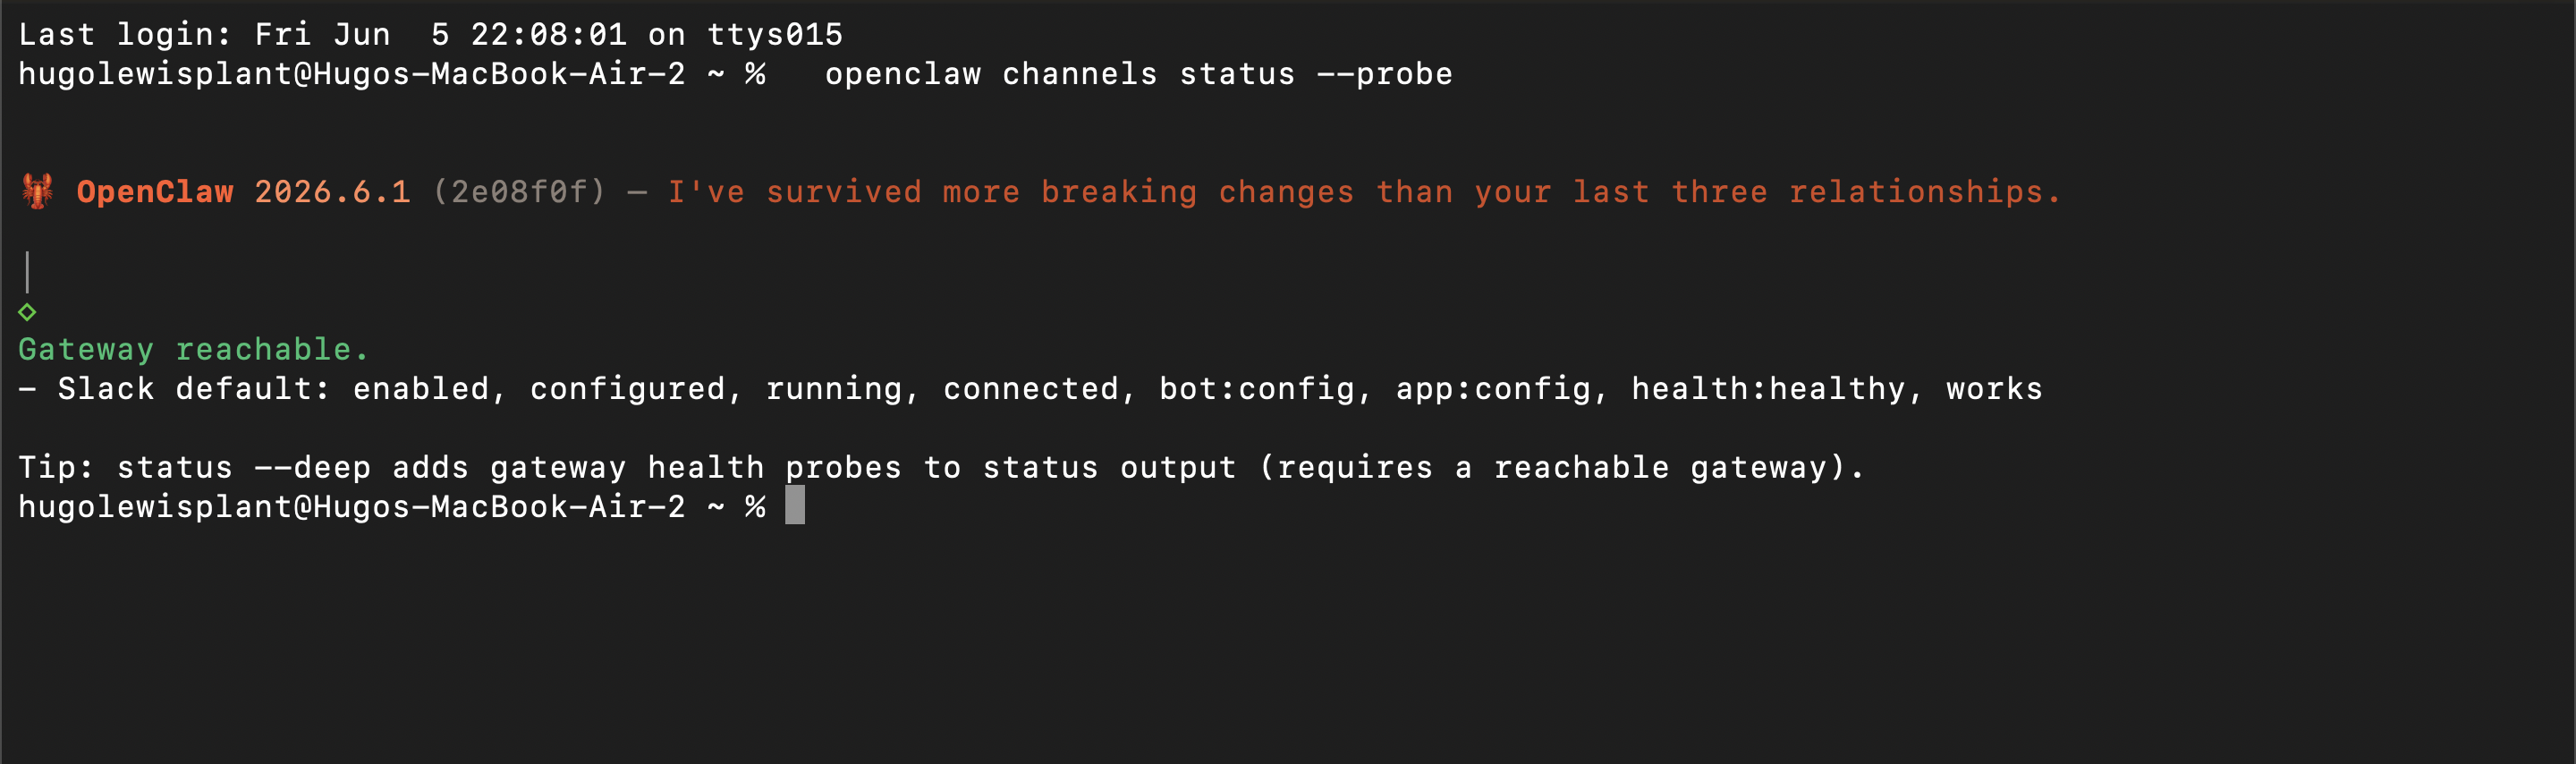
Step 8: Verify the connection
Give the gateway a few seconds to come up, then confirm the Slack channel actually connected:
openclaw channels status --probe
A healthy result shows Slack as connected, health:healthy. If instead you see invalid_auth, the App-Level Token is stale or Socket Mode is off on the Slack app; regenerate the token and make sure Socket Mode is enabled.
Step 9: Add the bot to a channel and message it
Installing the app is not enough — OpenClaw only sees a channel it has been invited into. In the channel you want it in, invite the bot:
/invite @YourBot
Then send a message that @mentions it, like @YourBot summarize this thread, and it replies. Two things to know that trip people up: in a channel OpenClaw only acts on @mentions (not every message), and its Slack channel policy defaults to an allowlist that silently drops messages from any channel it has not been told to listen in. Set channels.slack.groupPolicy to open (or allowlist the channel’s ID) so your messages actually reach the bot — otherwise it stays silent with no error. (More on that silent failure in the Reality Check
below.)
Heads up: because you are self-hosting, the assistant is only reachable while your gateway (and the machine it runs on) is up. If you want it online around the clock, you run it on an always-on machine or a VPS, and you own the updates, security, and token rotation that come with that.
Reality Check: What It Actually Took
The nine steps above are the clean version. When we built this for real, getting a single reply out of the self-hosted bot took hours, because several things fail completely silently — no error, no reply, nothing in the obvious logs. If you go down this road, here is what the manifest does not warn you about.
You have to turn on Event Subscriptions, or the bot never hears you. A connected Socket Mode pipe is not the same as Slack actually delivering messages. Until you enable Event Subscriptions and subscribe the bot to app_mention, message.im, message.channels, and message.groups, every message you send vanishes — the bot stays silent and the logs stay empty. Each event you add also forces a reinstall, which regenerates the bot token again.
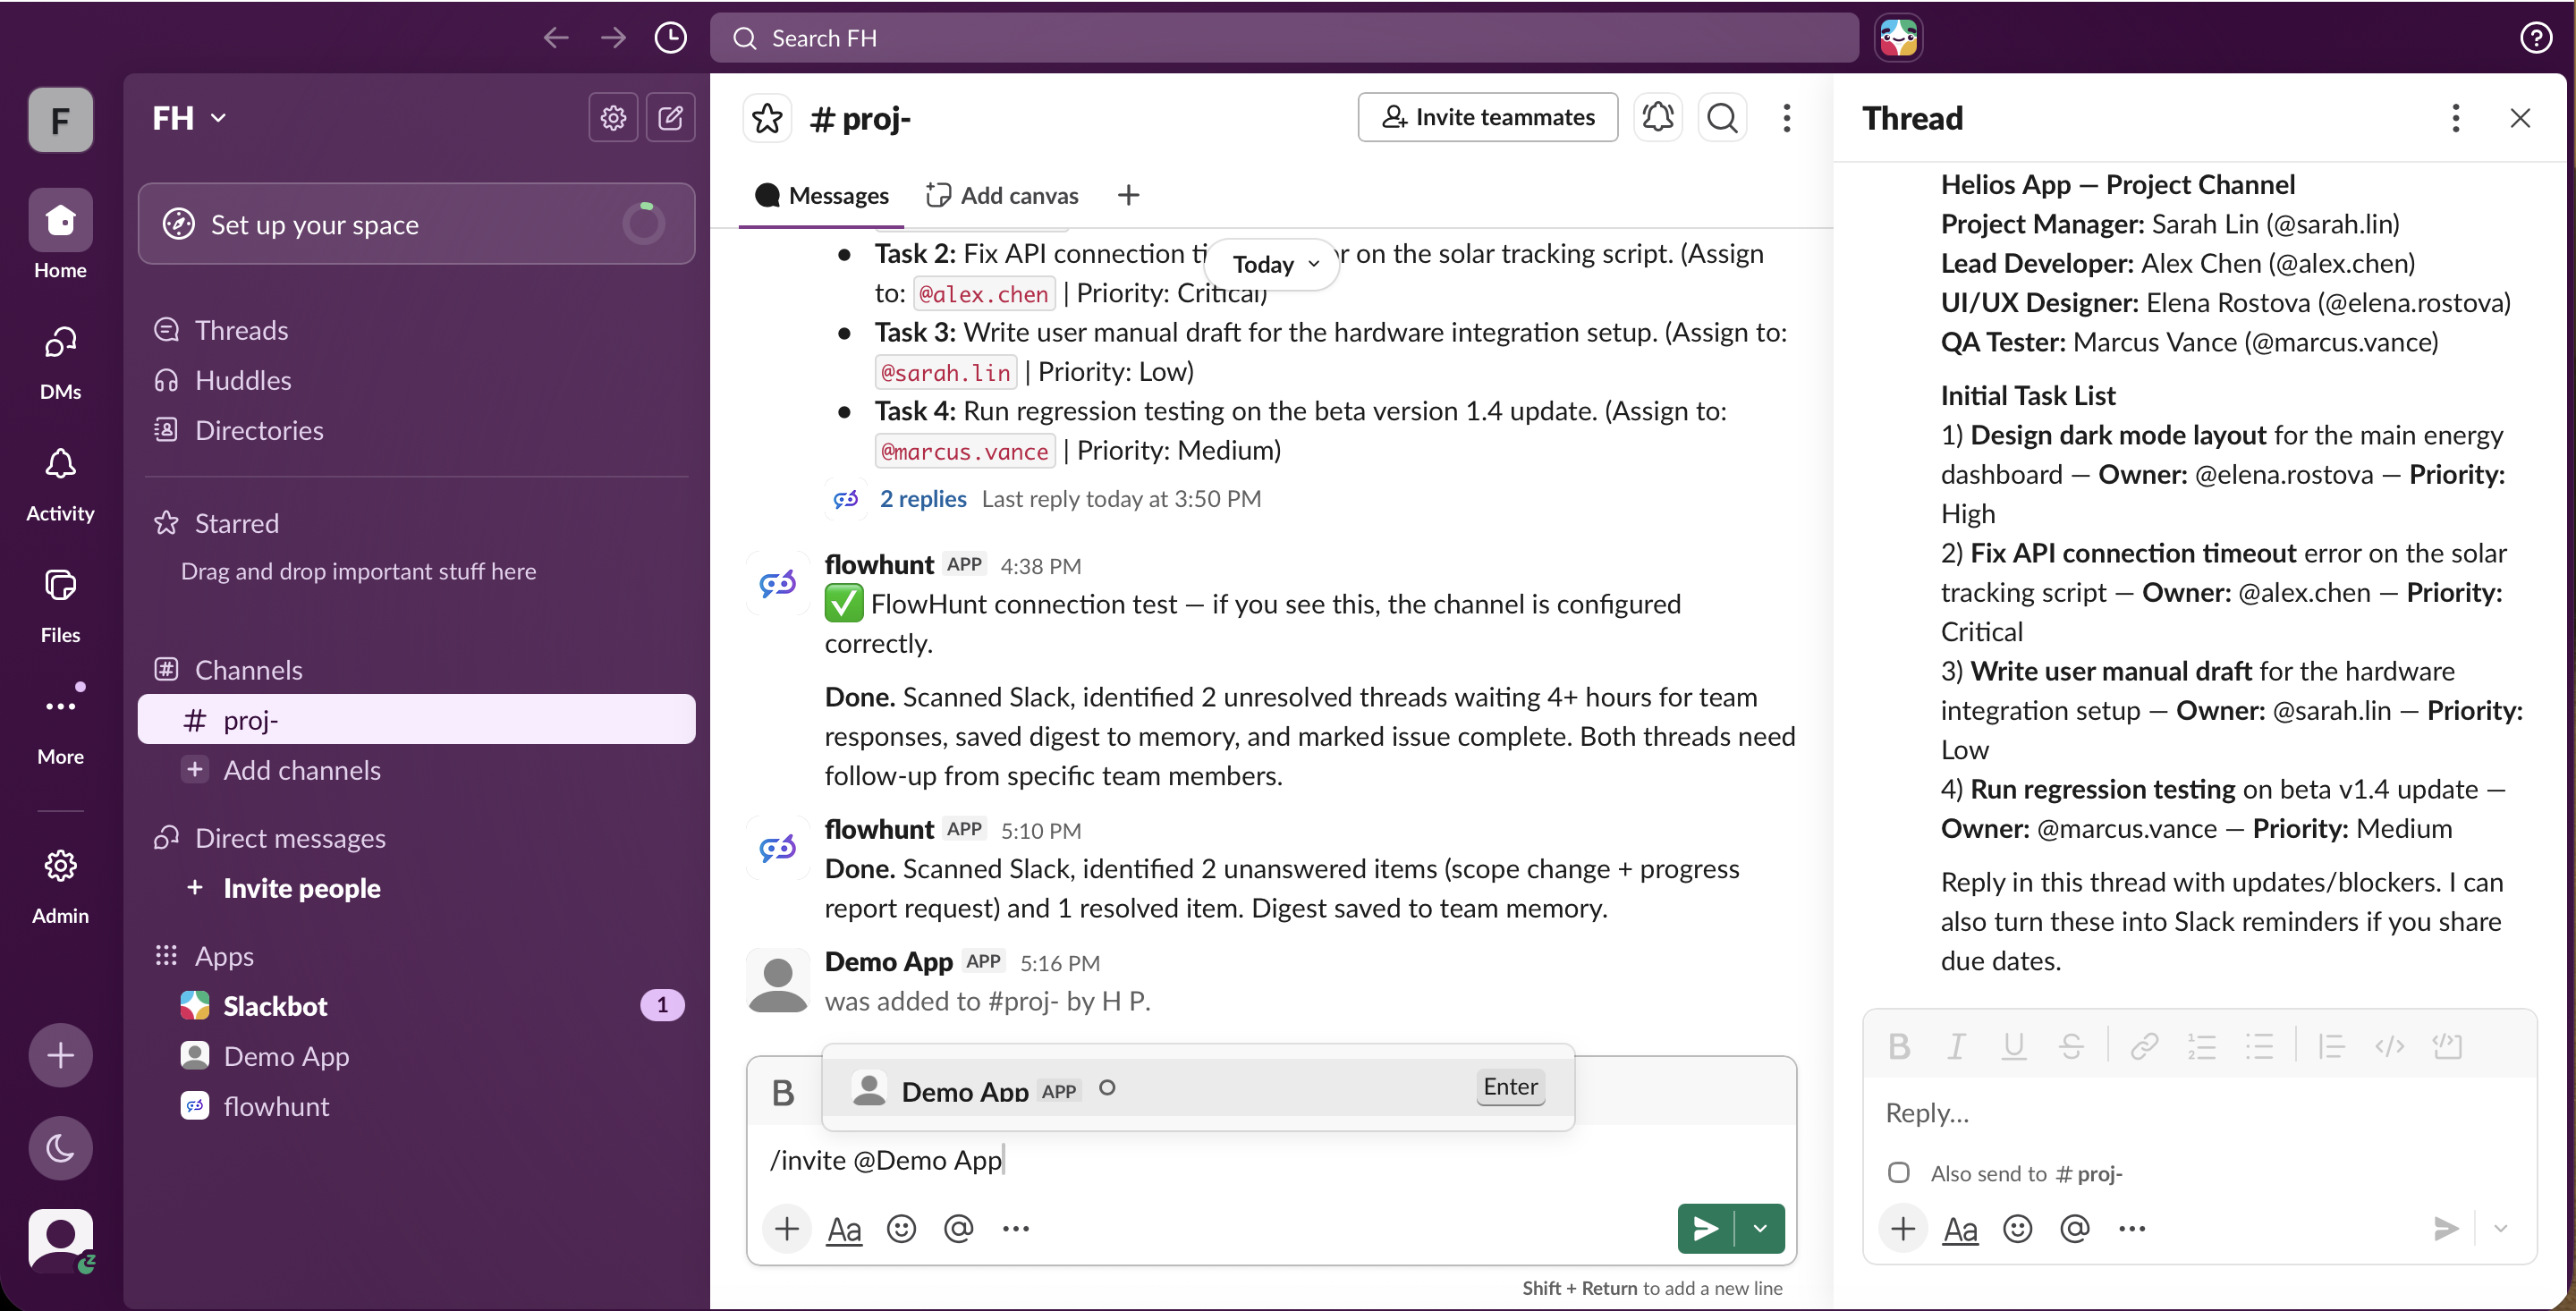
Then the channel allowlist silently eats your messages. OpenClaw’s Slack channel policy defaults to an allowlist, so even after events are flowing, messages from a channel that is not explicitly allowed are dropped with drop message (channel not allowed) — visible only if you turn on debug logging. You either allowlist each channel ID or set the policy to open. There is also a permission gate (commands.ownerAllowFrom) and a per-app “allow users to send messages” checkbox, each of which silently blocks replies until set.
And then the assistant could not think at all. OpenClaw’s default model runs on your Claude subscription via its built-in CLI runtime — and that login expires every few hours. With it expired, every turn failed with a FailoverError, so even a perfectly wired Slack bot produced no answer. The fix was to point OpenClaw at a free, never-expiring open-source model instead — NVIDIA’s Nemotron through an OpenRouter key, running on OpenClaw’s native runtime. (That swap is its own walkthrough, which we cover in Free LLMs for Your AI Assistant: FlowHunt vs OpenClaw + Nemotron.)
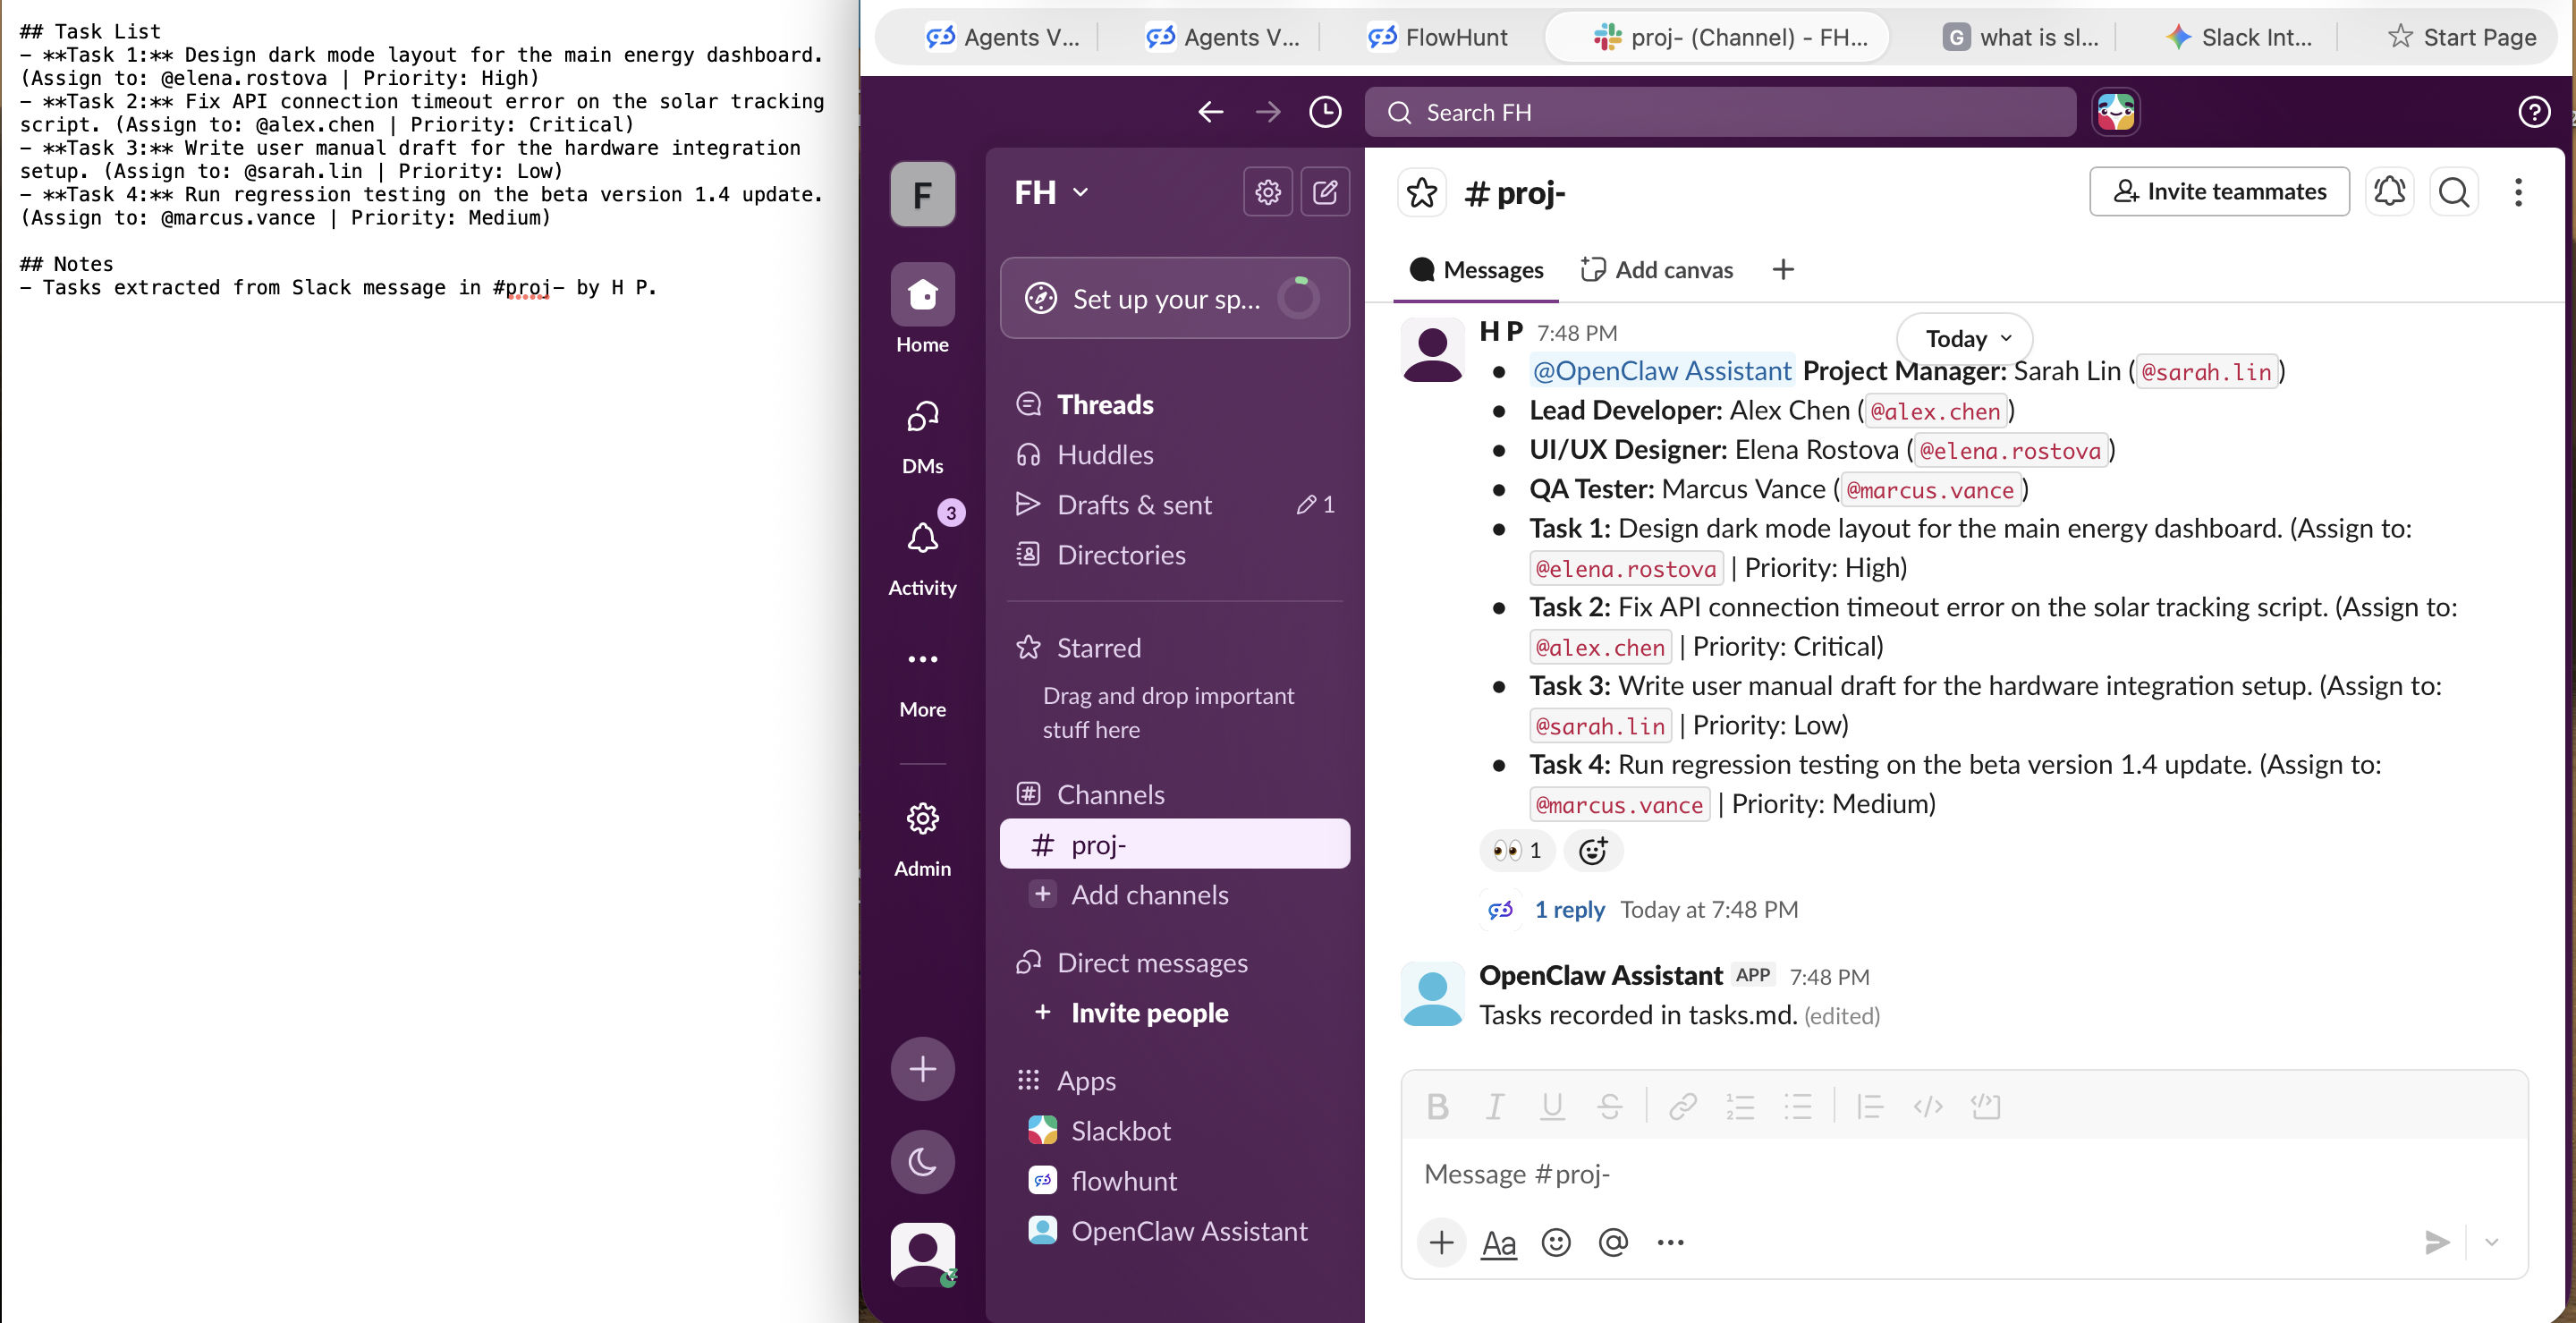
Once all of that was in place, it finally worked — the self-hosted assistant read a task list posted in Slack, extracted the action items, and saved them. Notably, it answered in a thread and wrote its real output to a file on disk (tasks.md) with no interface to view it, while its visible reply was hit-or-miss. It works, but you feel every bit of “free and self-hosted.”
By contrast, the FlowHunt bot replied correctly in the channel on the first message, with none of this — no event plumbing, no allowlist, no expiring login, no file hunting.
Join our newsletter
Get latest tips, trends, and deals for free.
Same Goal, Very Different Effort
Both routes end with an AI assistant your team can message in Slack. What differs is everything in between.
| FlowHunt | OpenClaw | |
|---|---|---|
| Hosting | Fully managed cloud, nothing to run (app.flowhunt.io ) | Self-hosted, you run and keep the gateway alive |
| Slack setup | One OAuth click, no API keys or config | Plugin, Slack app from a manifest, two tokens, config patch, channel invite + mention |
| Skills needed | None, point and click | Comfortable in a terminal |
| Stays online | Always, independent of your devices | Only while your gateway and host are up |
| Reuse elsewhere | Same agent to web, LinkedIn, API | One self-hosted assistant you wire per channel |
| Prebuilt starting point | More than 500 agents (around 30 cover the most popular jobs) | Configure your single assistant yourself |
| Model / brains | Managed production models, nothing to wire or expire | Default login expires every few hours; swap in your own free Nemotron/OpenRouter key to keep it running |
| Failure modes | It just works after one click | Several silent failures (events off, channel allowlist, expired model auth) with no error to guide you |
| Maintenance | Managed for you, zero ops | Updates, uptime, security, token rotation on you |
Which Should You Choose?
If your goal is a Slack assistant your team can actually rely on, FlowHunt is the faster, lower-maintenance path by a wide margin. There is no plugin to install, no Slack app to hand-build, no tokens to juggle, and no server to keep alive at 3 a.m. You authorize it once and it stays online, and because you built the agent in FlowHunt, you can put that same assistant in your website chat, on LinkedIn, or behind an API without redoing any of it. Start free and deploy to Slack today .
OpenClaw is a genuinely cool project if what you want is a private, self-hosted assistant on hardware you control, and you do not mind being the one who maintains the Slack app, the tokens, and the gateway. That control is the whole appeal of self-hosting. It is just not the low-effort path, and it is not built to be a team’s always-on Slack bot without you running infrastructure behind it.
Wrapping Up
Getting an AI assistant into Slack comes down to how much of the plumbing you want to own. With OpenClaw you own all of it: a Slack app built from a manifest, an App-Level Token and a Bot Token, a config patch, a gateway you keep running, and a channel allowlist to manage, all for one self-hosted assistant. With FlowHunt you own none of it: pick an agent, deploy to Slack, authorize, and your team is chatting with it in minutes, on a managed platform that also reaches your other channels and keeps the assistant online for you.
If you want the result without the upkeep, build your agent in FlowHunt and deploy it to Slack . The Slack bot is the easy part; everything FlowHunt manages behind it is what makes it worth keeping.
Track Your AI Work as a Project
One Slack assistant is a start. As you build more agents — across channels, workflows, or teams — FlowHunt AI Projects gives you a Kanban-style board to plan and ship your AI automations the way engineering teams track issues: with statuses, priorities, and a clear view of what is in progress, what is blocked, and what is done. If you prefer to run your AI work like a product, it is built for that.