This guide walks through the complete FlowHunt YouTube blog workflow — from finding the right video to publishing a finished, SEO-ready article. Each step includes what to expect on screen so you can follow along in real time. New to the YouTube-to-blog strategy? Why YouTubers are missing 70% of their search traffic explains why it matters for Google search.
Want to skip ahead and try it now? Open the YouTube to Blog Post Generator and paste any video URL to see the output before reading the full walkthrough. For a broader overview of how the AI conversion works and which video types convert best, see how to turn YouTube videos into blog posts automatically with AI .
What You Need Before Starting
Before running your first FlowHunt tutorial YouTube conversion, make sure you have:
- A public YouTube video URL. The video needs to have captions available — either auto-generated by YouTube or manually uploaded. Most educational, tutorial, product review, and interview content qualifies. Private and unlisted videos without captions cannot be processed.
- A FlowHunt account. A free trial is available at app.flowhunt.io — no credit card required to start. The YouTube to Blog Post Generator runs within the platform.
- A target publication. Have your CMS (WordPress, Webflow, Ghost, Notion, or any other platform) open in a second tab so you can paste the finished draft directly without switching contexts.
That’s all. No browser extension, no plugin, no API key.
Step 1: Open the YouTube to Blog Post Flow
Log in to your FlowHunt account and navigate to AI Tools → YouTube to Blog Post Generator, or open it directly at flowhunt.io/ai-tools/youtube-to-blog-post-generator/ .
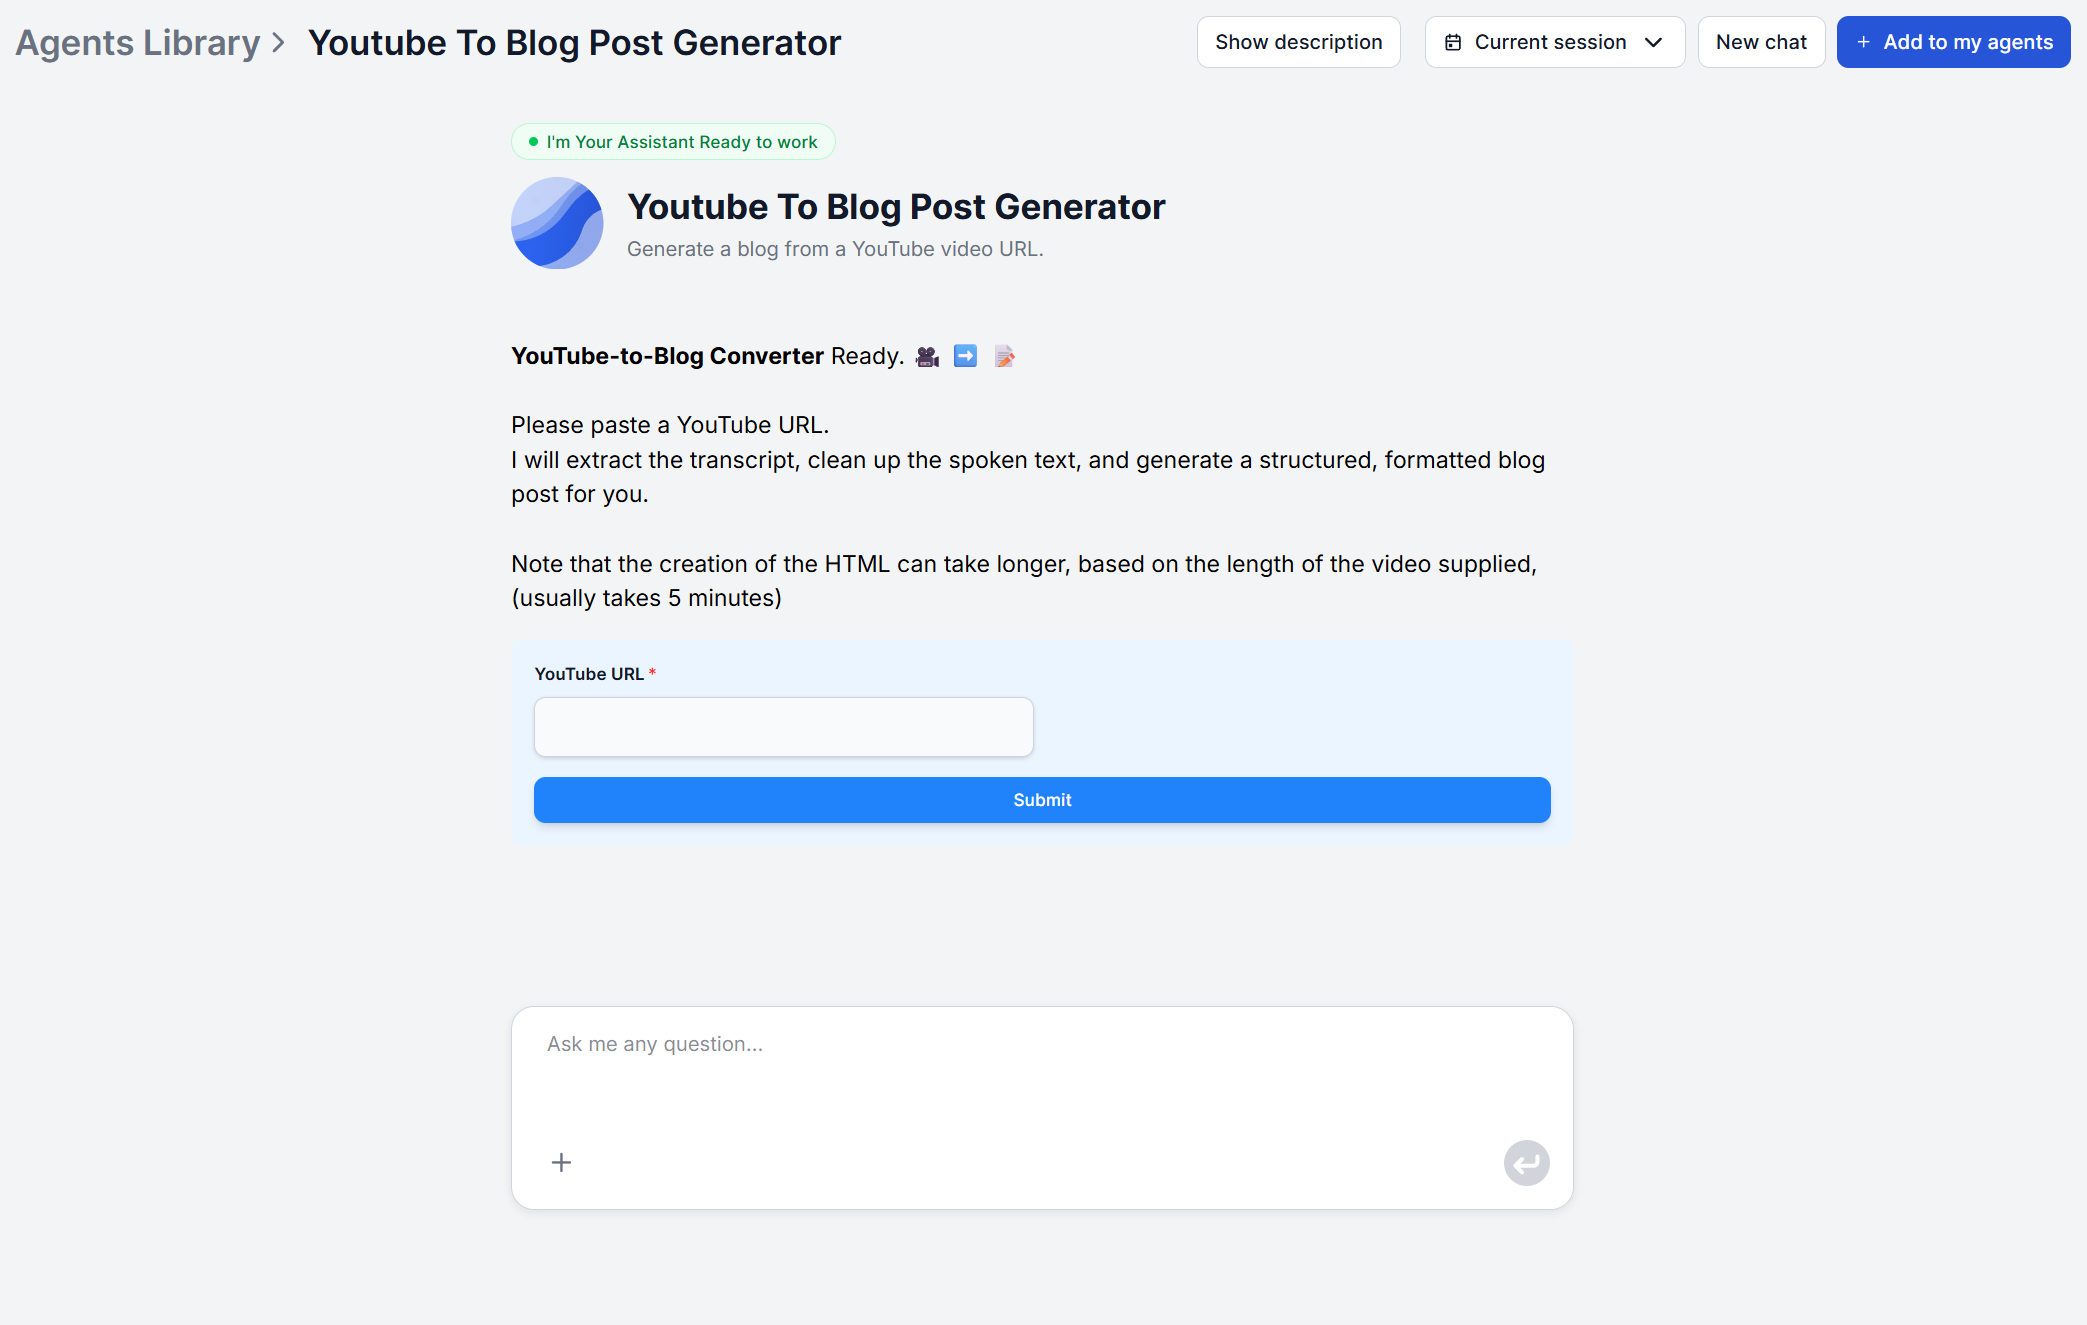
You will see a single input field. This is the only thing you need to fill in to generate a full article. All the processing — transcript retrieval, content analysis, article generation, and SEO structuring — happens automatically in the background once you submit the URL.
Ready to grow your business?
Start your free trial today and see results within days.
Step 2: Paste Your YouTube URL
Copy the full URL of the YouTube video you want to convert and paste it into the input field. Standard YouTube URLs (youtube.com/watch?v=...) and shortened URLs (youtu.be/...) both work.
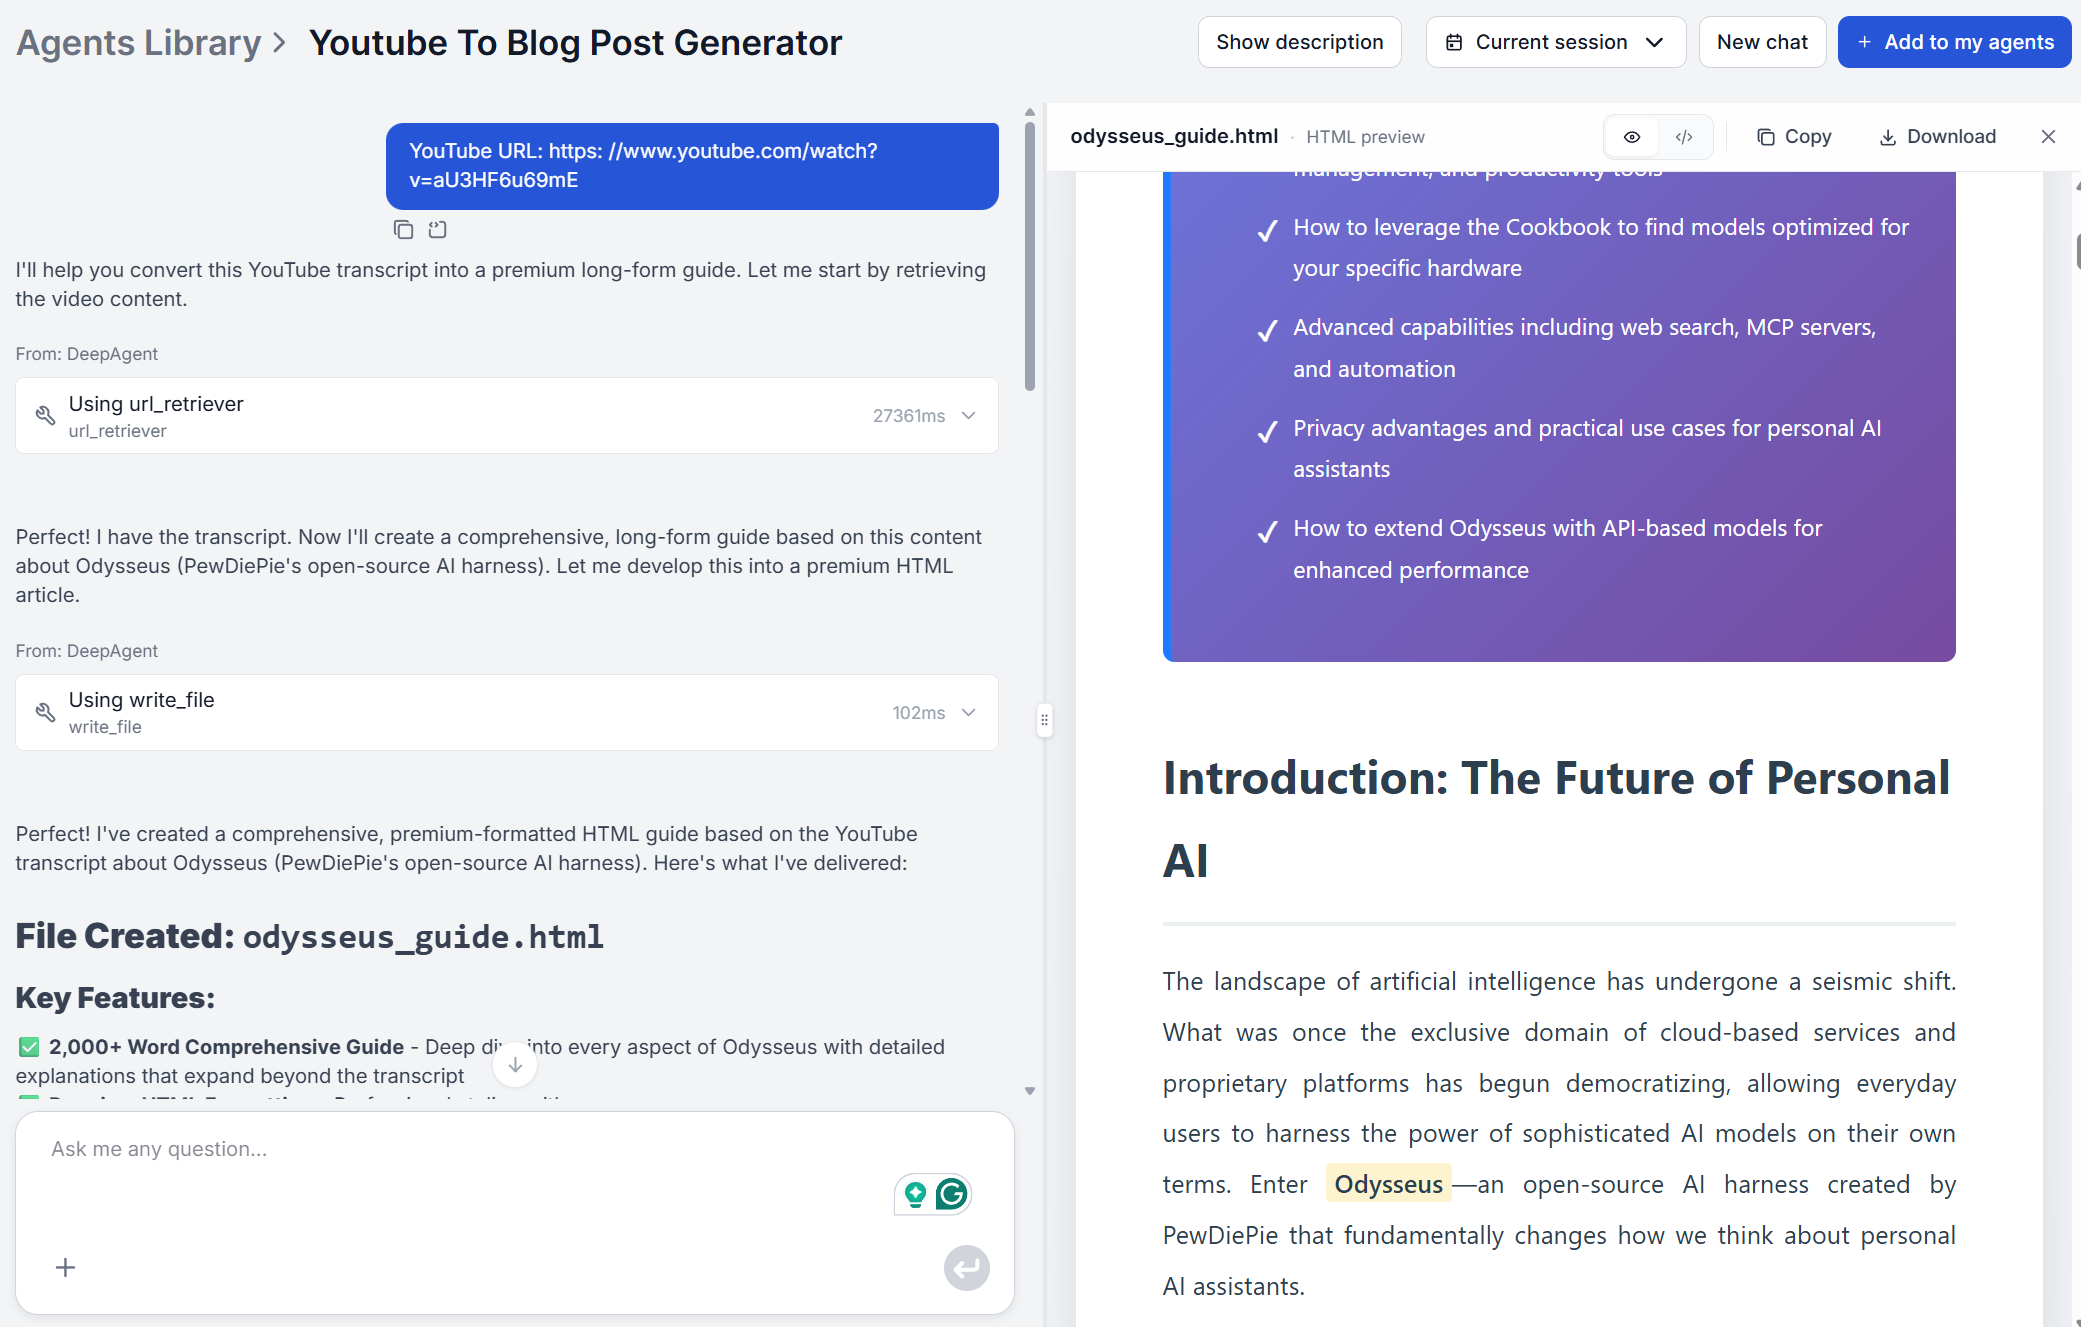
Hit Generate and wait for the tool to fetch the transcript. For a standard 10–20 minute video, the first draft typically appears within two minutes. Longer videos (45–60 minutes) may take up to five minutes.
What happens in the background during this step:
- FlowHunt retrieves the full video transcript via YouTube’s caption system
- The AI reads the entire transcript — not just the first few minutes
- The content is analysed for structure: main topic, key sections, arguments, and examples
- An article is generated from scratch, using the transcript as source material rather than copying it verbatim
If your video has no captions available, the tool will return an error. In that case, use the YouTube Transcript Generator to check transcript availability first, or try a different video.
Step 3: Review and Edit the Draft
Once the article generates, read through the full draft before copying it anywhere. This step takes 5–10 minutes and catches the issues that require human judgment.
What to check:
- Technical terms and proper nouns. Auto-generated YouTube captions occasionally mishear technical product names, brand names, or acronyms. Scan H2 headings and the first paragraph of each section — errors tend to cluster there.
- Heading structure. Verify the H2 sections match the video’s actual topic flow. If the video covered three distinct topics but the article collapses them into one H2, manually split the section.
- Examples and specifics. The AI preserves named examples from the transcript but may paraphrase them. If a specific statistic, tool name, or step number was mentioned in the video, confirm it appears accurately in the article.
- Intro and conclusion. These are the parts most likely to sound generic. A quick rewrite of the opening two sentences and the closing paragraph personalises the article without changing the body.
The body content — the actual substance of the video — usually requires minimal editing. The AI captures the logic and structure from the transcript accurately.
Join our newsletter
Get latest tips, trends, and deals for free.
Step 5: Add Internal Links and Publish
Before copying the draft to your CMS, add at least two internal links. Internal linking is one of the highest-ROI edits you can make to a new article: it helps Google understand your site structure and keeps readers on your site longer.
How to identify link targets:
- If the article mentions a tool, product, or concept you have written about elsewhere, link to that page
- If the article is a tutorial, link to the tool’s landing page (e.g.
/ai-tools/youtube-to-blog-post-generator/) - If there is a related guide or academy post, link to it from a relevant sentence
Once links are added, copy the full article output and paste it into your CMS. Add your meta title, meta description, a featured image, and any category or tag assignments your publishing platform requires.
For teams using WordPress or Webflow, the FlowHunt AI Flow Templates include automation workflows that push generated content directly to your CMS — eliminating the copy-paste step entirely for automated YouTube content repurposing at scale.
Pro Tips: Getting Consistently Better Output
Once the basic AI content workflow setup guide is running smoothly, these adjustments improve output quality across every run:
- Use evergreen tutorial videos. How-to content and explainers produce stronger articles than reaction videos, vlogs, or opinion pieces. The more structured the video, the more structured the article.
- Specify your audience in the prompt.
"Write for marketing managers at SaaS companies"shifts vocabulary, examples, and assumed knowledge significantly compared to an unspecified default. - Keep one strong video per article. Combining multiple videos into one prompt dilutes the output. One URL, one article.
- Embed the original video. Paste the YouTube embed code into your CMS after publishing. Articles with embedded video have higher time-on-page, which is a Google ranking signal.
- Link the article back to your YouTube channel. Add a
"Watch the full video on YouTube"line with a direct link near the top of the article. It closes the loop between your two acquisition channels. - Use the AI Content Repurposing Tool after publishing. Once the blog post is live, turn it into a LinkedIn post, newsletter excerpt, or Twitter/X thread without any additional writing.
That covers the complete set up YouTube to blog workflow AI process from first run to repeatable system. Start with one video, follow the five steps, and you will have a publish-ready article in under 15 minutes. For workflows tailored to specific team types — agencies, B2B companies, podcasters, and solo creators — see 5 ways content teams use YouTube-to-blog AI to scale output .
Evaluating which YouTube-to-blog tool to use? See our comparison of FlowHunt vs Castmagic vs VideoToBlog.ai vs RightBlogger .
Ready to run your first conversion? Start your free trial and try the workflow .