
Adding Gemini 1.5 Pro to Slack for Your Team
Integrate Gemini 1.5 Pro with Slack using Flowhunt to create a powerful Slackbot that answers queries, automates tasks, and enhances team collaboration. Learn h...
3 min read
Gemini 1.5 Pro
Slack
+5

Learn how to configure Single Sign-On (SSO) for your enterprise FlowHunt account by integrating with your Microsoft Azure AD / Entra ID.
Single Sign-On (SSO) allows your team members to access FlowHunt using your organization’s existing identity provider (IdP). This guide walks you through the process of setting up SSO integration for your enterprise FlowHunt account.

Before you begin the SSO setup process, ensure you have:

You will see that SSO will be enabled by default.
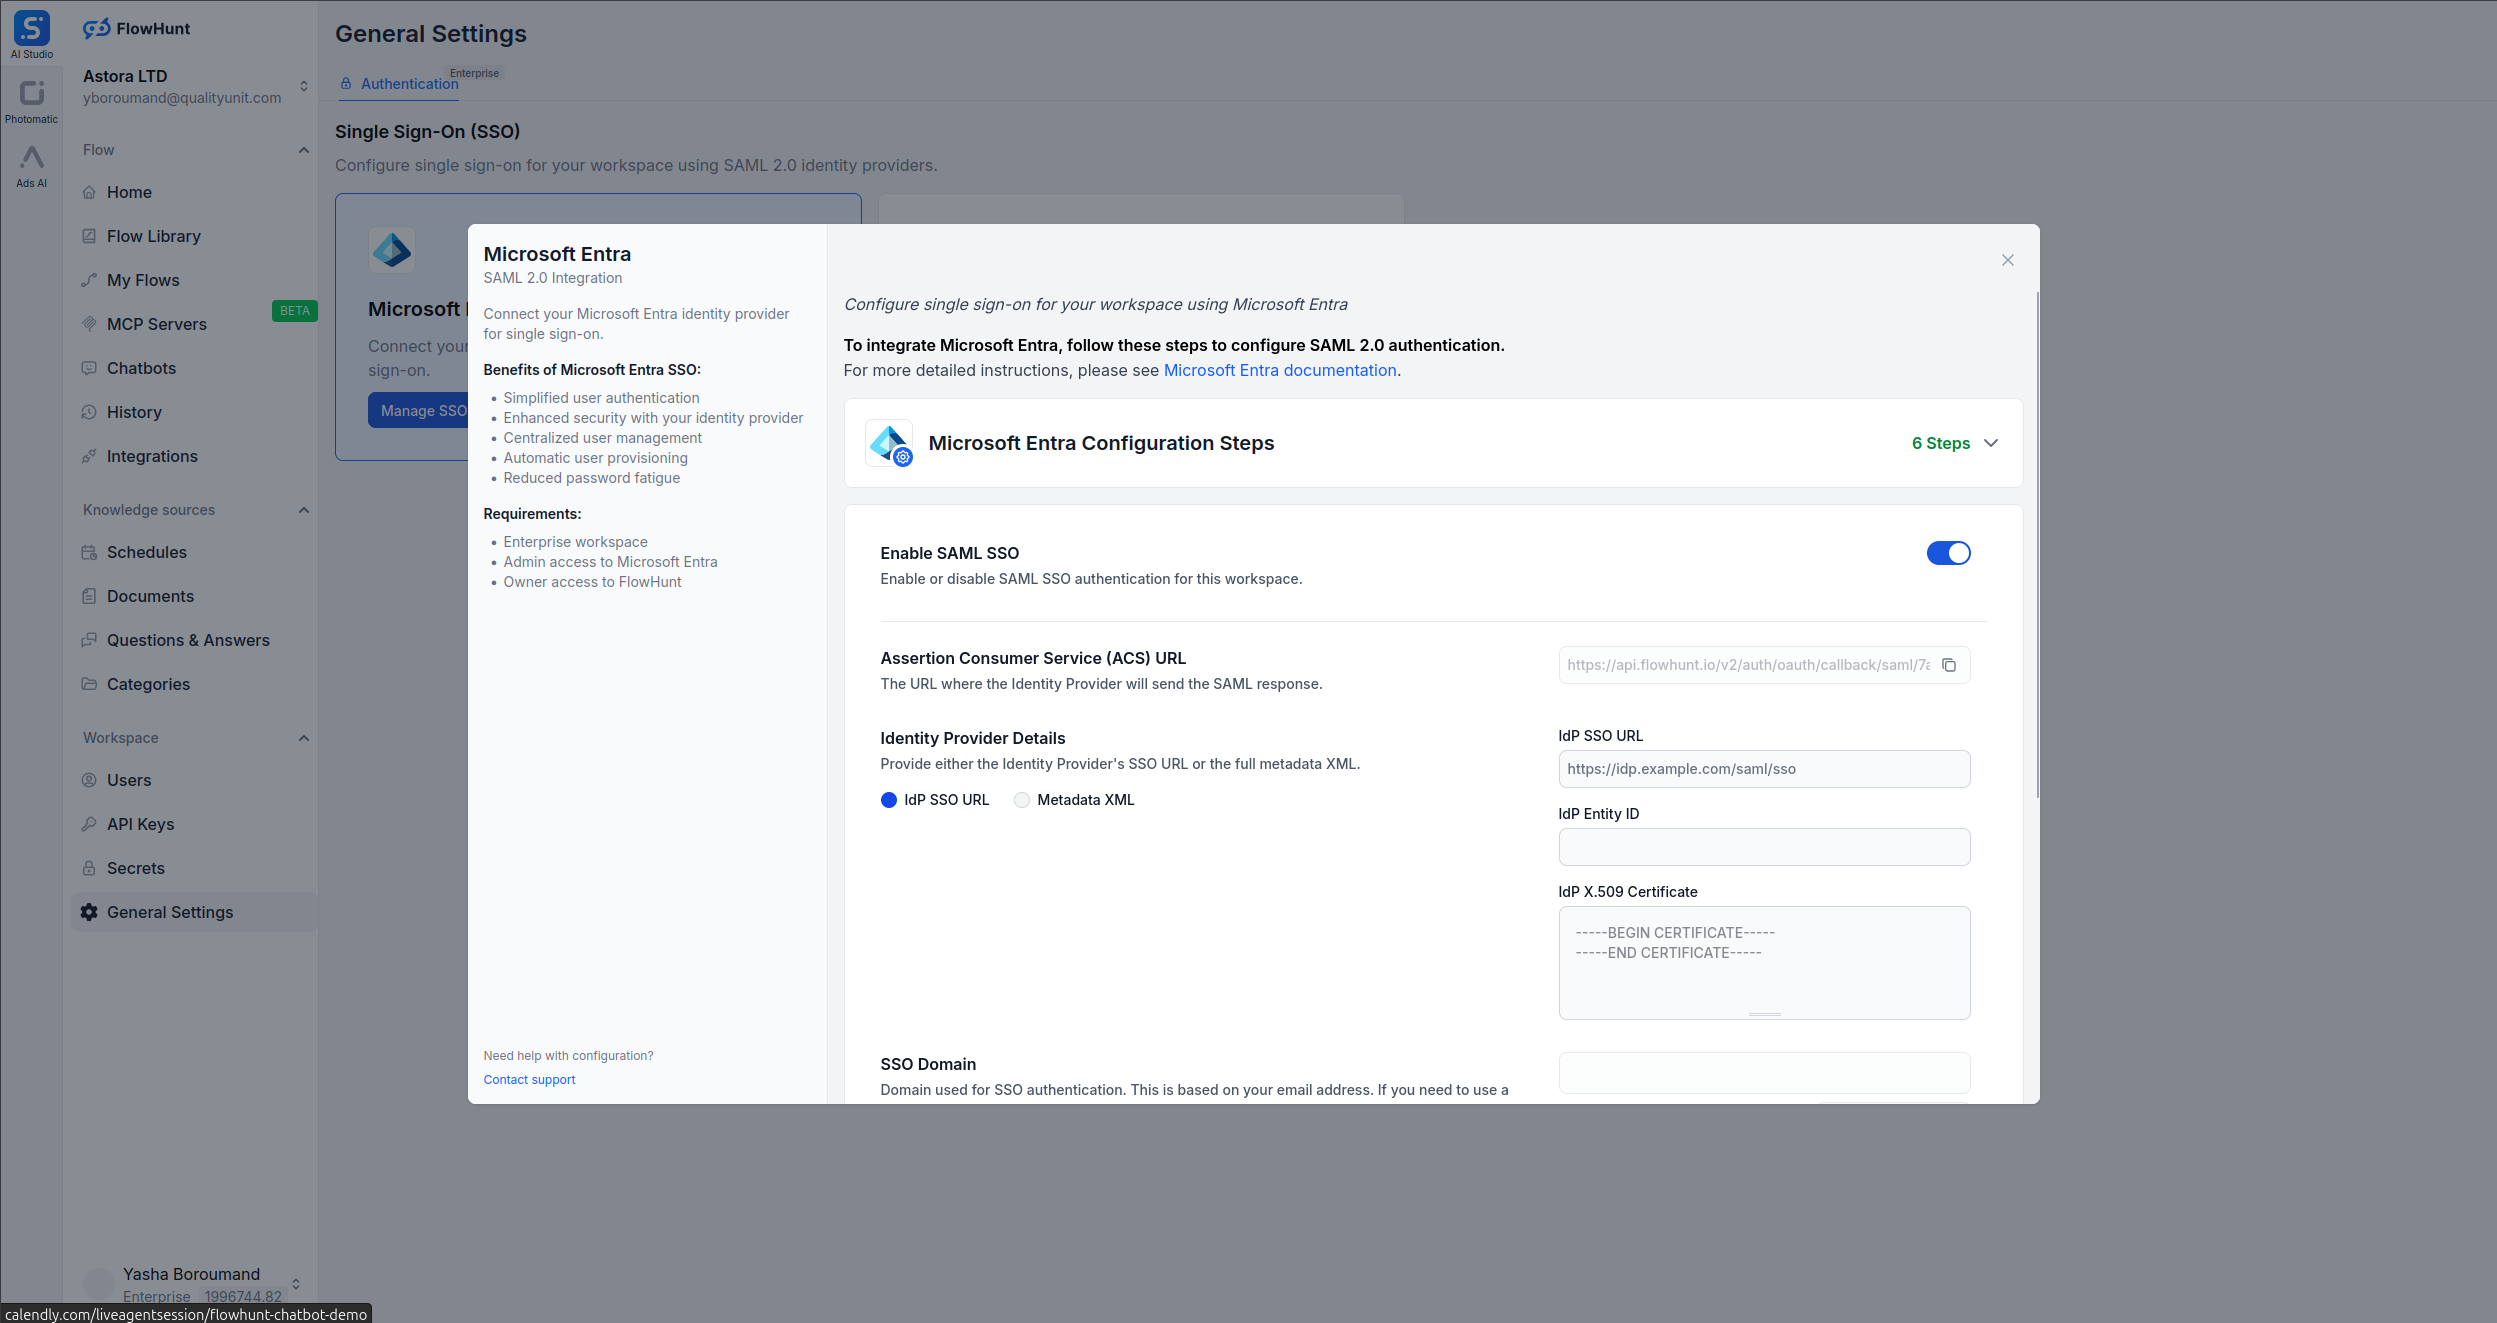
Copy Assertion Consumer Service (ACS) URL from FlowHunt SSO settings page.

https://www.flowhunt.ioSet up FlowHunt Test SSO section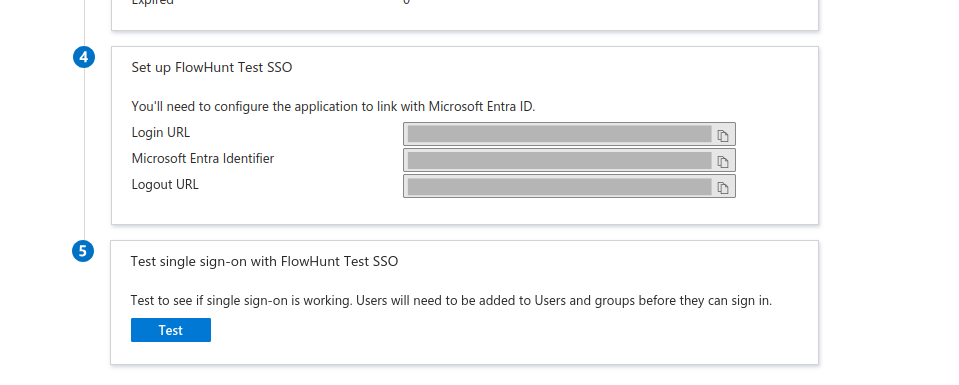
IdP SSO URL and paste the URL you copied from Microsoft Entra ID from Login URL section in field IdP SSO URLMicrosoft Entra Identifier from Entra ID page in field IdP Entity IDCertificate (Base64) file in field IdP Certificate. It may start with -----BEGIN CERTIFICATE----- and end with -----END CERTIFICATE-----
Update SAML Settings button. In the next section, we will describe the optional settings available in the SAML Settings section to further configure your SSO setup.If set to Any Method, users can sign in with SSO or username/password. If set to Enforce SSO, users must use SSO to sign in.
If Enabled, FlowHunt will create a new account for users who sign in for the first time. If Disabled, users must be added to FlowHunt manually.
Start your free trial today and see results within days.
If you encounter issues during the SSO setup process:
“Invalid SAML Response” Error
Users Cannot Access FlowHunt After SSO Login
Attribute Mapping Issues
If you continue to experience issues with your SSO configuration:
Integrate Gemini 1.5 Pro with Slack using Flowhunt to create a powerful Slackbot that answers queries, automates tasks, and enhances team collaboration. Learn h...

Integrate Llama 3.2 1B with Slack using Flowhunt to create a powerful Slackbot that answers queries, automates tasks, and enhances team collaboration. Learn how...

Integrate Claude 2 with Slack using Flowhunt to create a powerful Slackbot that answers queries, automates tasks, and enhances team collaboration. Learn how to ...
Cookie Consent
We use cookies to enhance your browsing experience and analyze our traffic. See our privacy policy.