Step-by-step guide to integrate FlowHunt with Shopify, set up a Shopify chatbot from the Flow Library, publish it, and embed it on your Shopify storefront.
1) Integrate Shopify with FlowHunt (via Shopify App Store)
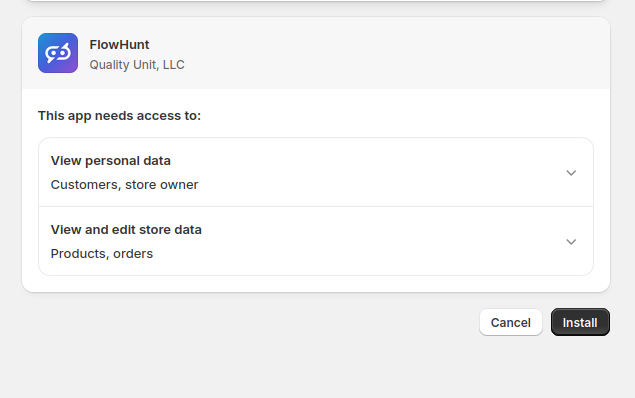
2) Install the FlowHunt App on your Shopify store
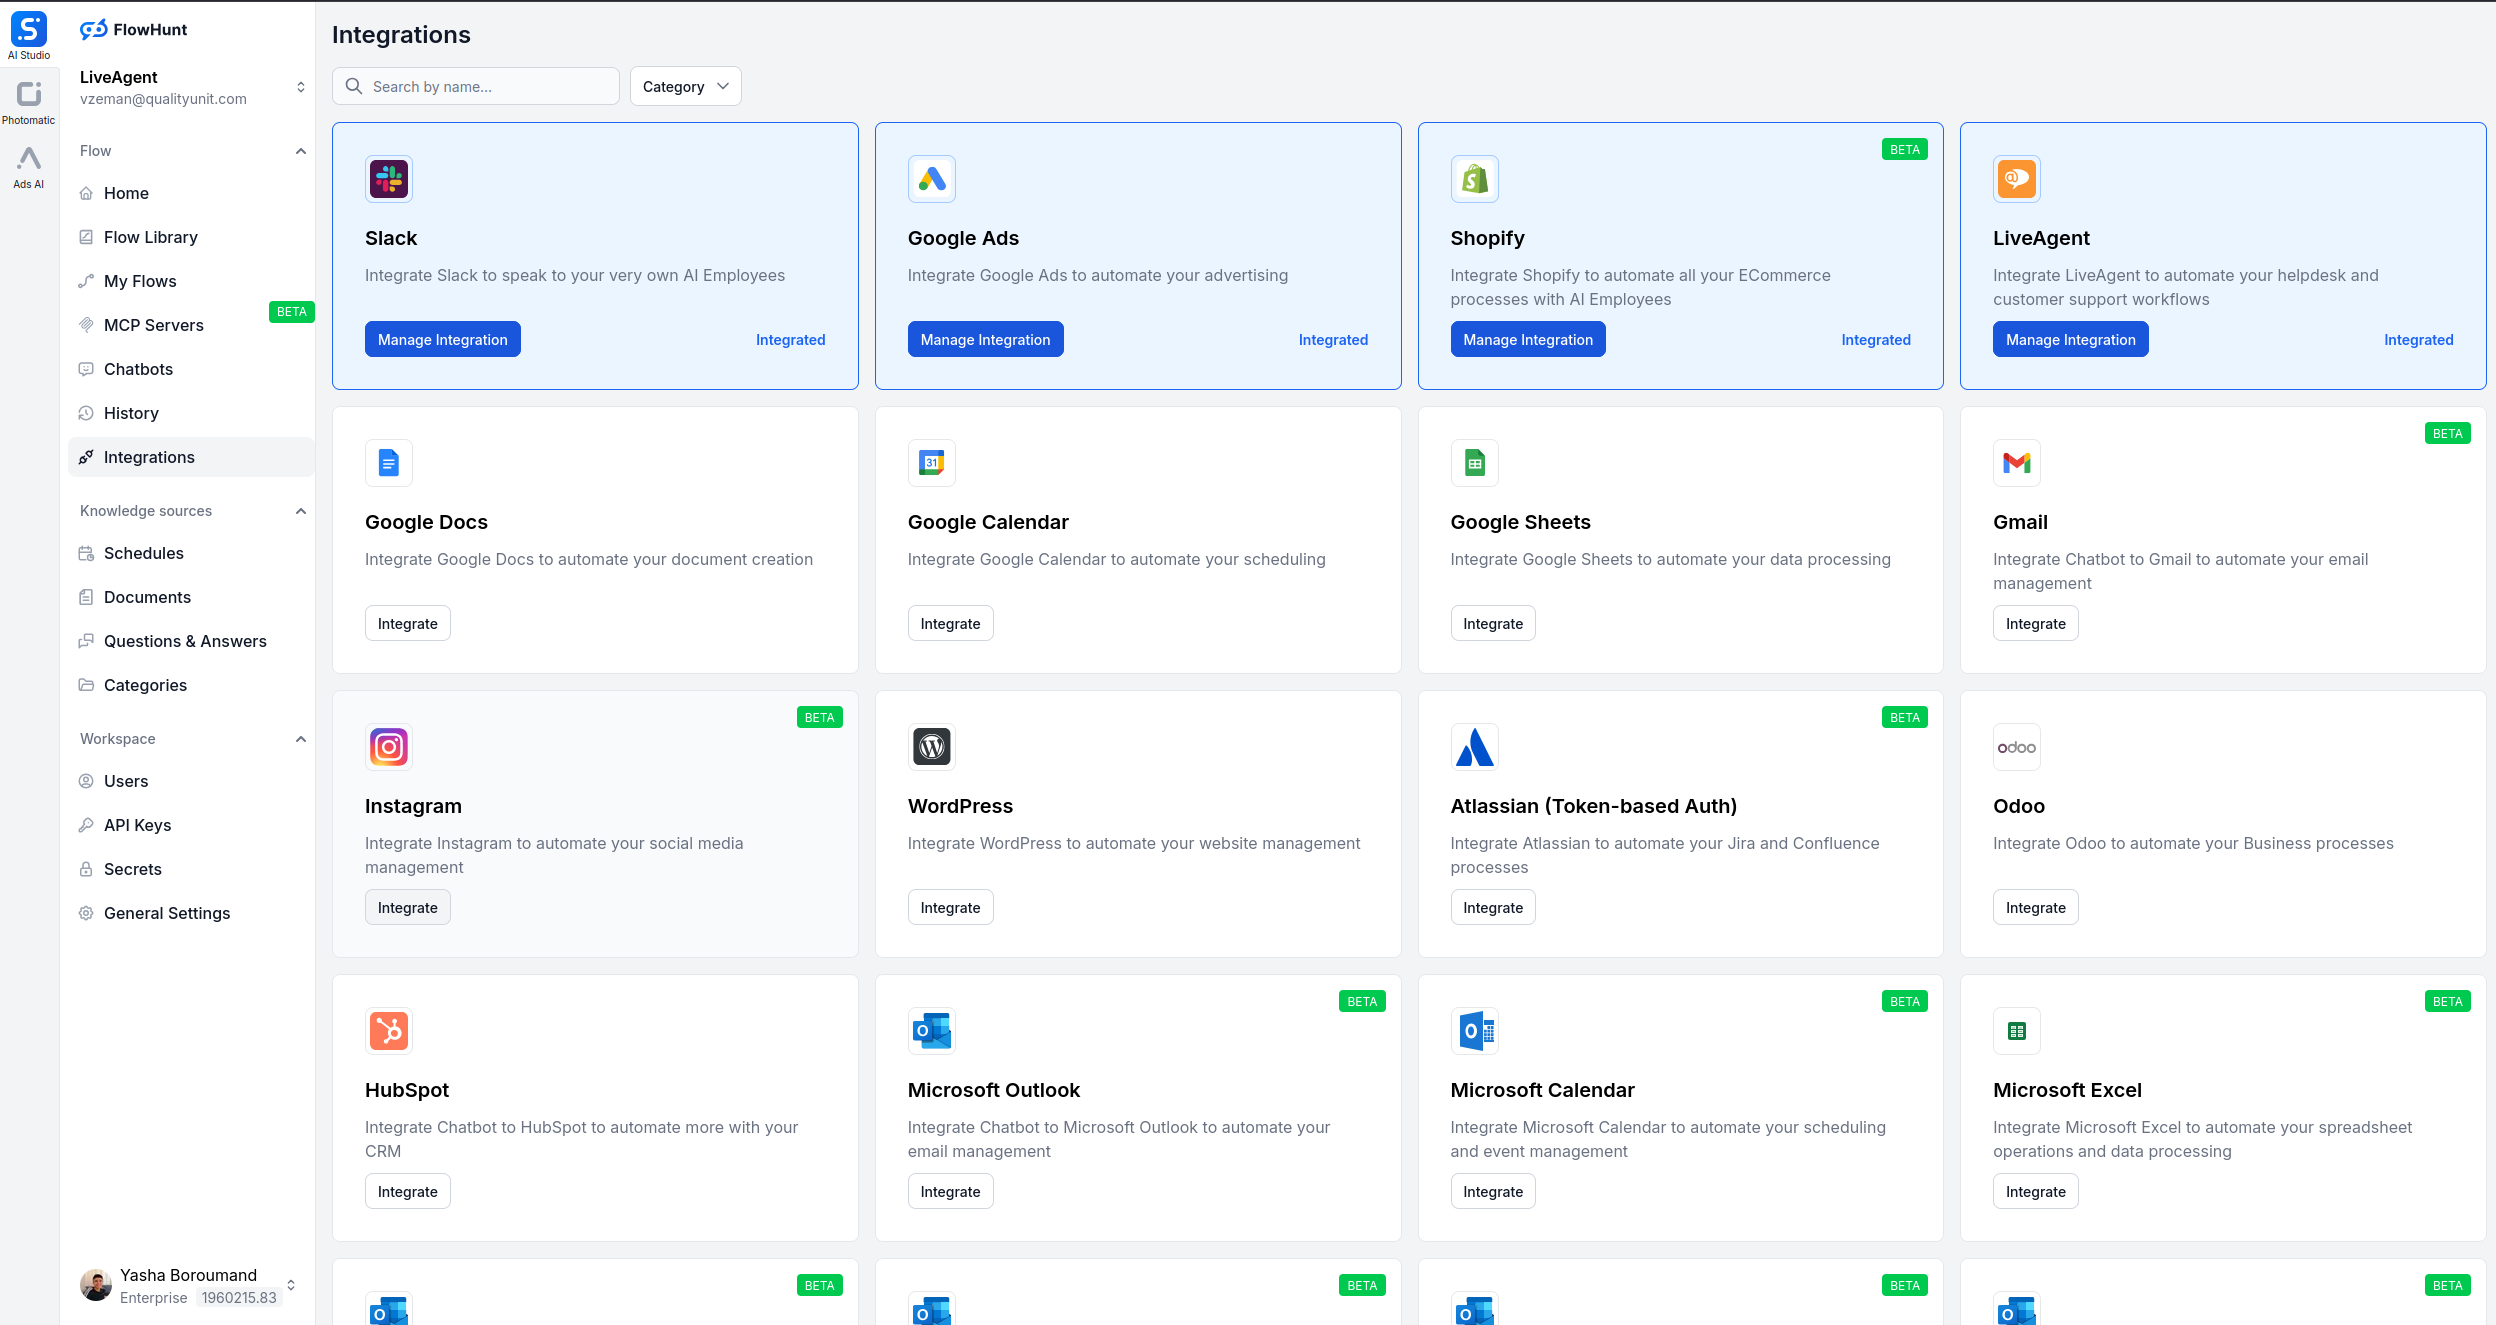
3) Confirm the Shopify integration is enabled
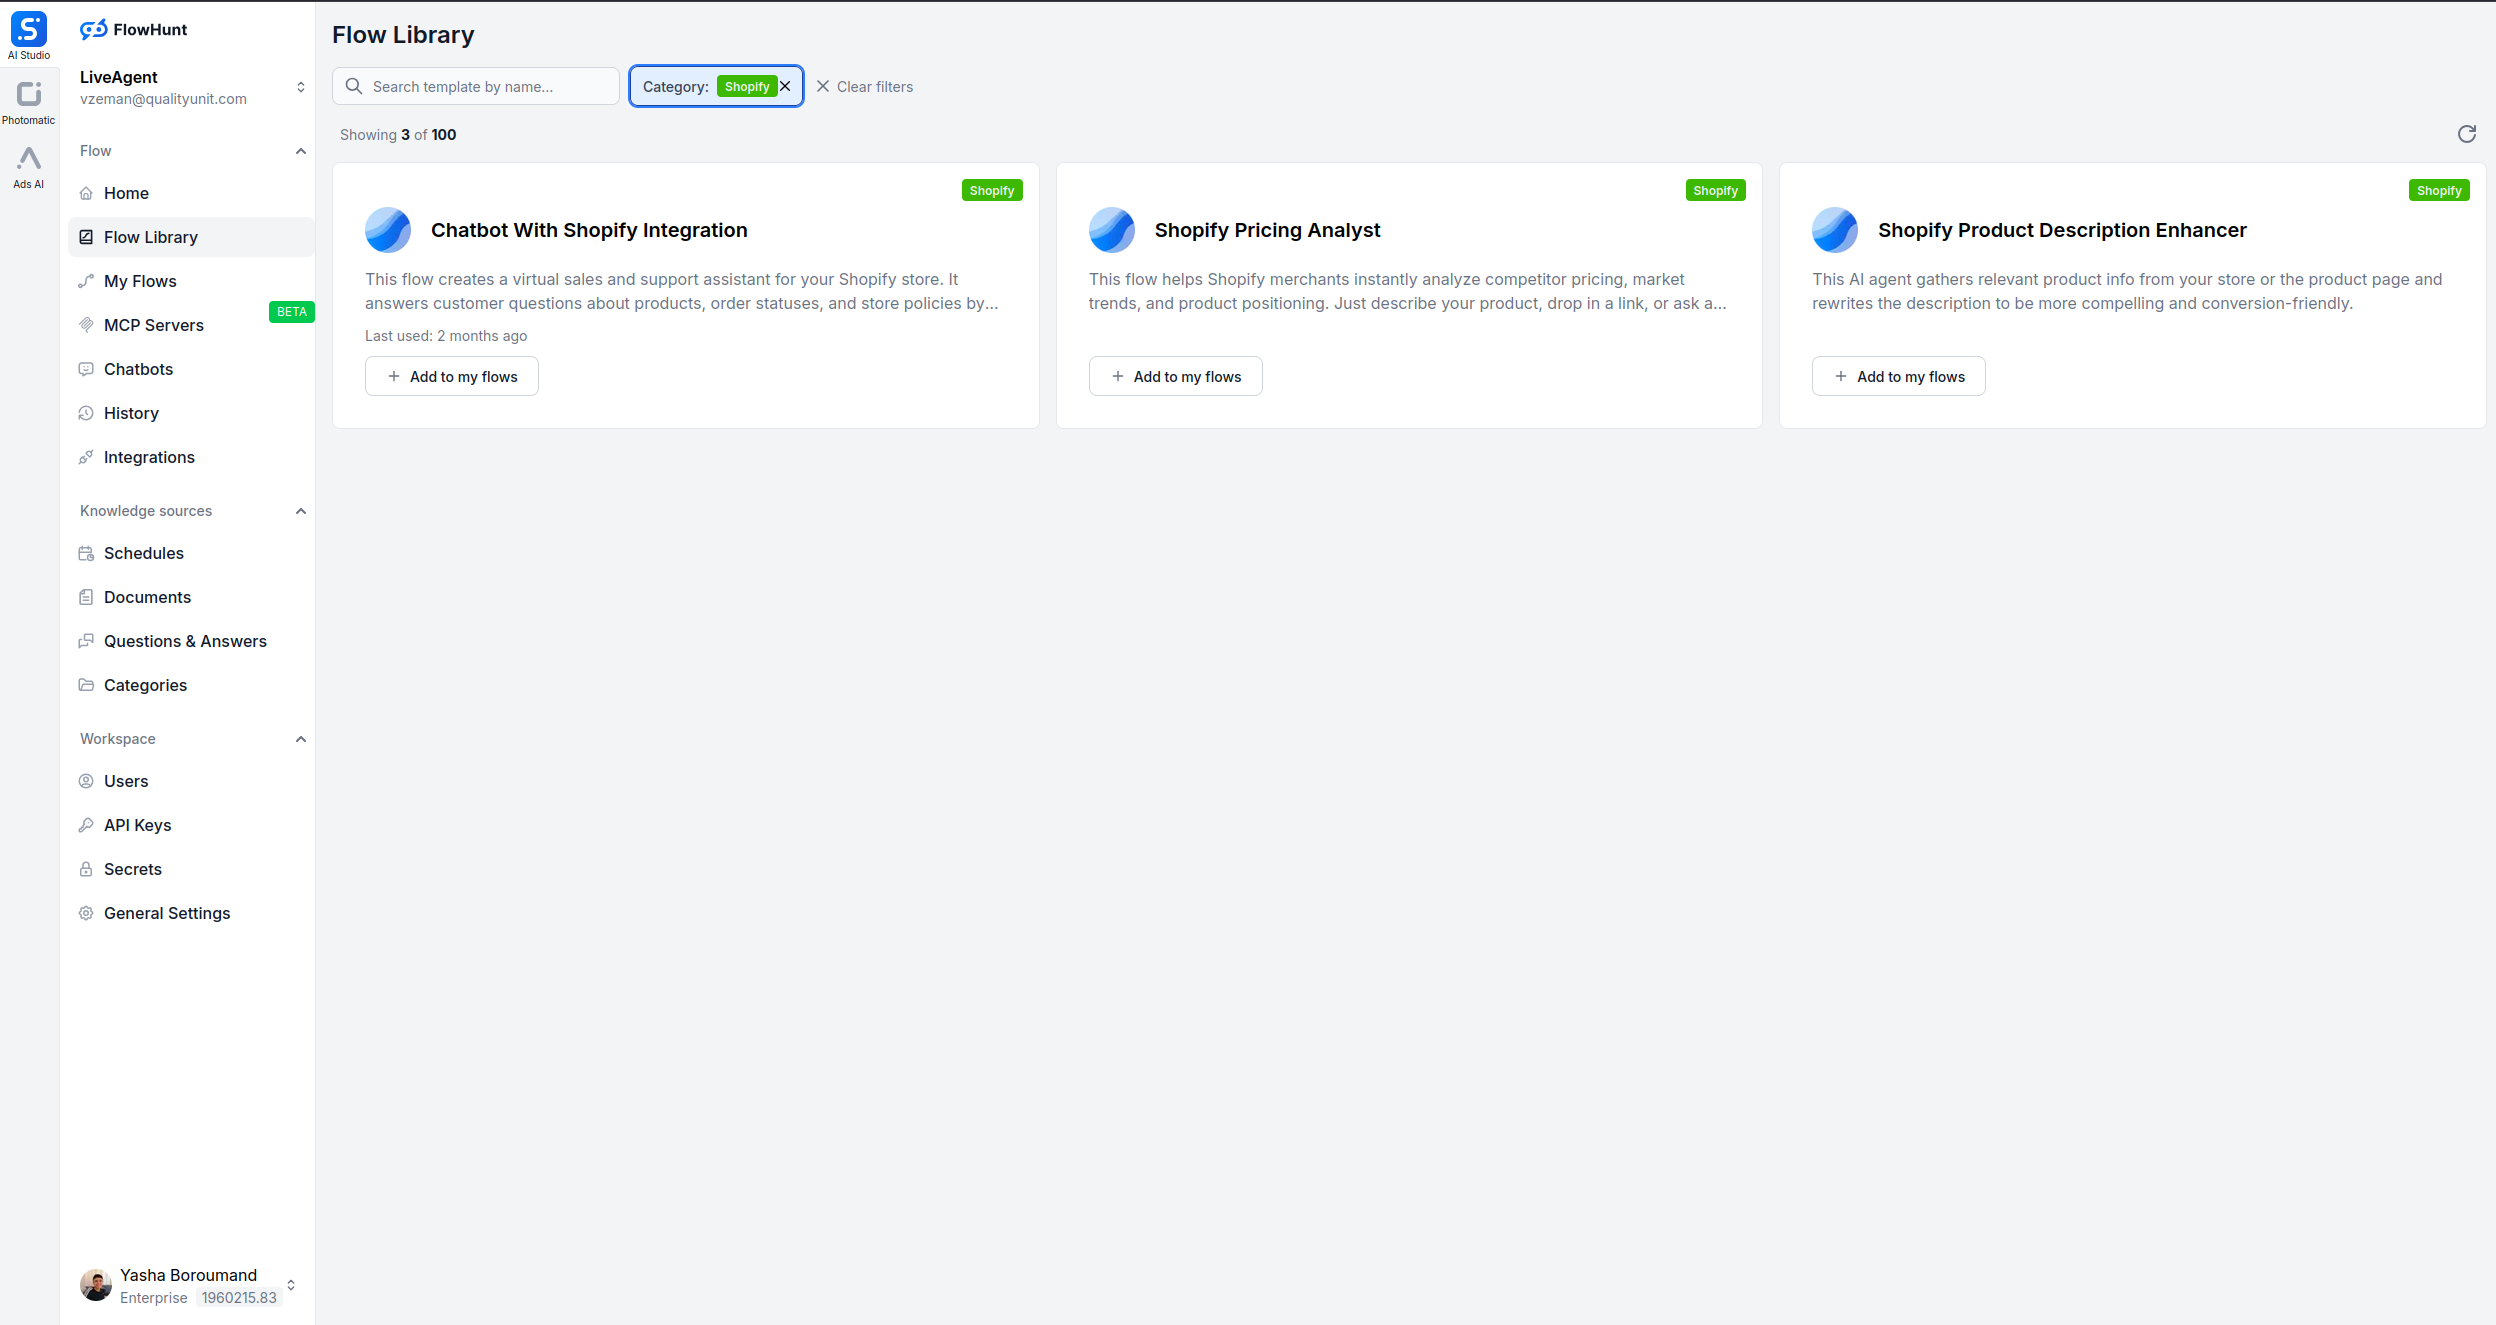
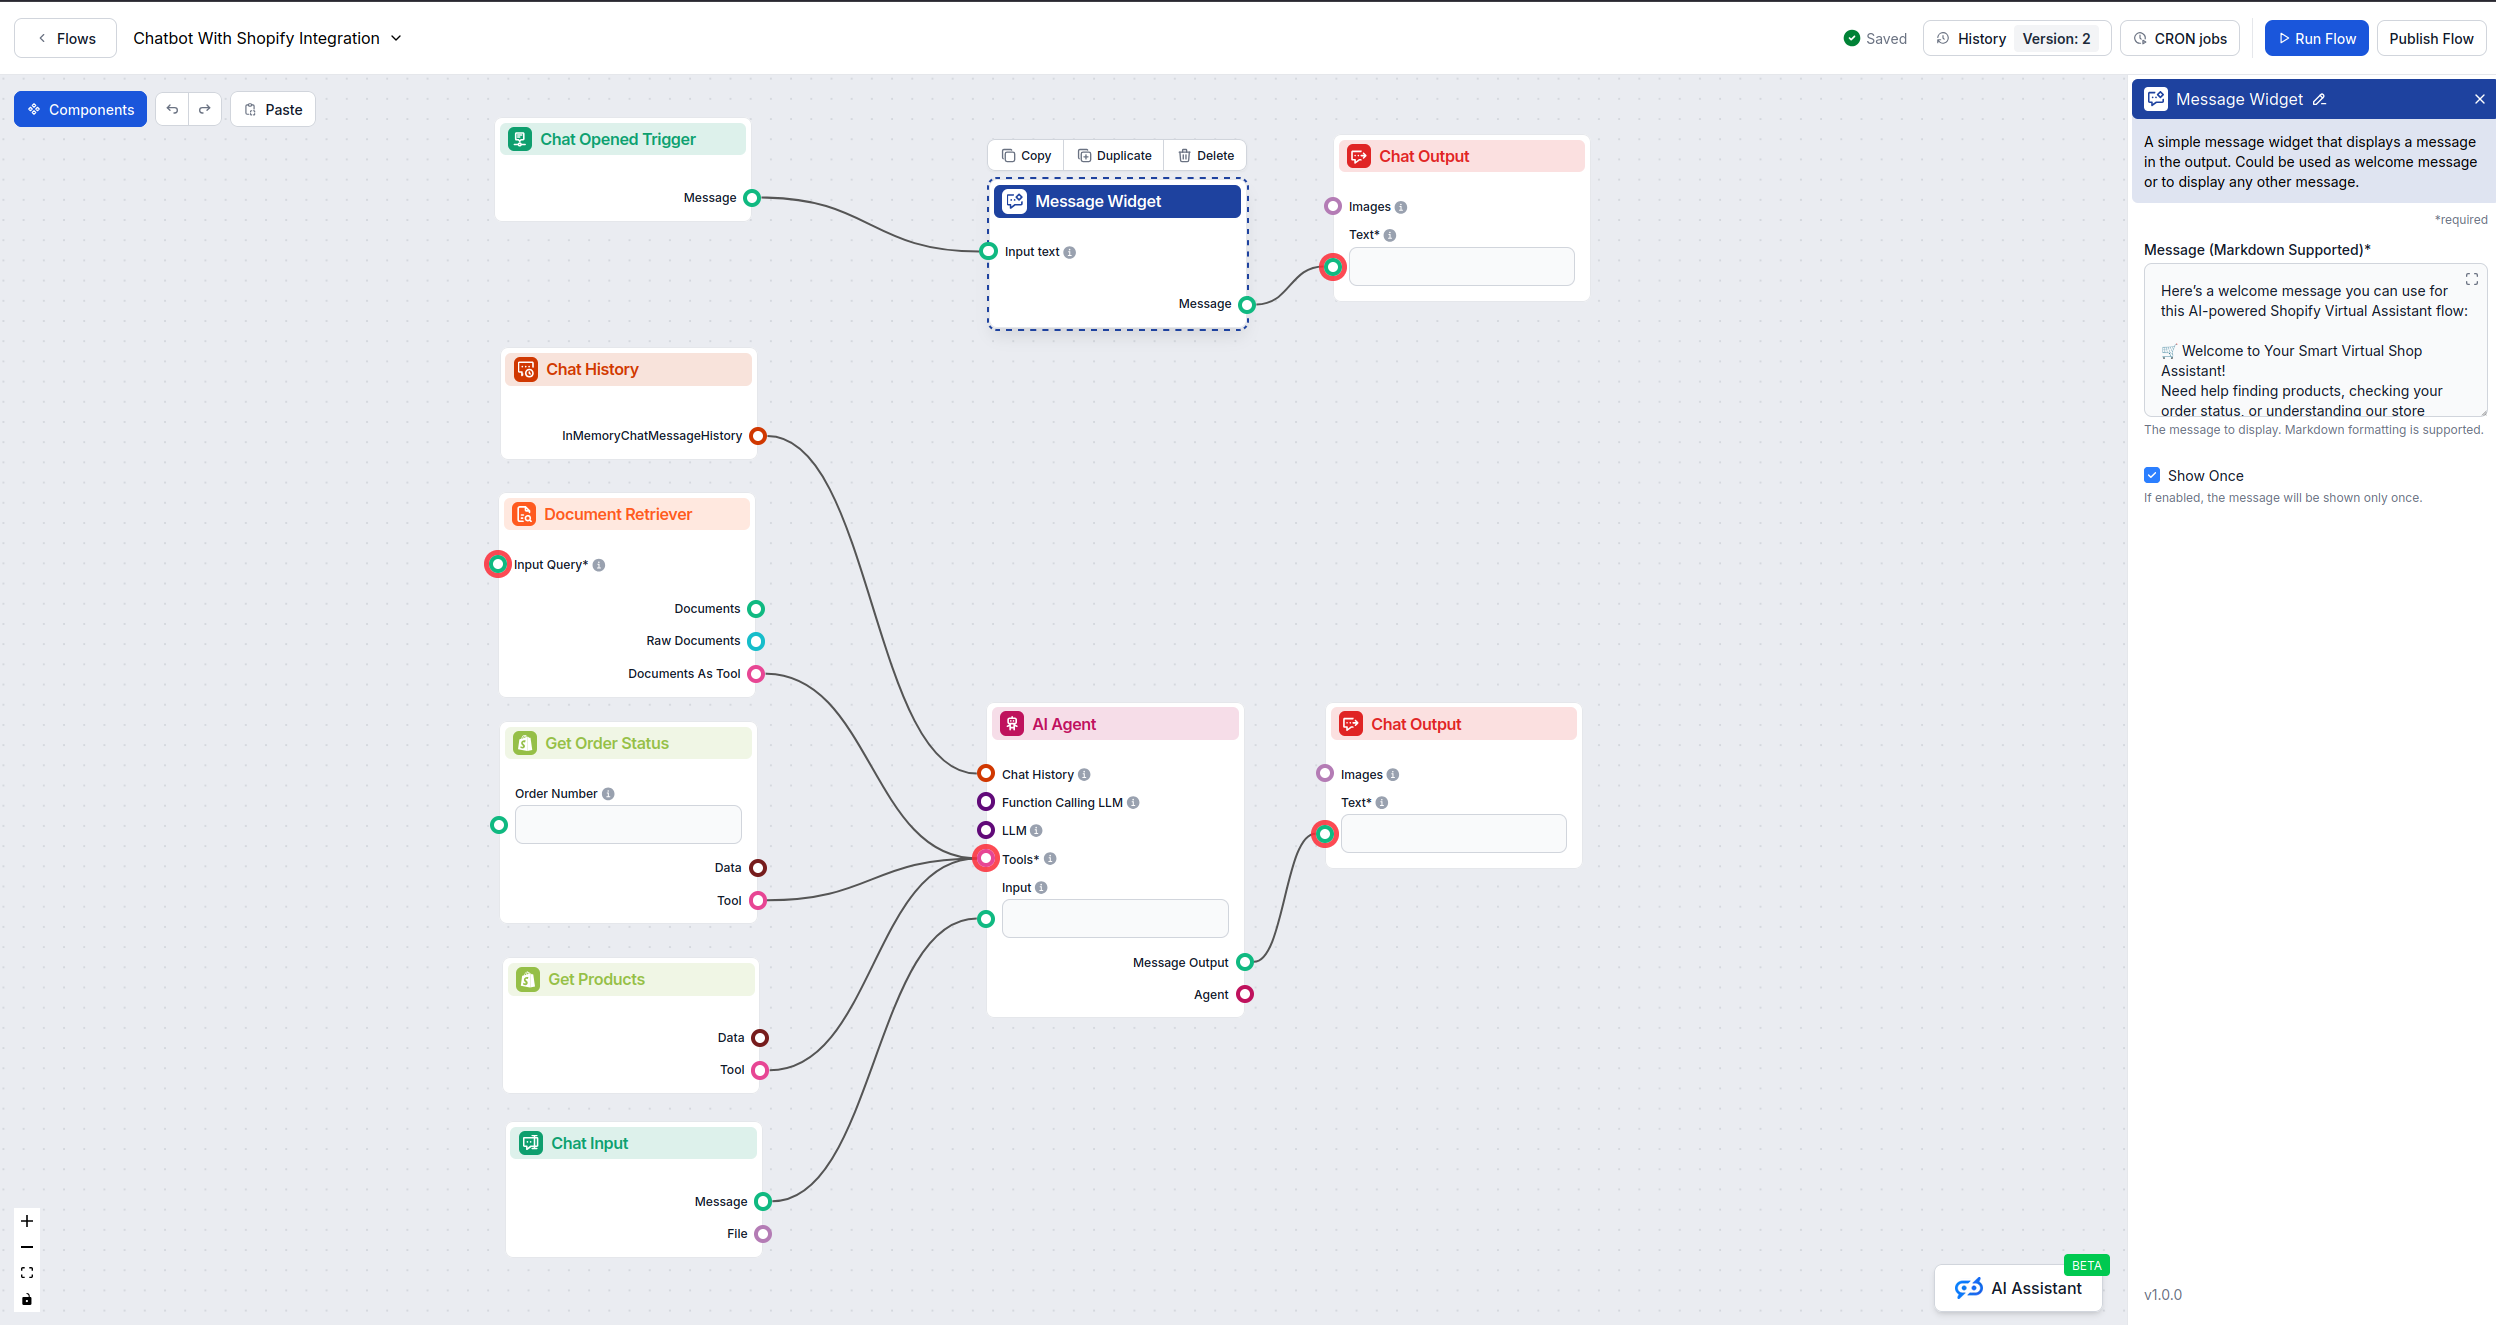
4) Add a Shopify chatbot from the Flow Library
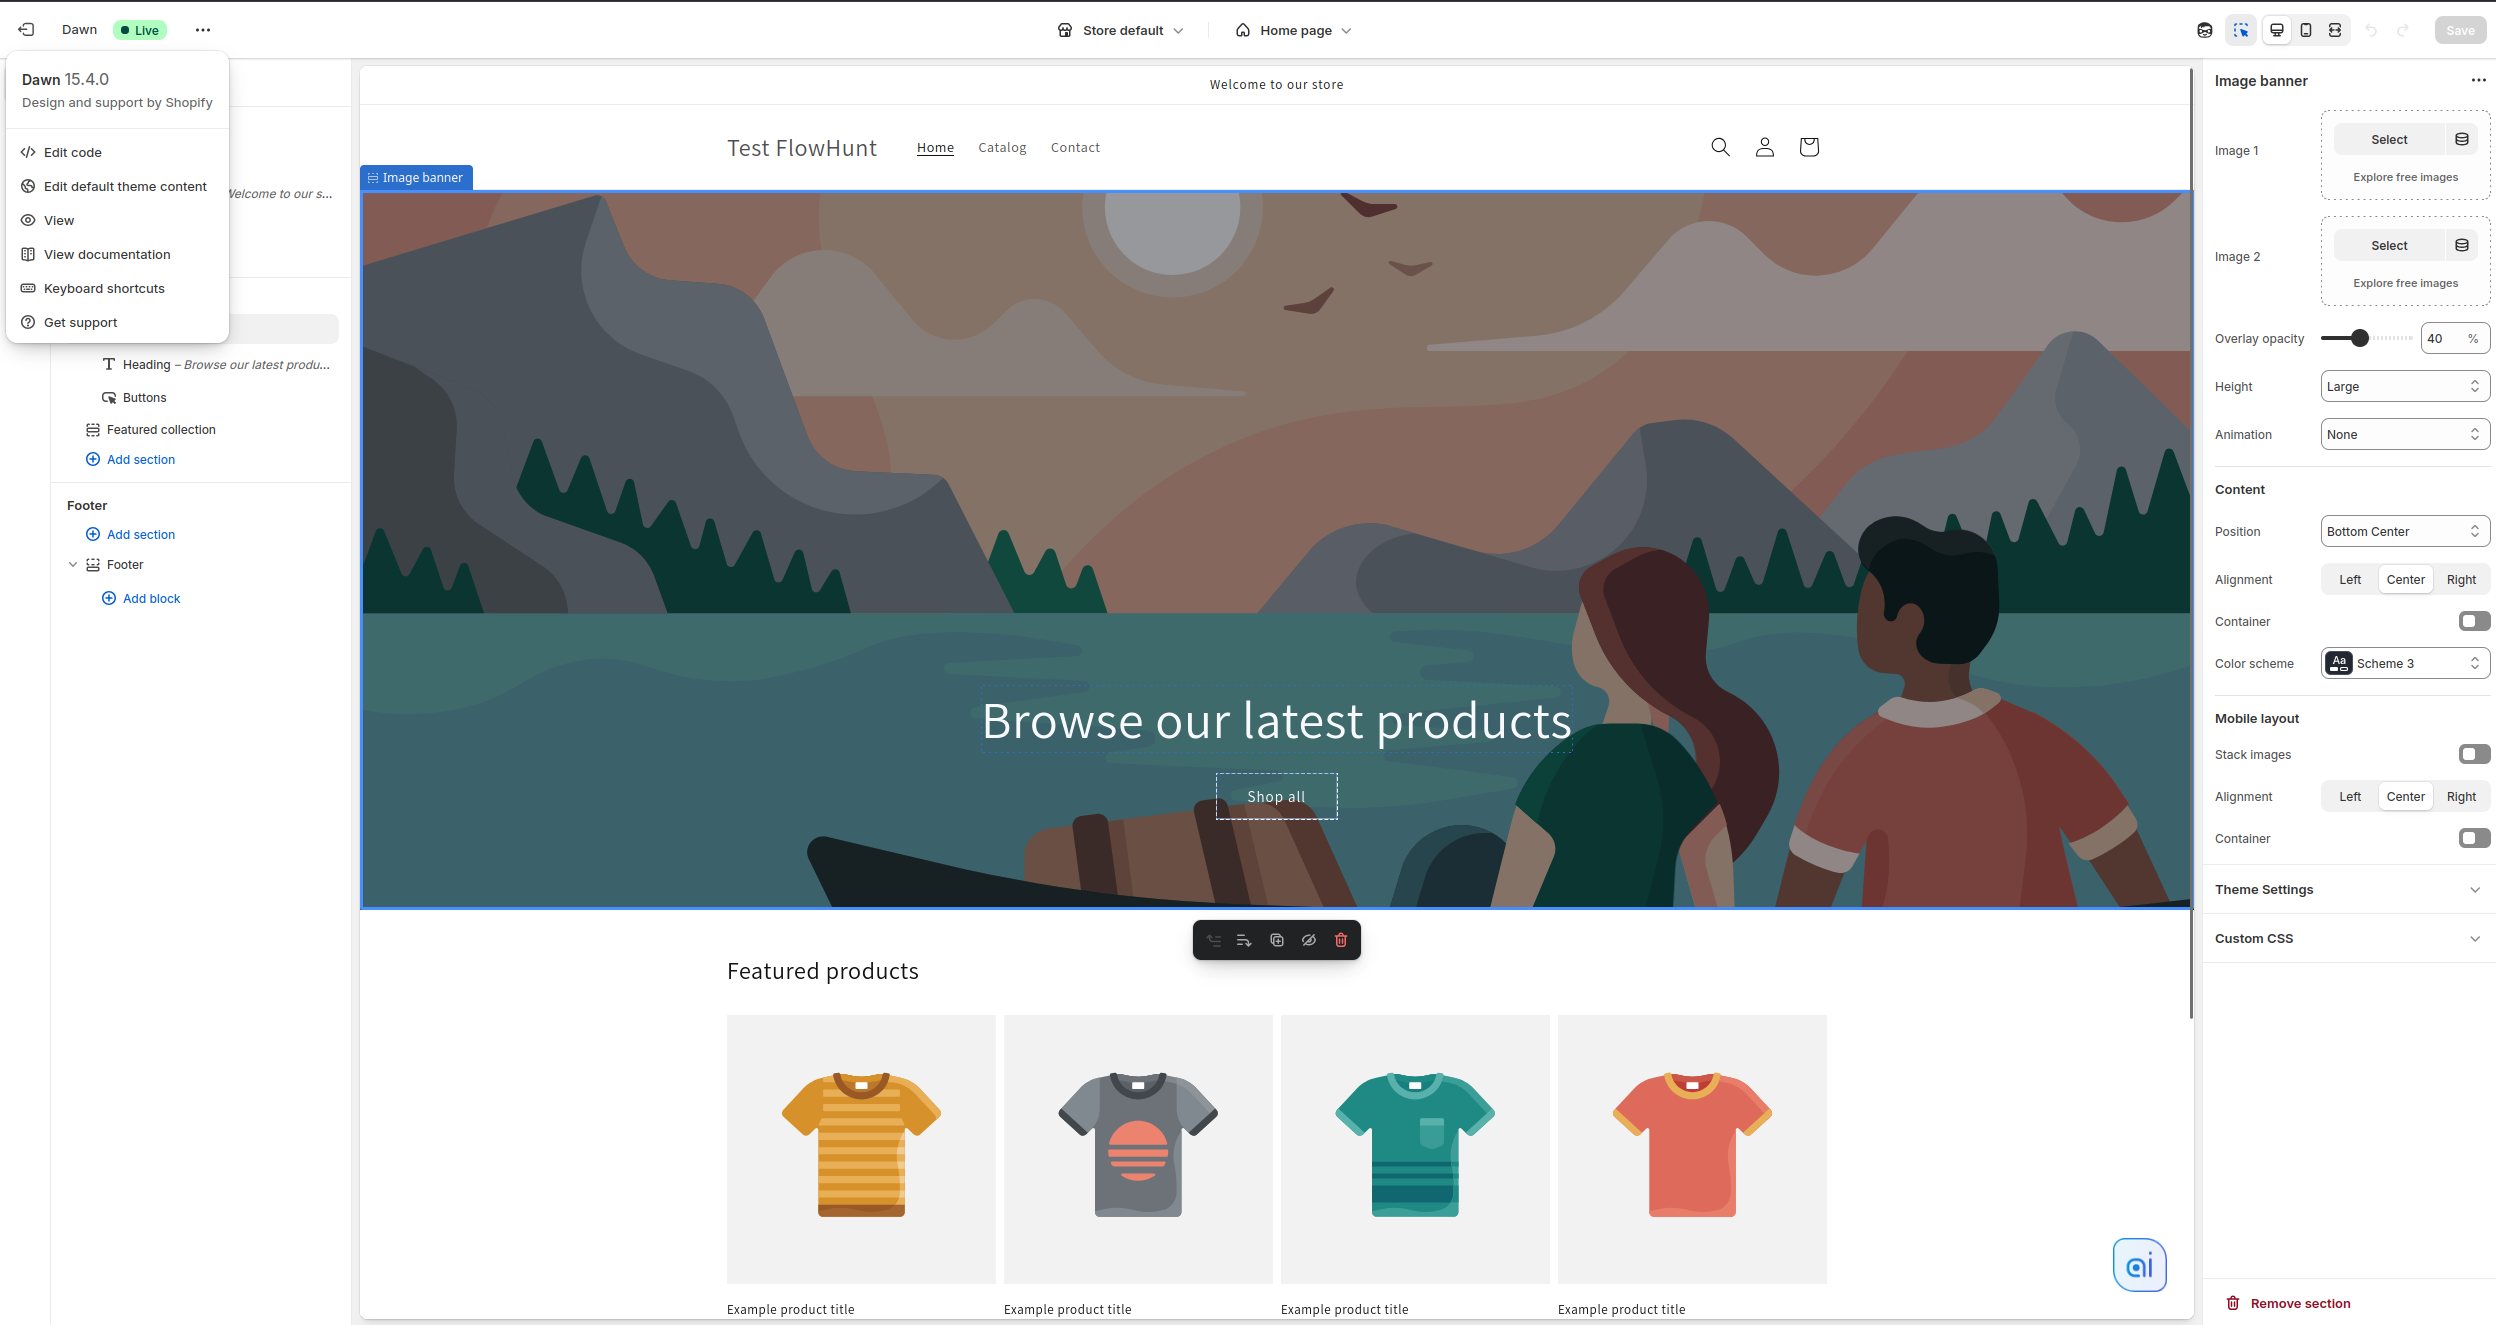
5) Customize the chatbot for your brand
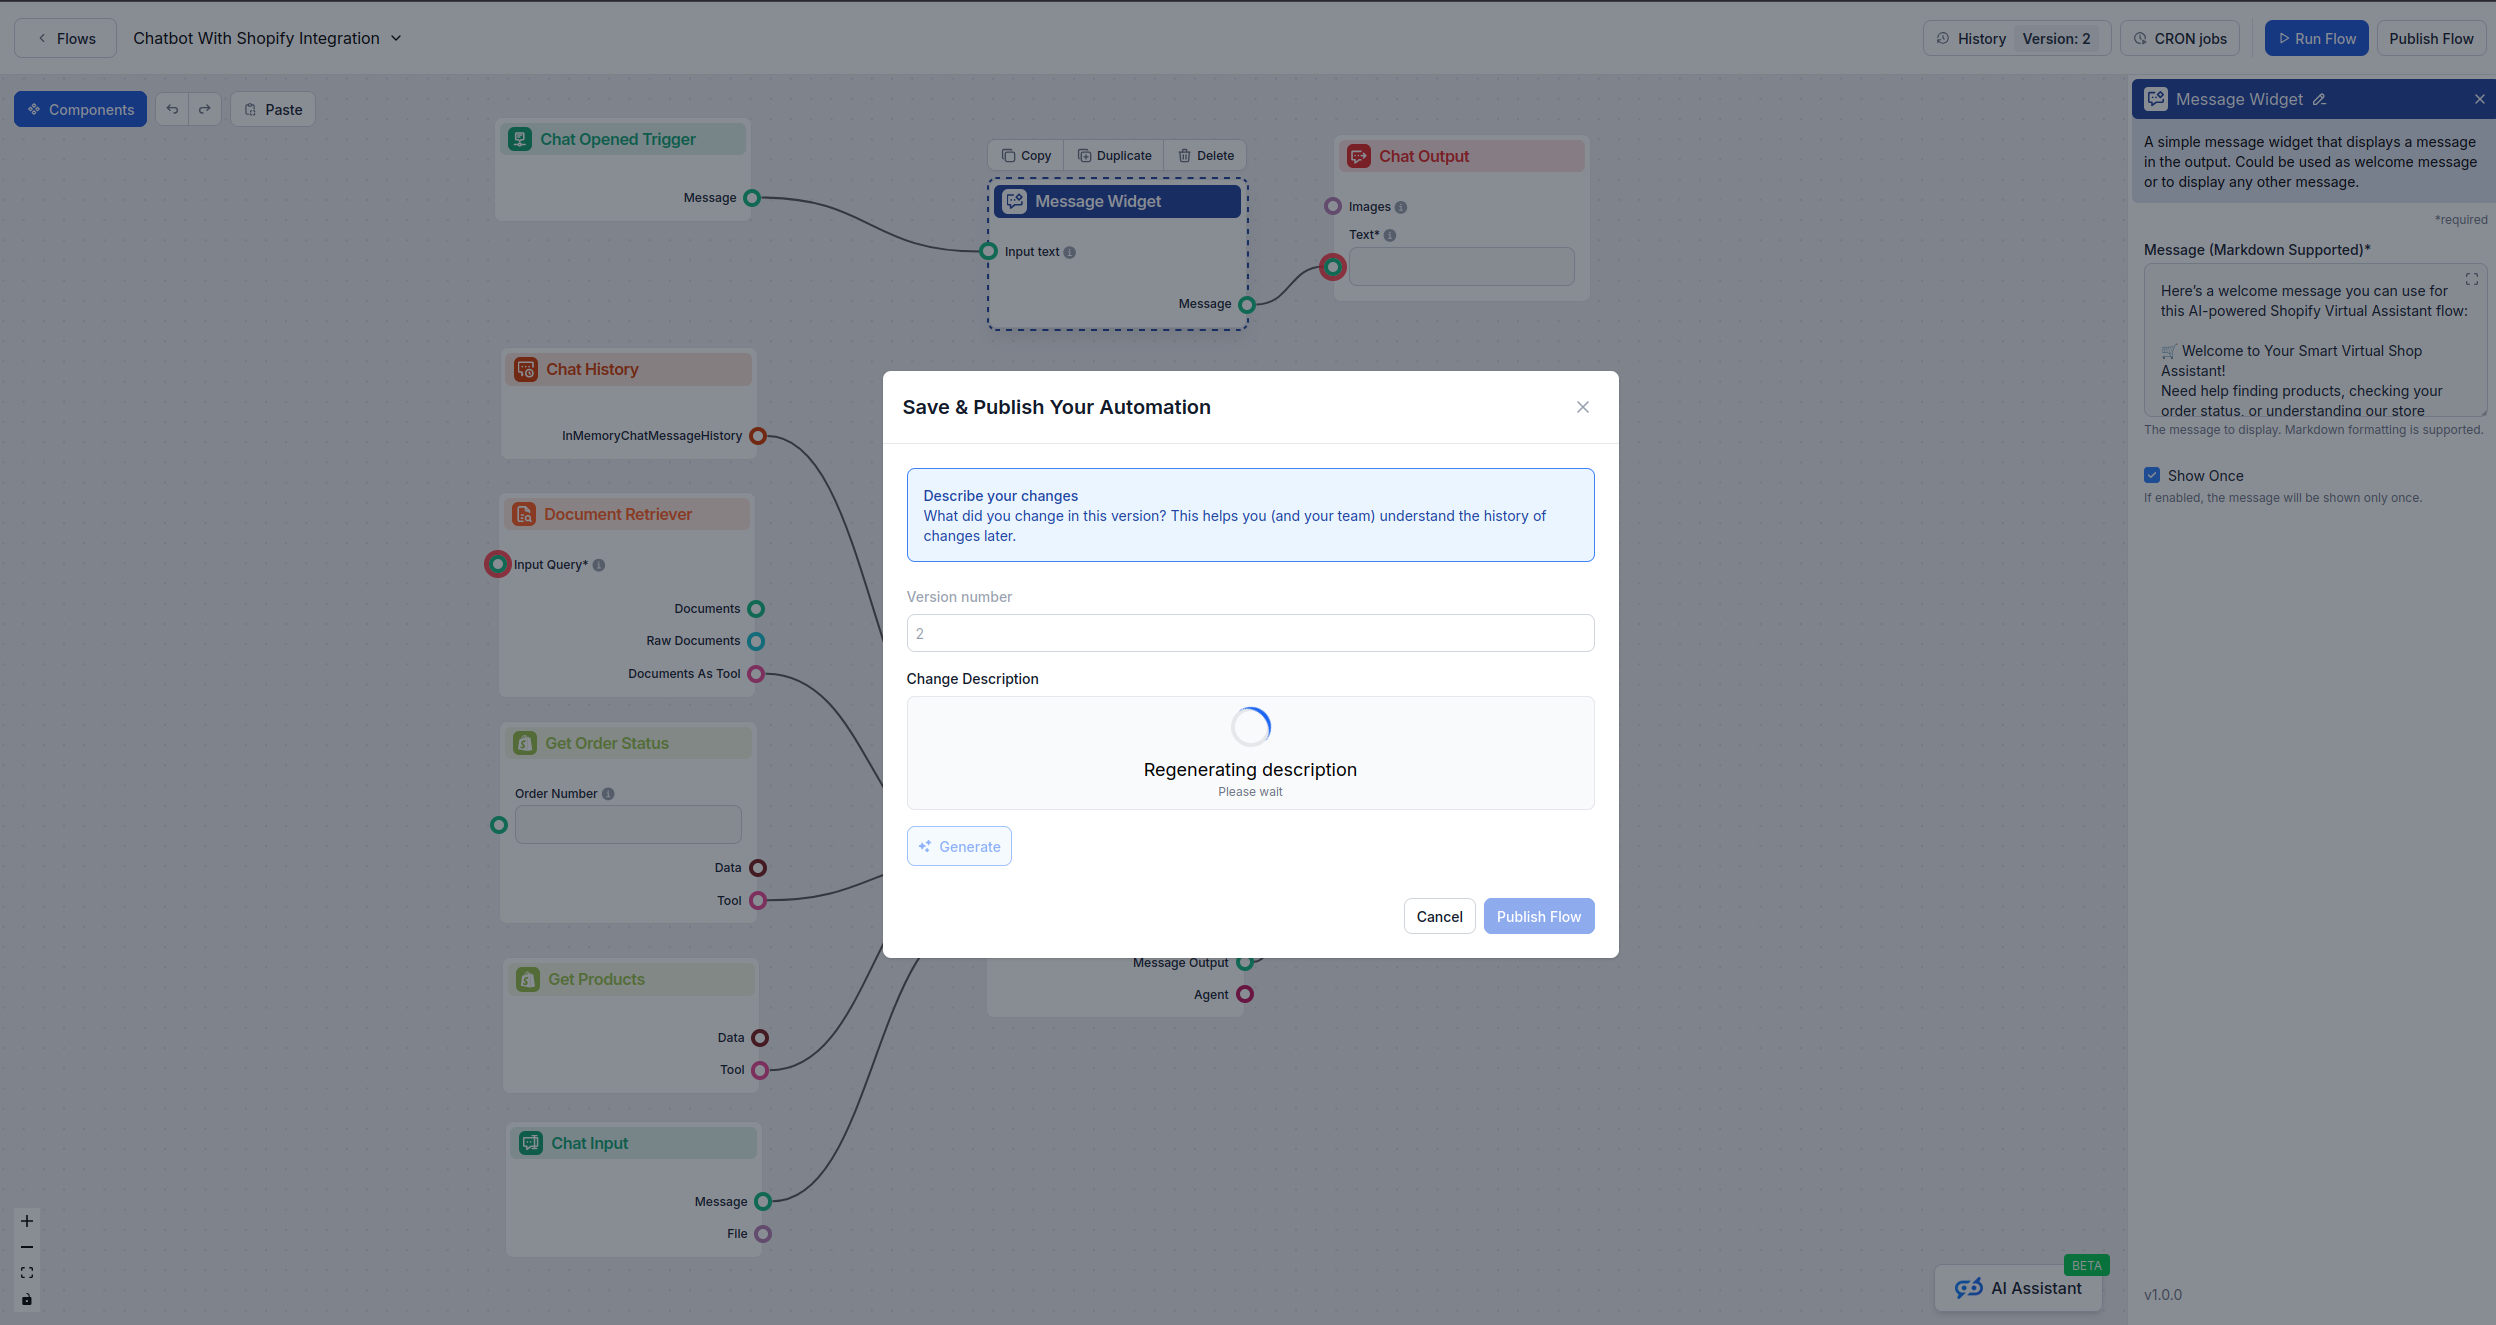
6) Publish the flow
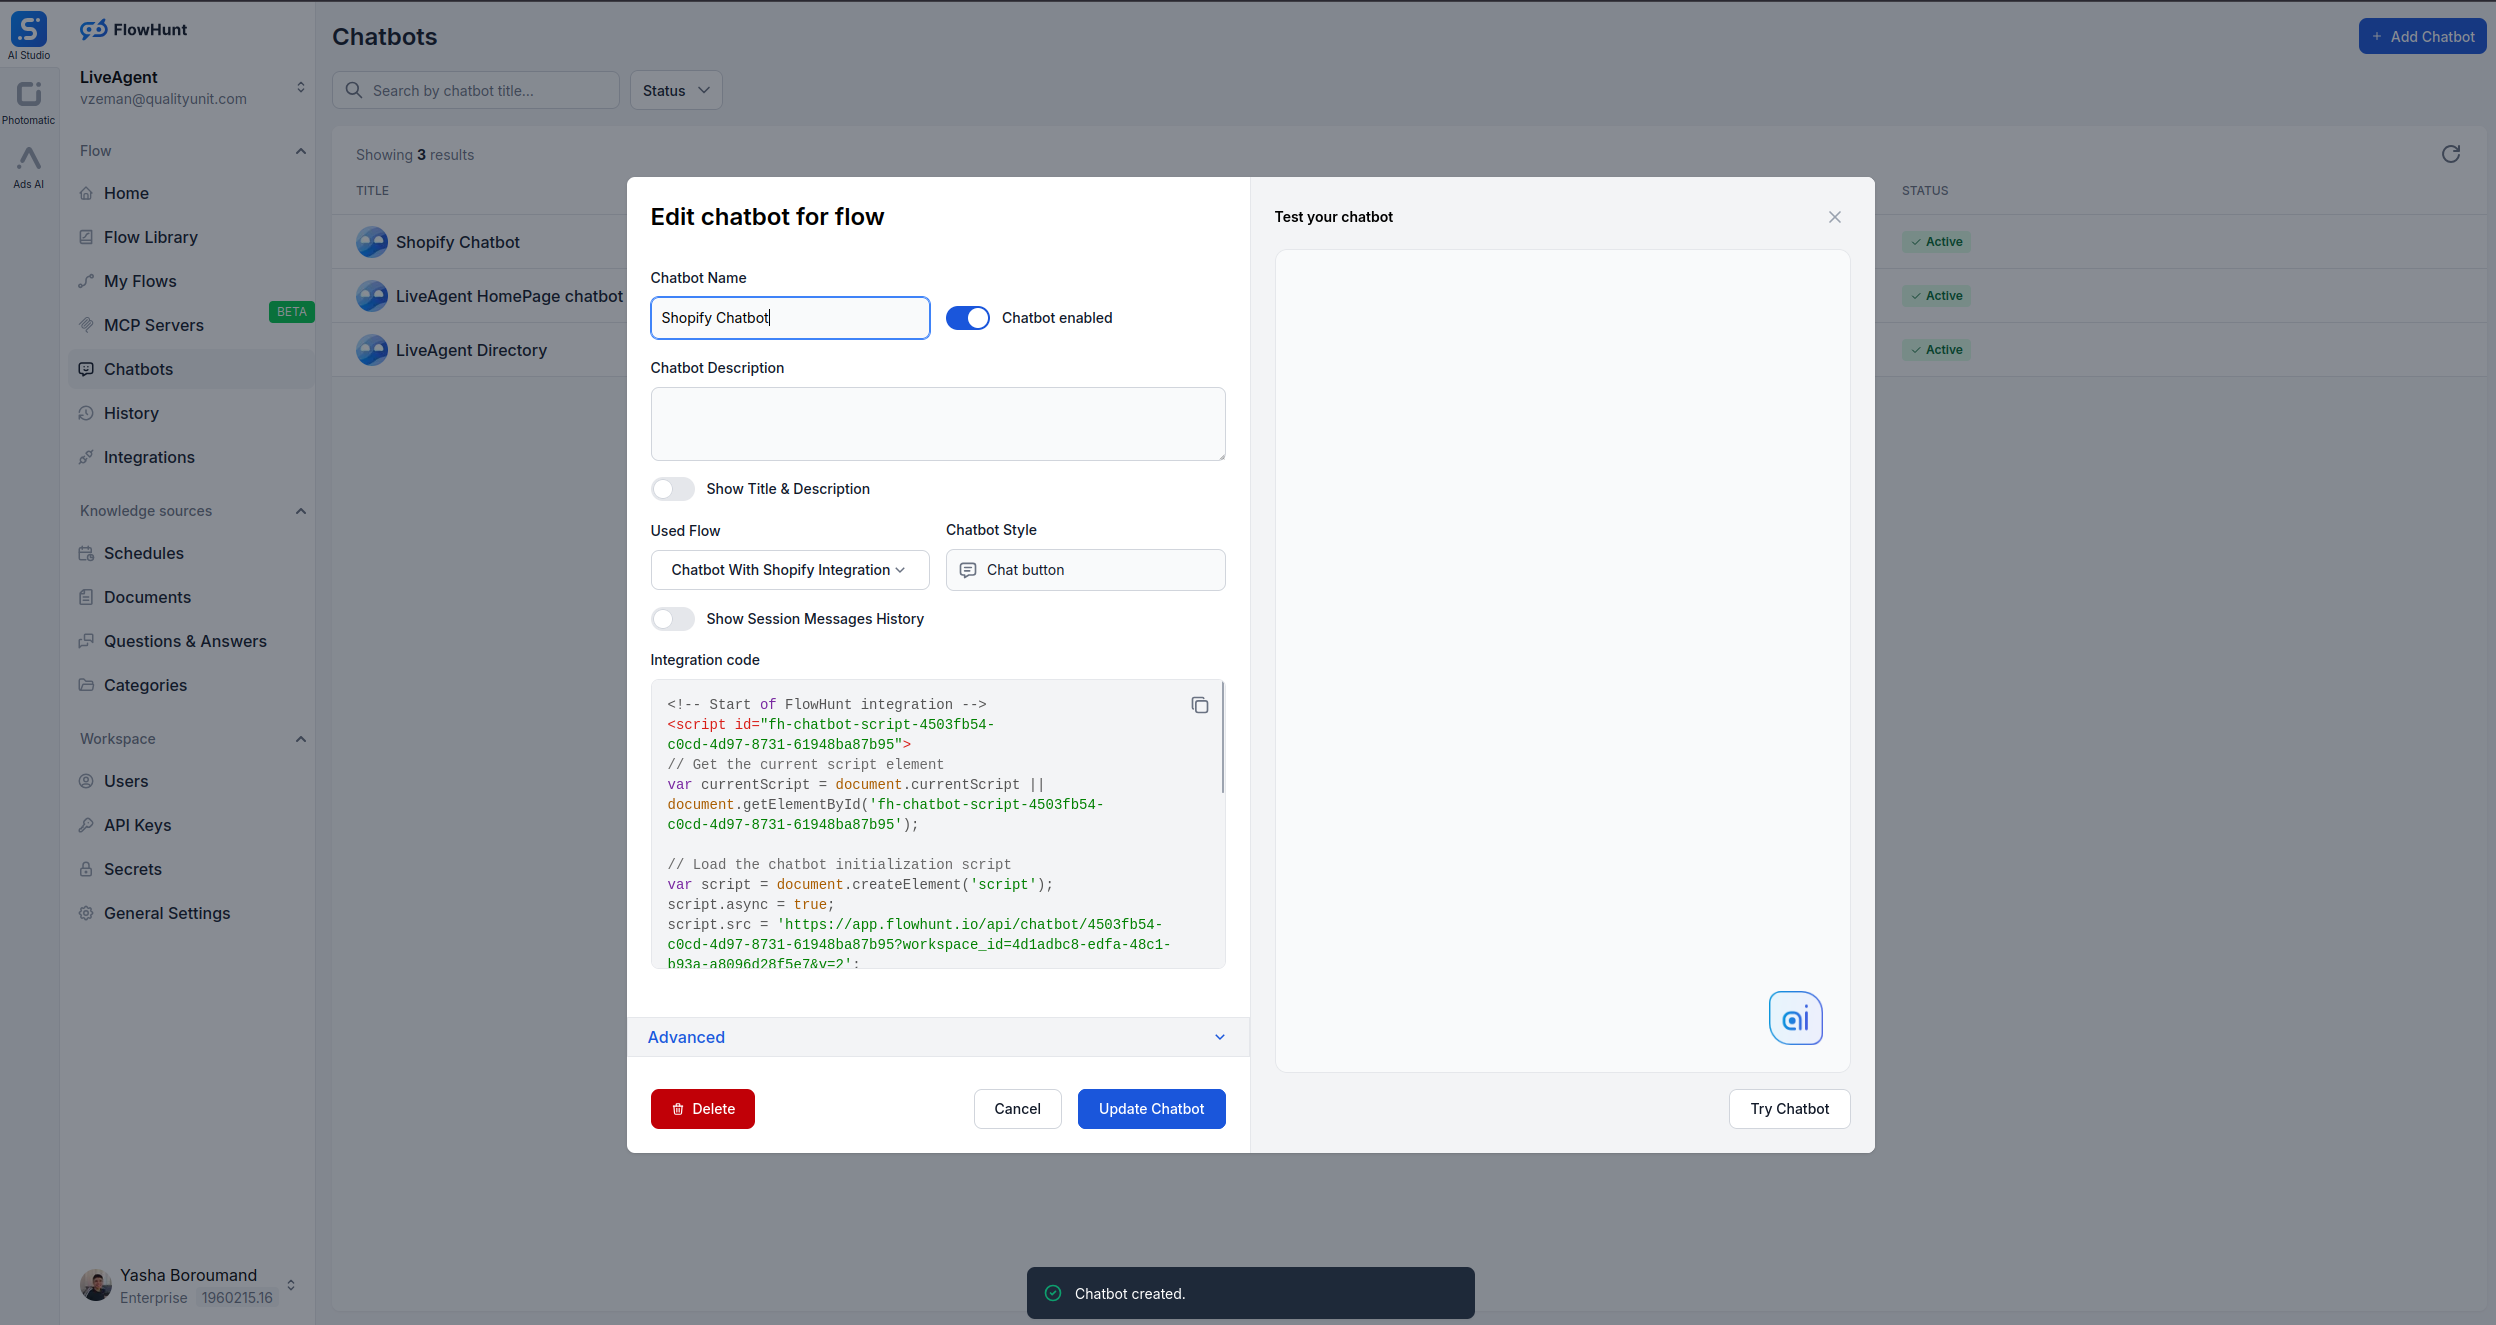
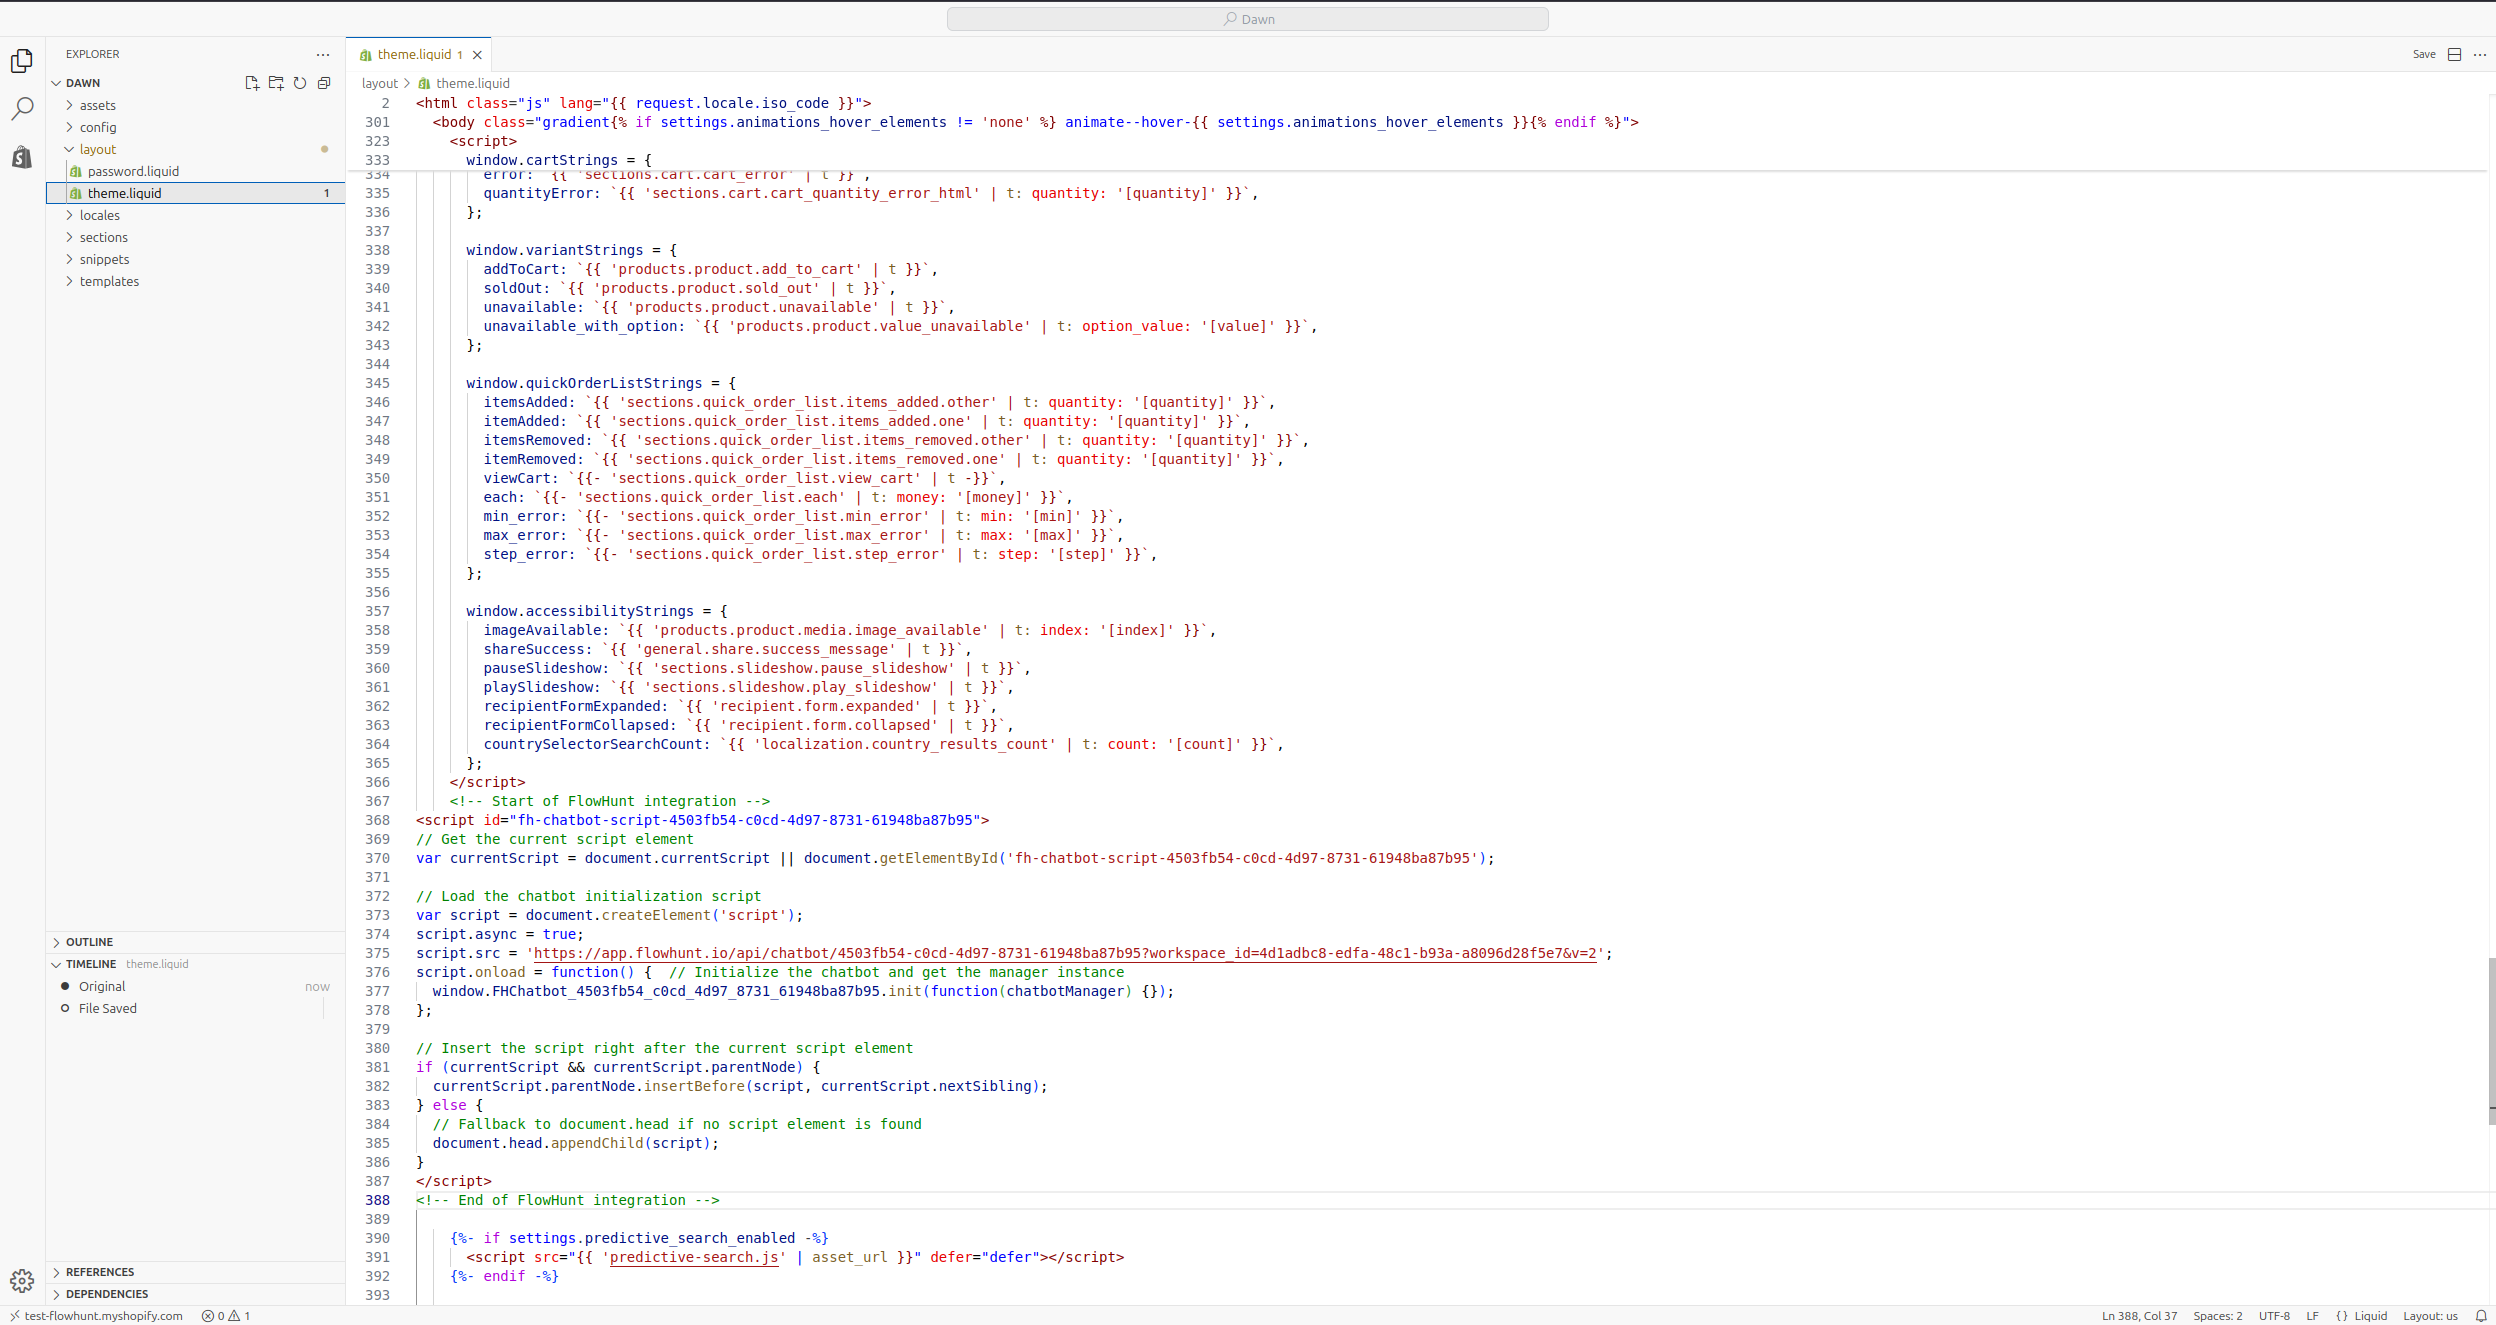
7) Create a new Integration Code (Chatbot)
8) Embed the chatbot on your Shopify storefront
Option A — Add to theme.liquid (site-wide)
Option B — Add via a Custom Liquid section (specific pages)
Verification and testing
Troubleshooting
This guide walks you through connecting FlowHunt to your Shopify store, adding a prebuilt Shopify chatbot flow, publishing it, and embedding the chatbot on your storefront.
Save. FlowHunt will generate a script snippet (your Integration Code).
Keep this snippet handy—you’ll paste it into your Shopify theme in the next step.
8) Embed the chatbot on your Shopify storefront
You can add the Integration Code in two ways. Choose the option that best fits your needs.
Option A — Add to theme.liquid (site-wide)
This method adds the chatbot to every page of your store. Follow these detailed steps:
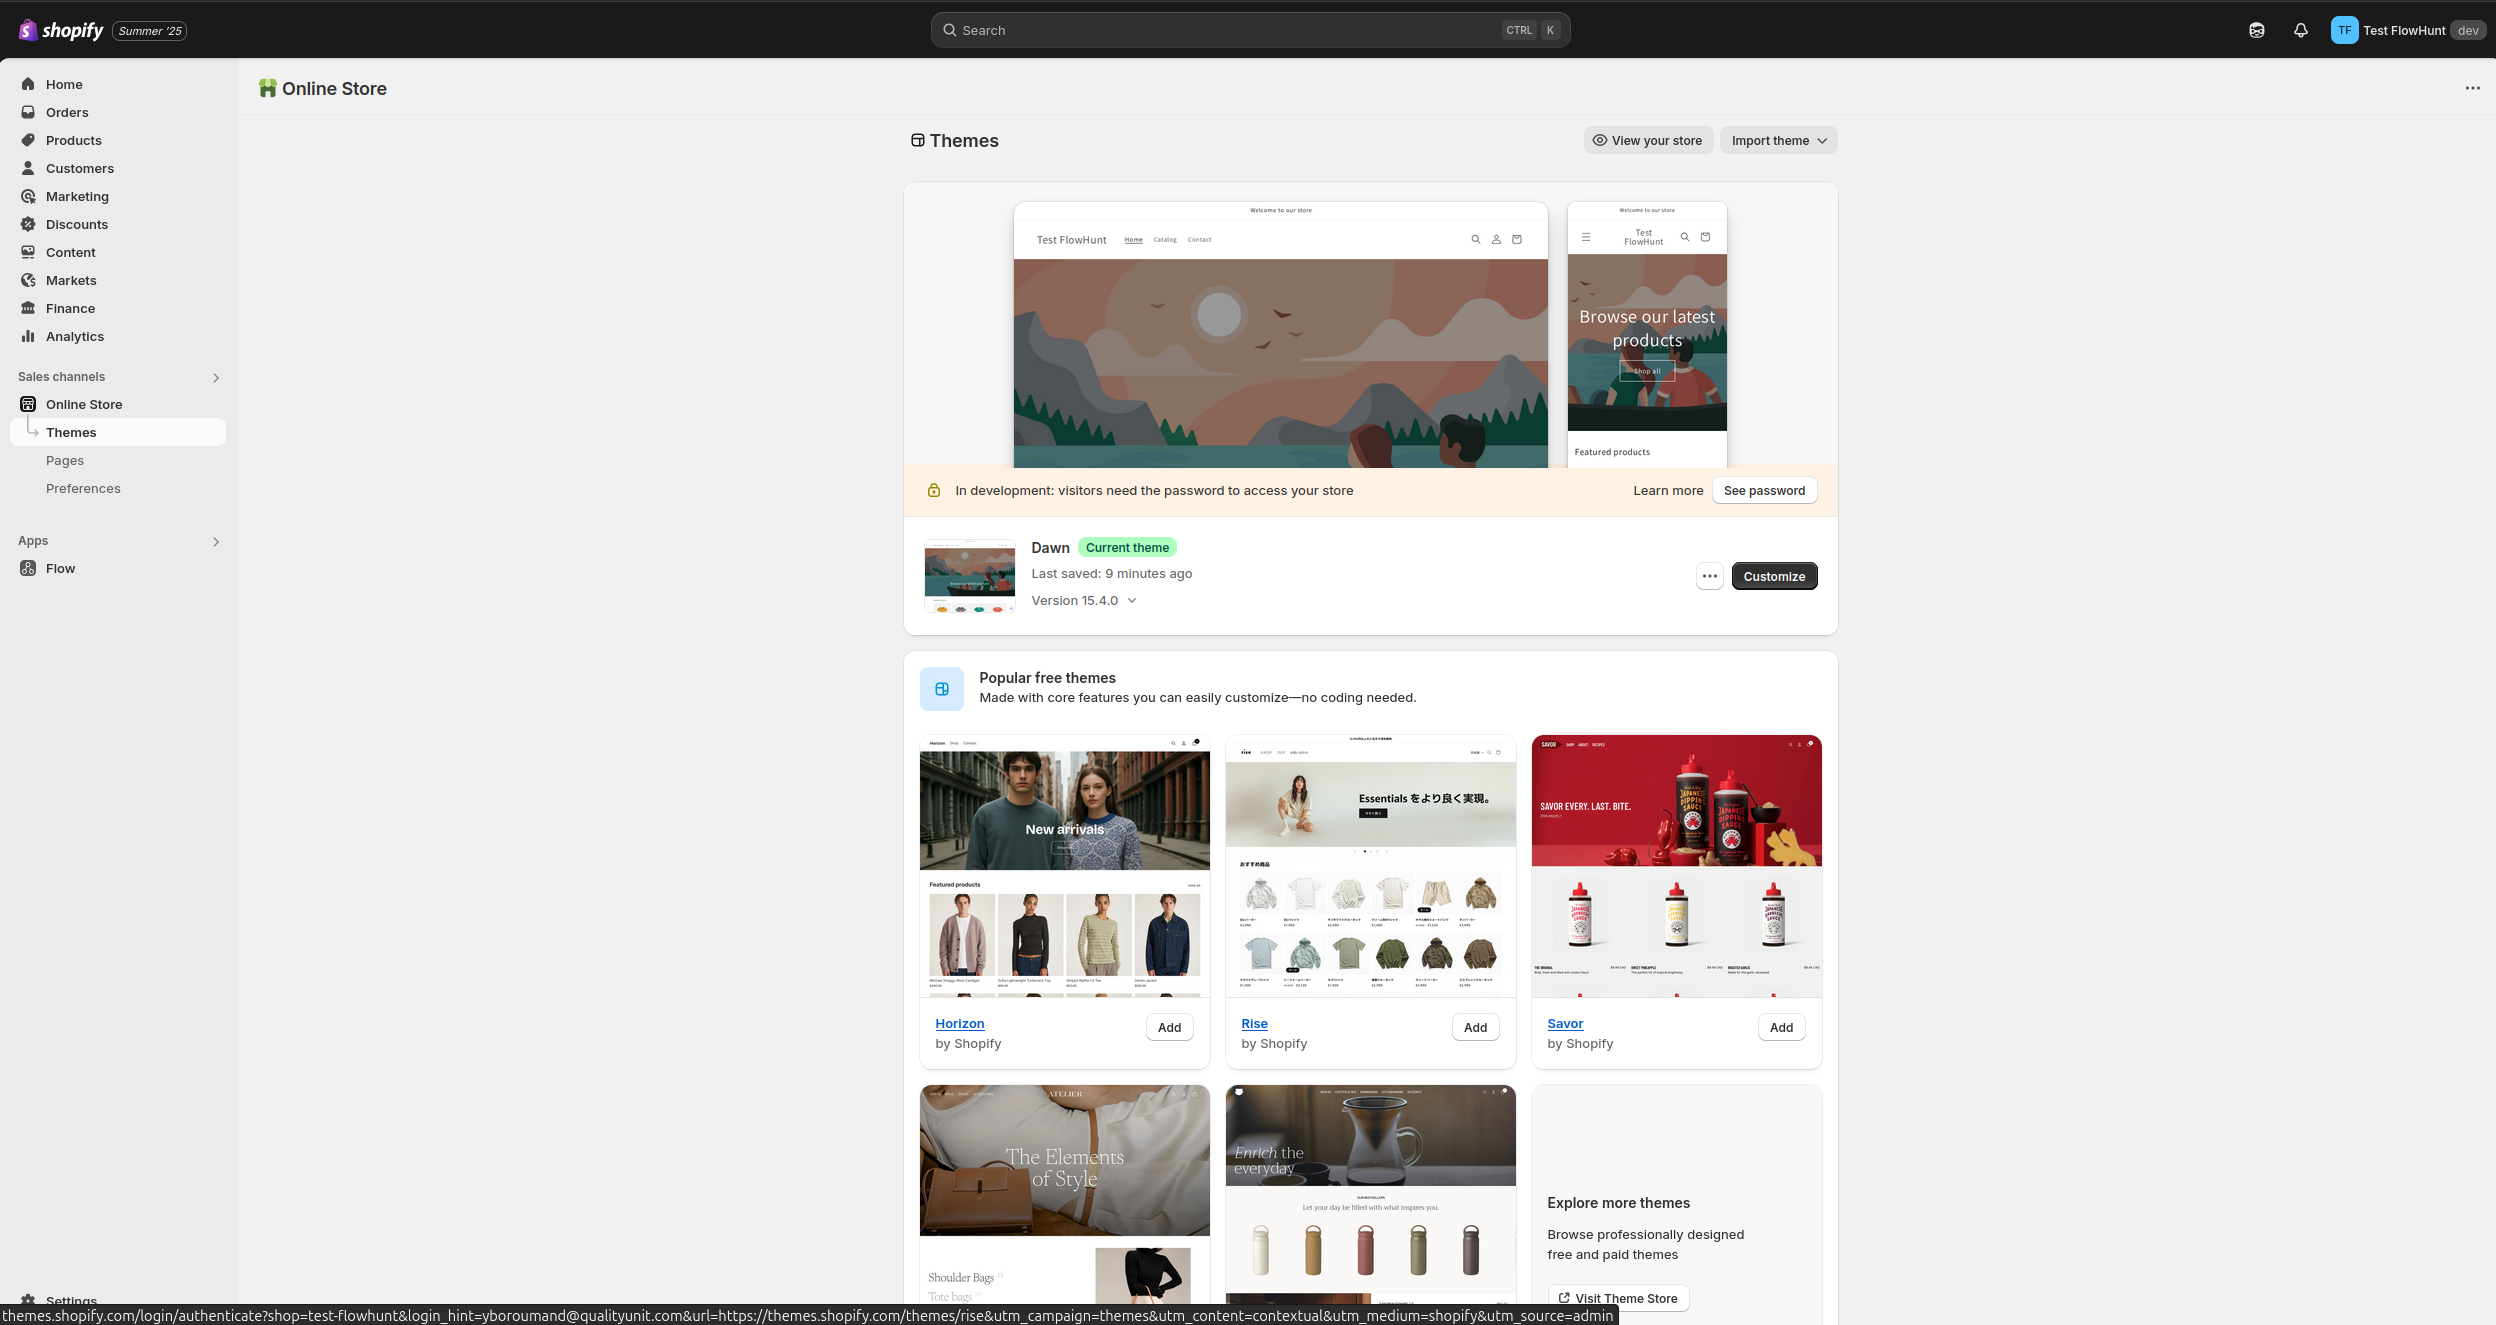
Step 1: Navigate to your Shopify admin and go to Online Store > Themes
Step 2: Click the Customize button next to your active theme
Step 3: Click the 3 dots (⋯) at the top left and select Edit Code
Step 4: Locate your theme.liquid file in the Layout folder (/layout/theme.liquid)
Step 5: Add the Integration Code just before the closing </body> tag
Step 6: Save your changes by pressing Ctrl + S (or Cmd + S on Mac)
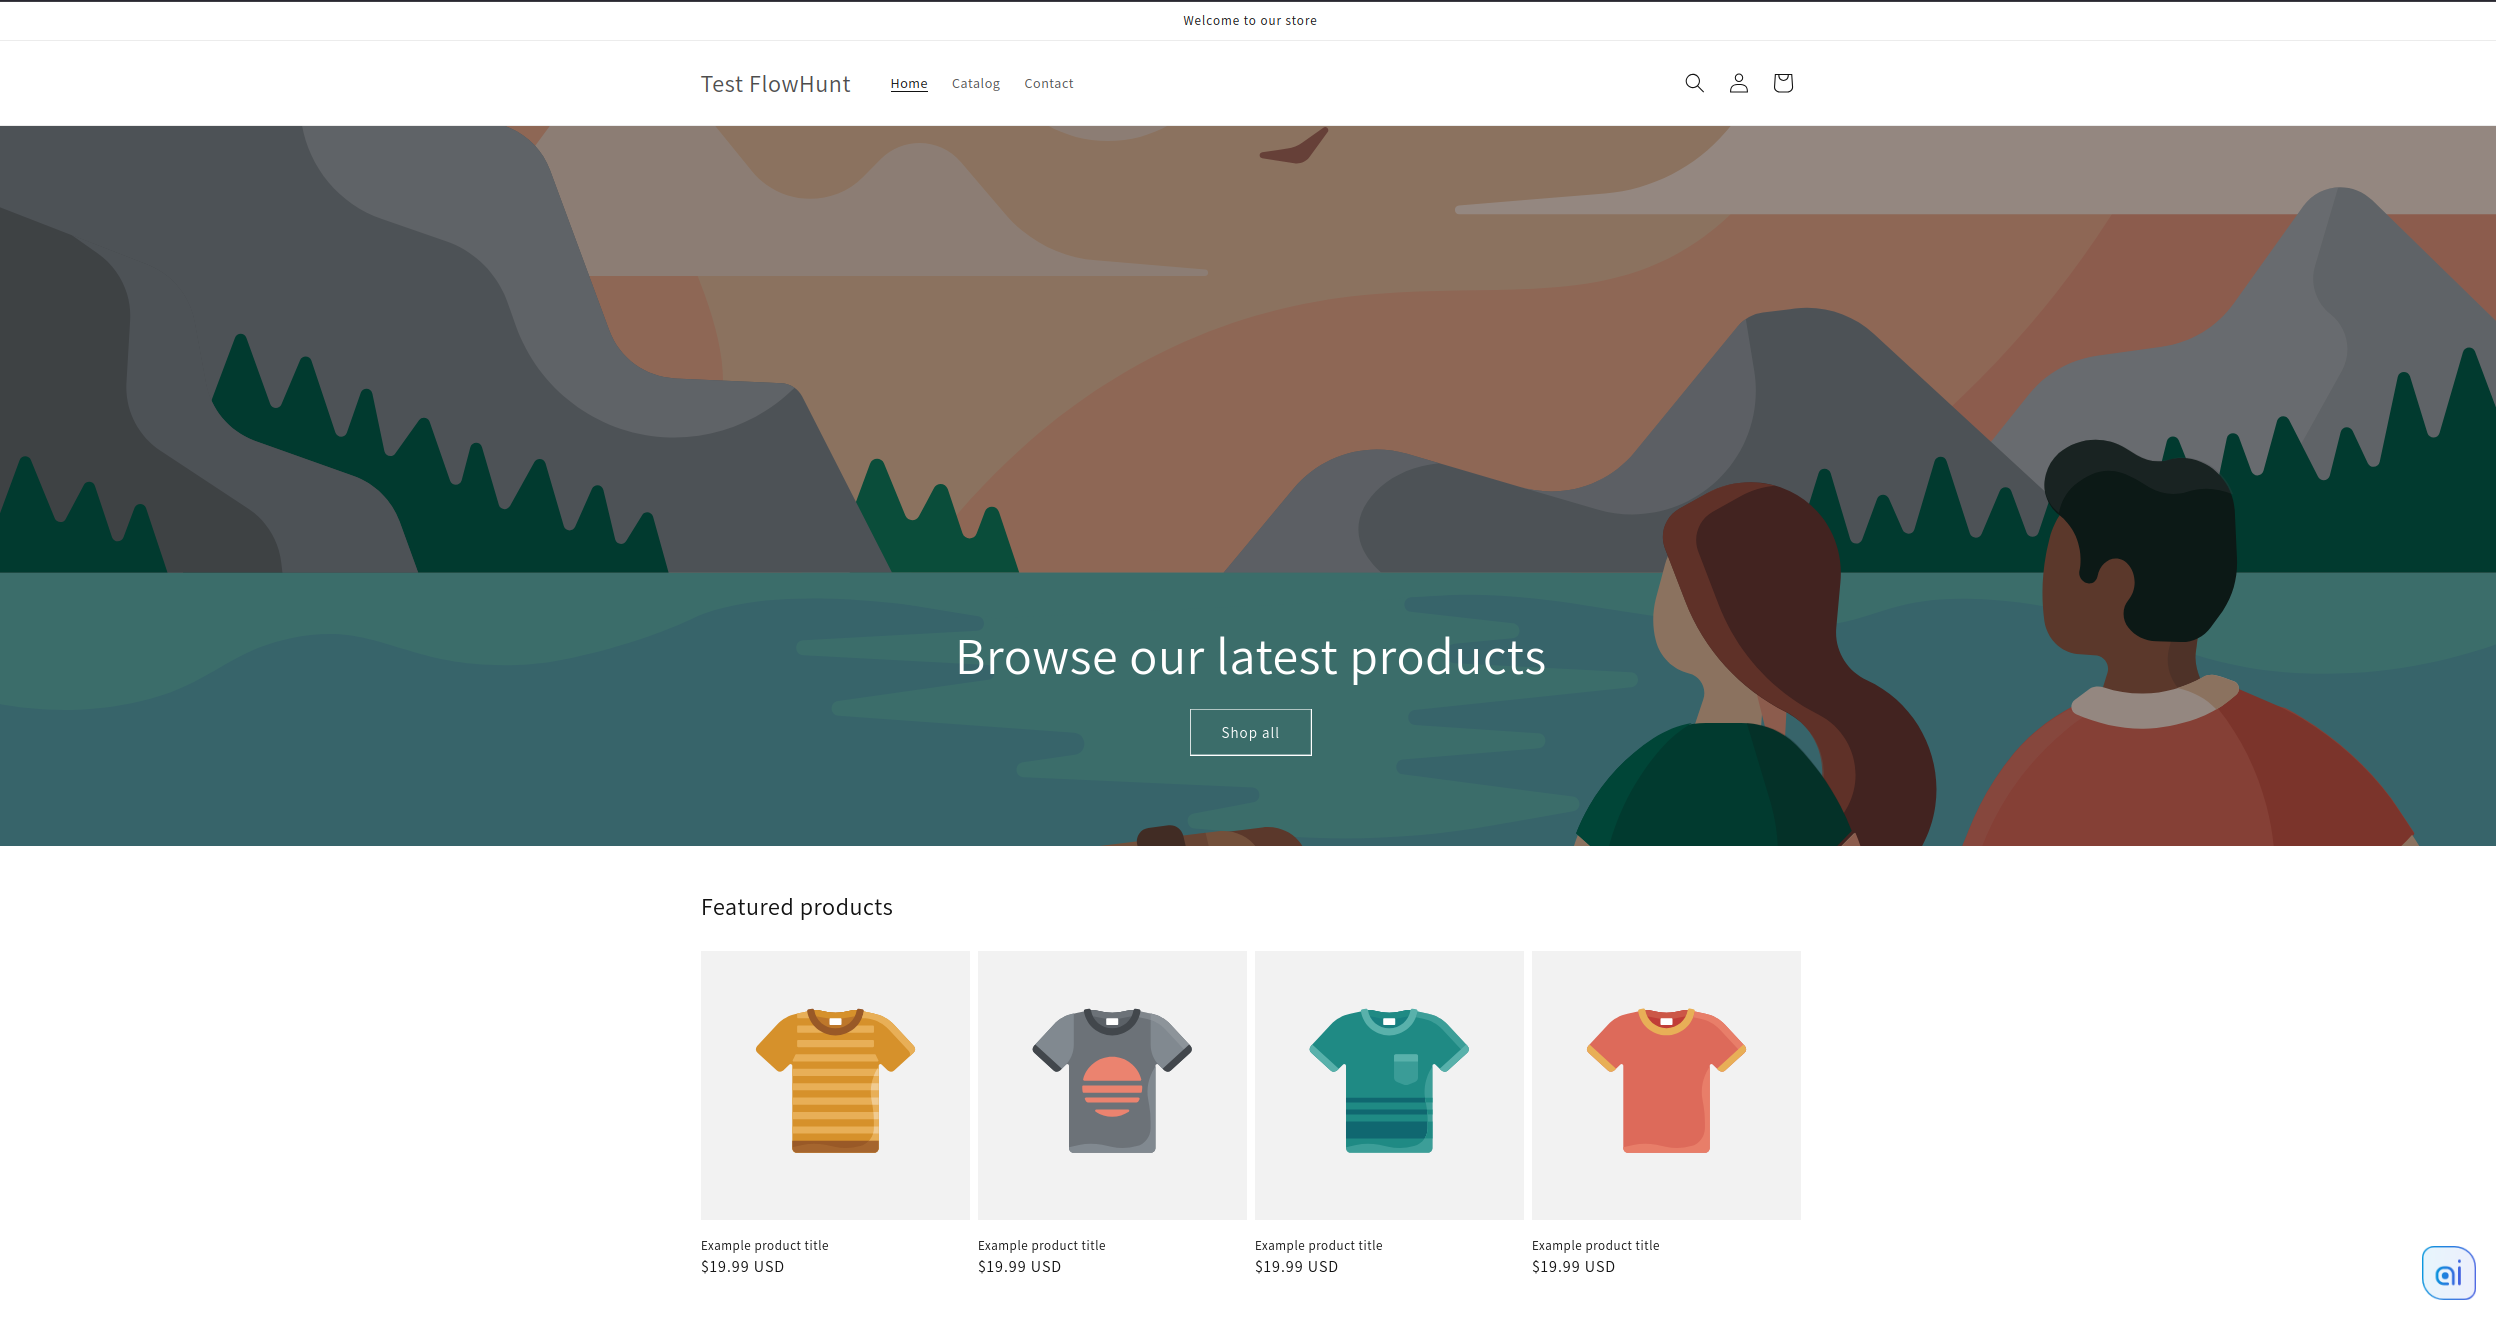
After saving, visit your storefront and refresh the page. The chatbot should appear on all pages.
Important Notes:
Pasting before </body> ensures the widget loads on every page
Keep the FlowHunt snippet intact and unmodified
The chatbot will appear on all pages of your store
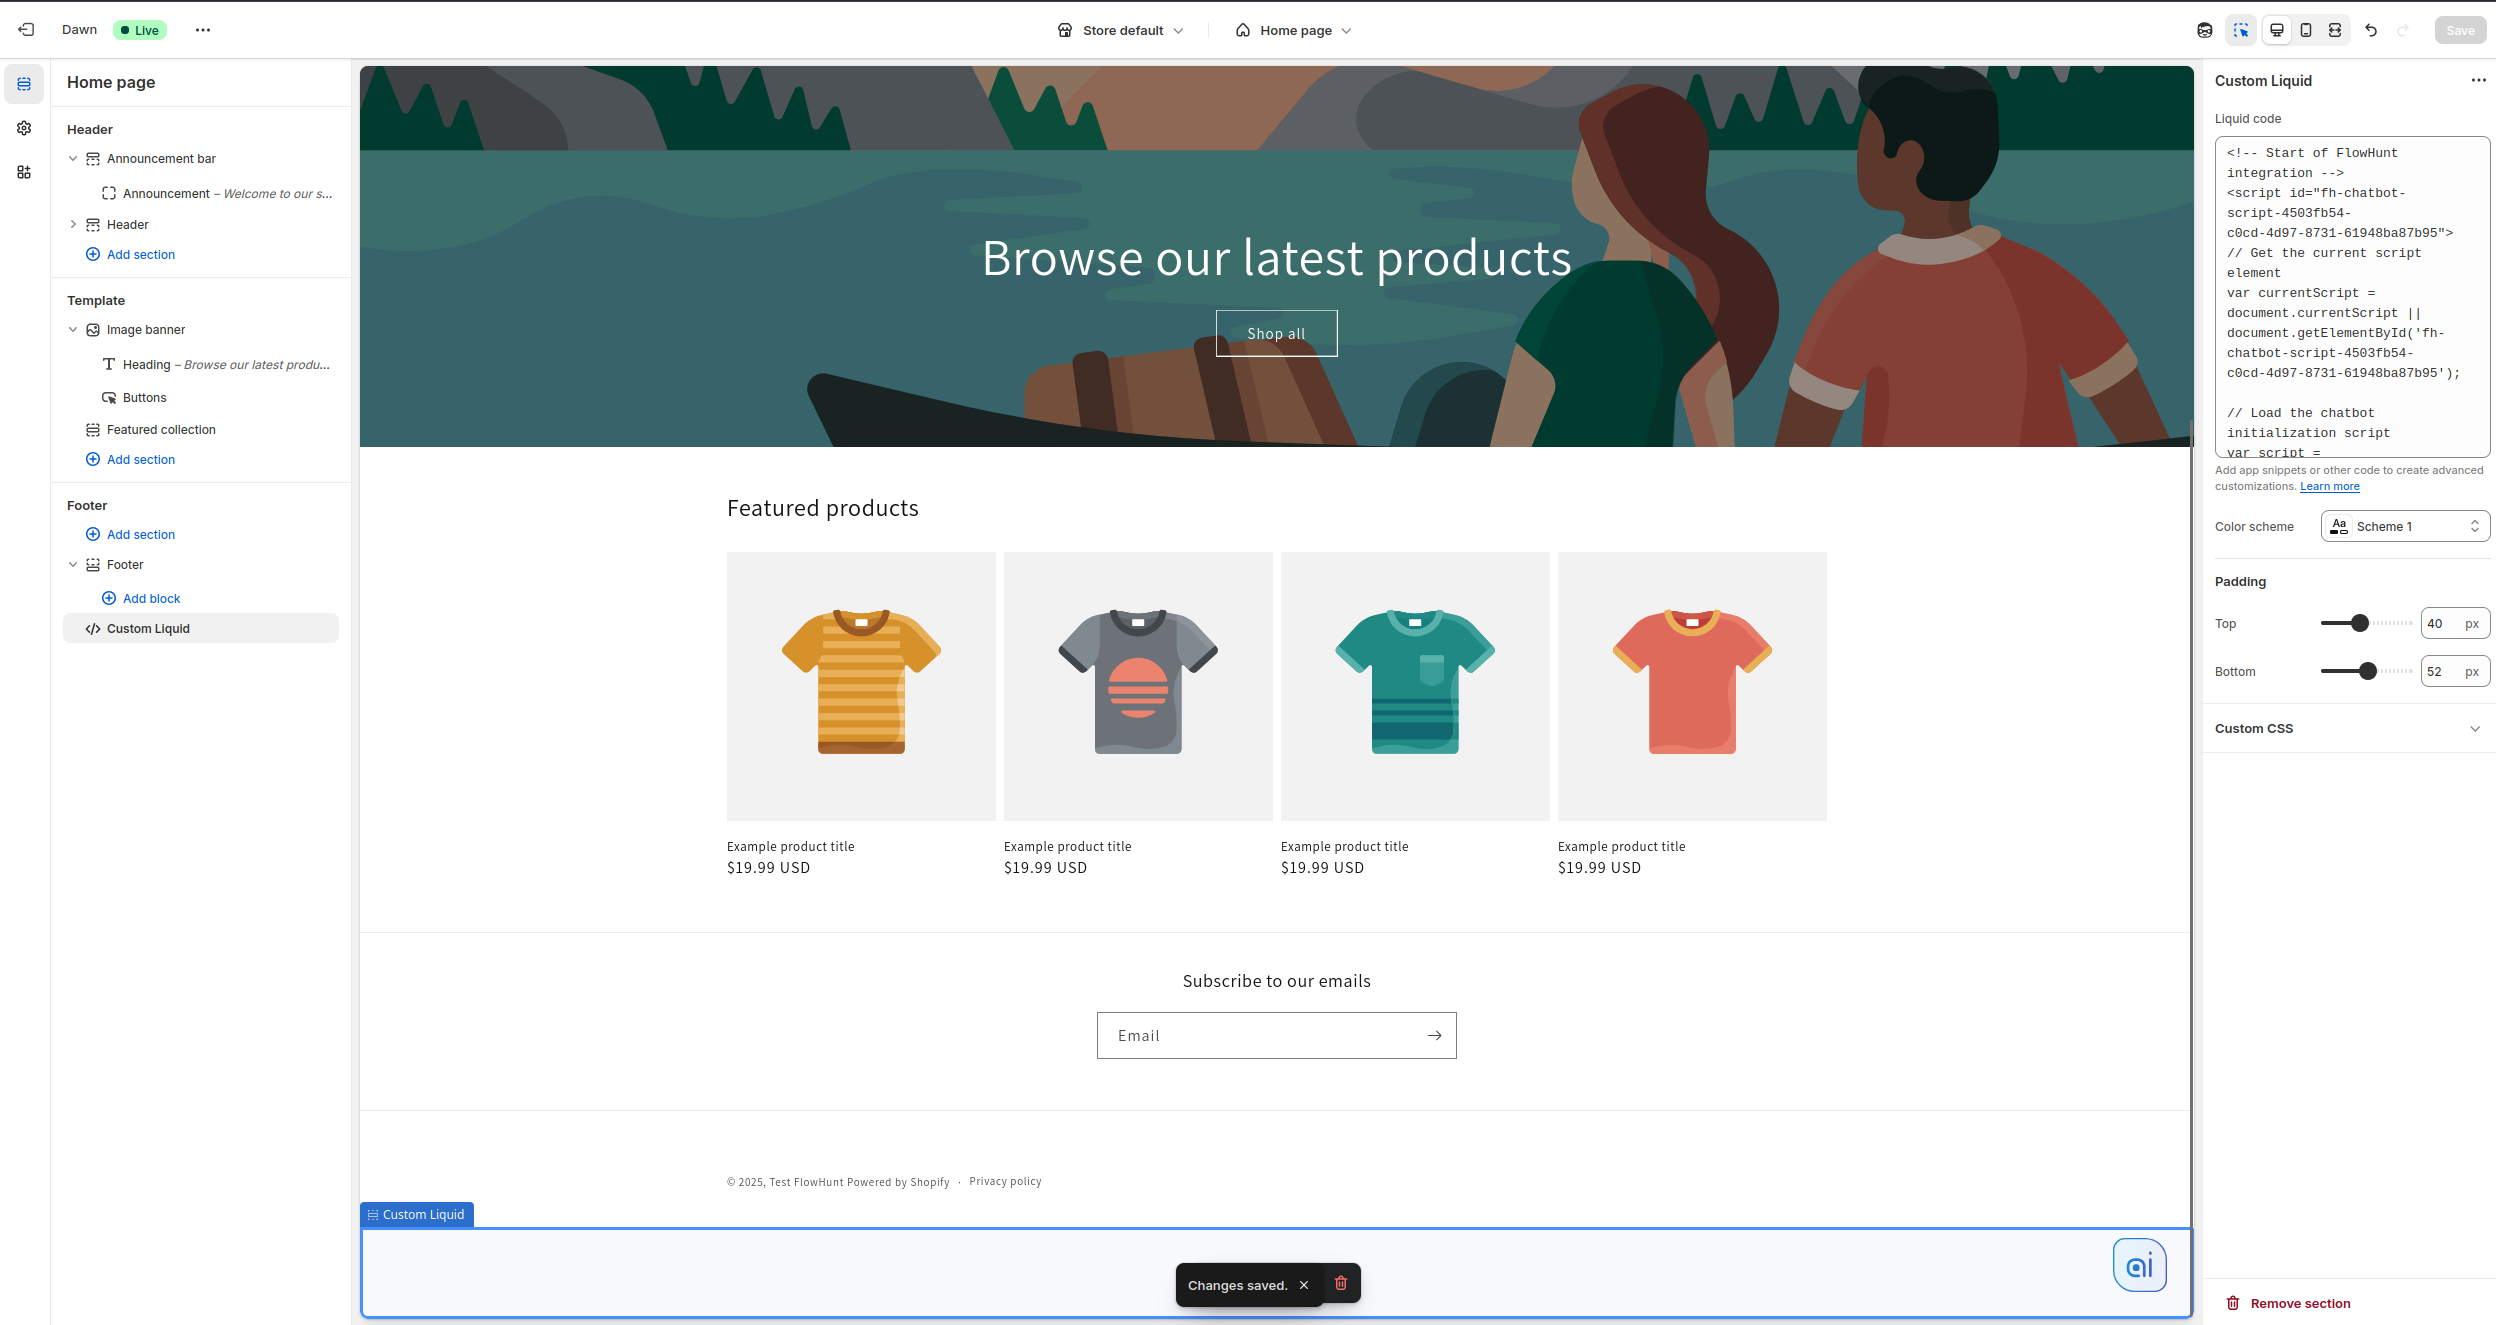
Option B — Add via a Custom Liquid section (specific pages)
This method allows you to show the chatbot only on specific pages or templates. Perfect if you want the chatbot on product pages only, or specific landing pages.
Step 1: Go to Online Store > Themes and click Customize next to your active theme
Step 2: Navigate to the specific template you want to add the chatbot to (e.g., Product pages, Collection pages, or a specific page)
Step 3: Click Add section or Add block (depending on your theme)
Step 4: Look for and select Custom Liquid from the available options
Step 5: Paste your FlowHunt Integration Code into the Custom Liquid content area
Step 6: Click Save and then Preview to test the chatbot on that specific template
Important Notes:
This method gives you precise control over where the chatbot appears
You’ll need to repeat these steps for each template where you want the chatbot
Great for testing the chatbot on specific pages before rolling out site-wide
The chatbot will only appear on the templates you’ve configured
Verification and testing
Open your storefront in an incognito/private window to avoid cached assets.
Ask common questions (shipping, returns, product availability) to validate the flow.
Review the conversation logs in FlowHunt (enable Verbose if needed) to see what documents or tools were used.
Troubleshooting
Chatbot not showing: Ensure the Integration Code is included on the page, your theme is published, and the domain is allowed in the Chatbots settings.
Duplicated widgets: Remove any duplicate snippets and keep one active Integration Code.
Missing answers: Verify Knowledge Sources and Document Retriever settings in your flow, then republish.
Shopify permissions error: Reconnect Shopify under FlowHunt → Integrations and reinstall if prompted.
Frequently Asked Questions
Yes. Use Option B to add the Integration Code only on selected templates or pages.
The widget is loaded asynchronously to minimize impact. Place it before
as recommended.
Only if you enable the relevant tools/actions and permissions in FlowHunt and Shopify. Keep least-privilege principles.
Adjust appearance in the Chatbots configuration for that Integration Code.
How to Build an AI-Powered Chatbot for Your Shopify Store: Complete Guide
Learn how to build and deploy an AI-powered customer support chatbot for your Shopify store using FlowHunt's Shopify integration. Automate order tracking, produ...
Integrate FlowHunt with Shopify to automate product discovery, enrich descriptions with AI, track orders in real time, and deploy intelligent customer support—n...
Build a Shopify AI Manager: Automate & Control Your Store with FlowHunt
Learn how to create an AI-powered Shopify manager using FlowHunt's MCP server integration to automate product management, orders, customers, and inventory contr...
12 min read
Shopify
AI Automation
+3
Cookie Consent We use cookies to enhance your browsing experience and analyze our traffic. See our privacy policy.