


AI Lesson Plan Generator
Generate complete, standards-aligned lesson plans in seconds with FlowHunt's AI Lesson Plan Generator. Provide a topic, grade level, and teaching objectives to ...
3 min read
Education
AI
+3
Step-by-step FlowHunt lesson plan tutorial, from entering your topic and grade level to reviewing a complete, standards-aligned plan with objectives, activities, assessment, and timing.
This FlowHunt lesson plan tutorial walks you through generating your first standards-aligned lesson plan, start to finish. The AI Lesson Plan Generator takes a topic, a grade level, and your teaching goals, and returns a complete plan along with objectives, materials, activities, timing, and assessment ideas. All that’s left for you to do is review, edit and add what’s unique to you and your classroom dynamics. Here’s the exact process, step by step.
Before your first run, have two things ready.
A FlowHunt account. The AI Lesson Plan Generator is available from the Agent Library from day one with no separate setup required. Simply search for it in the library and add it to your agents. If you need custom adjustments, the flow is easy to edit via the visual editor .
A topic, a grade level, and your teaching goals. These are the three inputs the tool actually works from. The topic is what the lesson covers, the grade level determines vocabulary and standards alignment, and the teaching goals are what you want students able to do by the end of the lesson. The more specific the goals are, the more the output will match what you intend to teach.
Head to the Agent Library and search for the AI Lesson Plan Generator, or open it directly from its tool page . You can start chatting with it immediately, or click + Add to my agents to pull it into your workspace first.
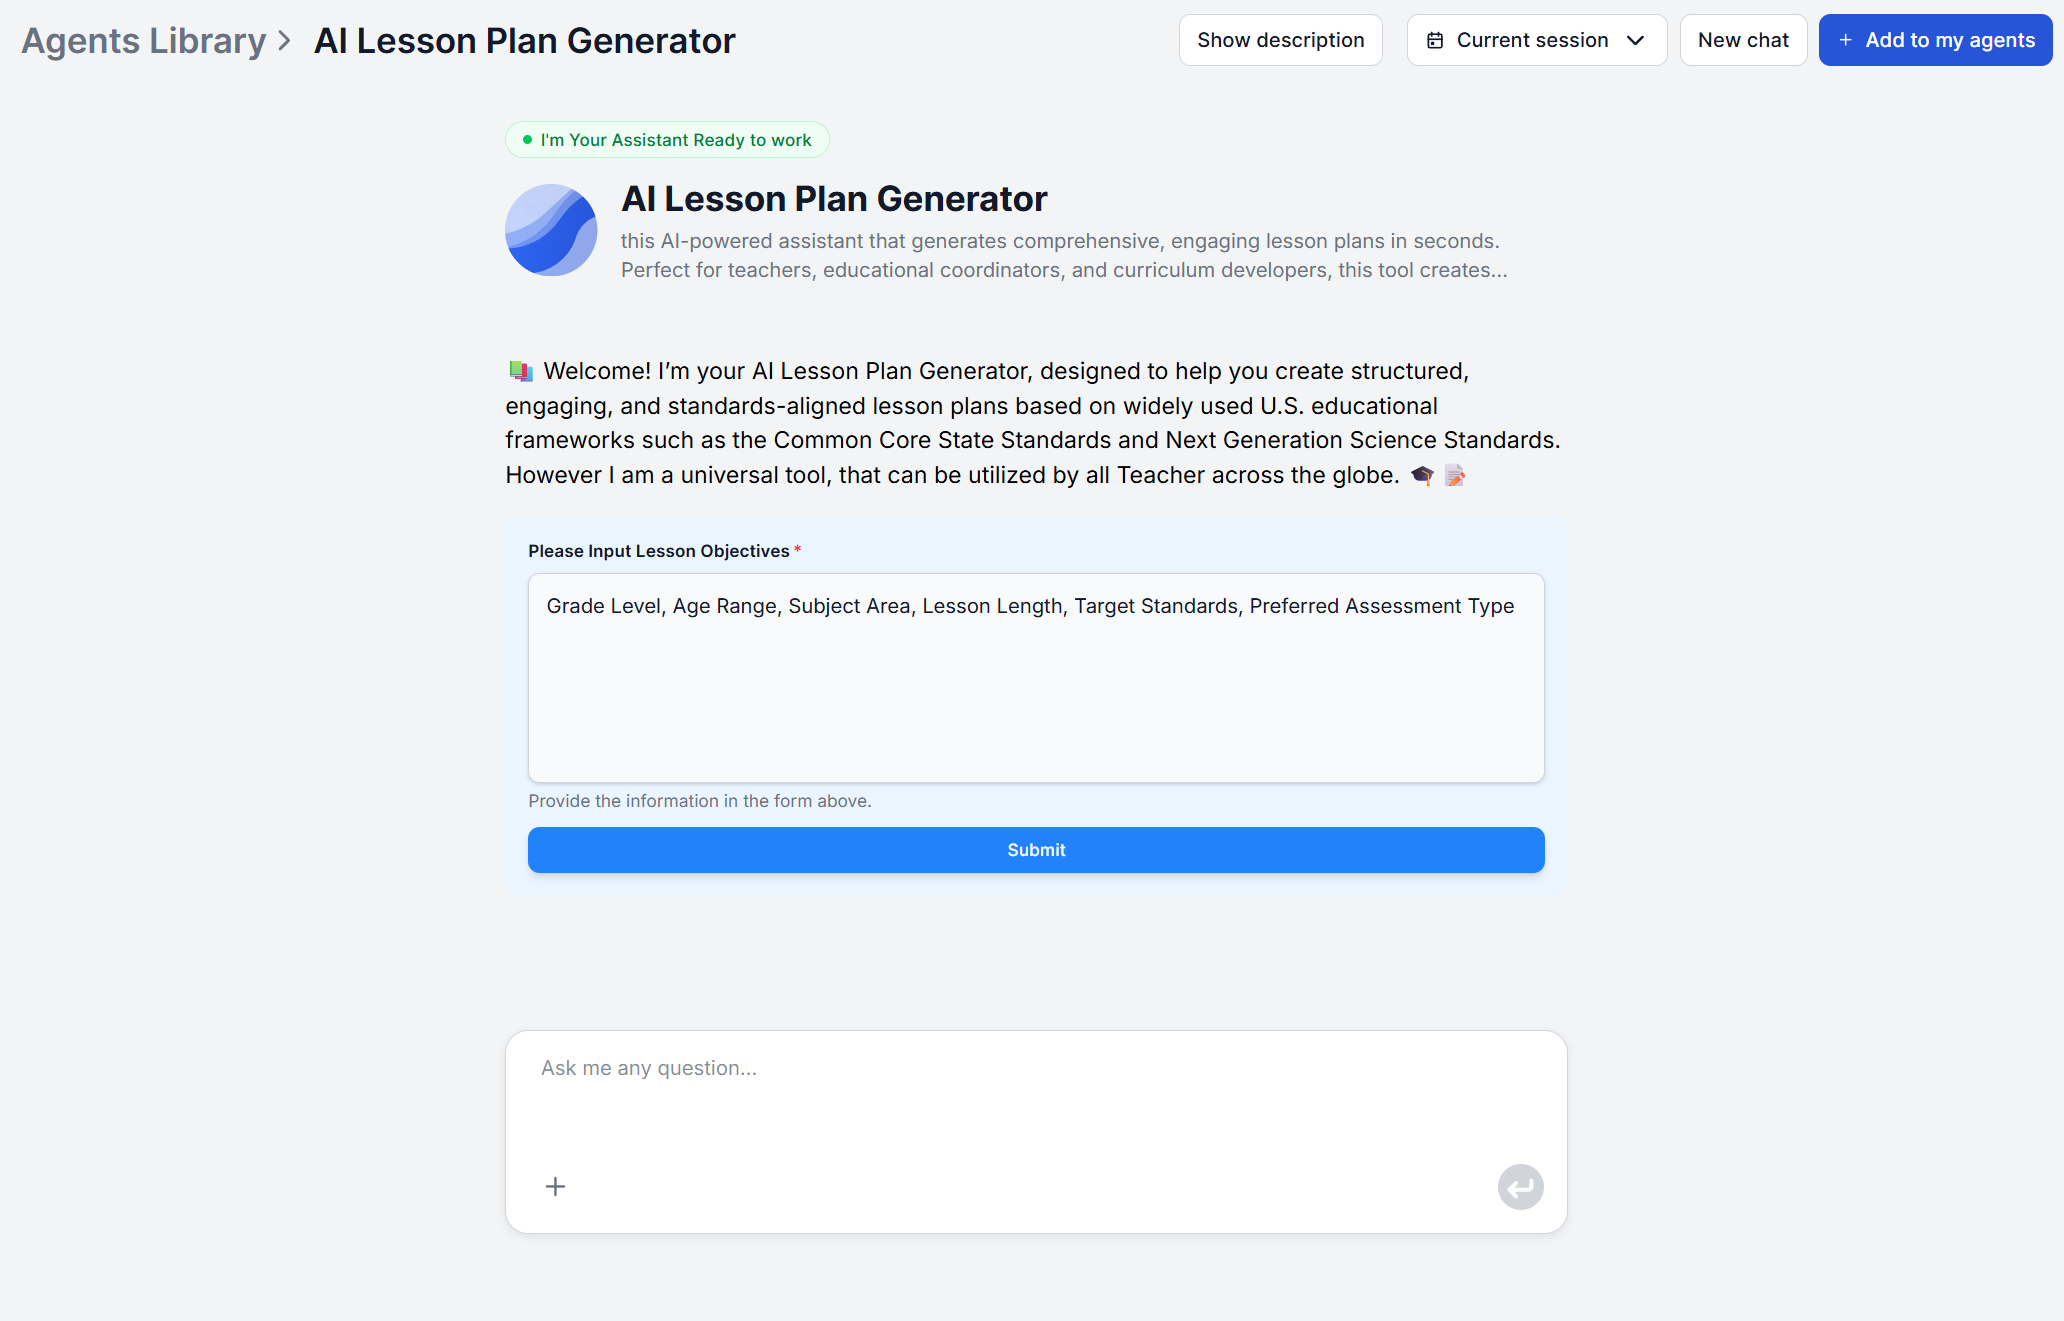
Type your topic and grade level into the chat. For example:
“I’m teaching a lesson on the water cycle to a 4th-grade class.”

Start your free trial today and see results within days.
Follow up with what you actually want students able to do by the end of the lesson. This is the input that shapes the learning objectives the plan gets built around, so it’s worth being specific rather than only restating the topic.
“By the end, students should be able to explain evaporation, condensation, and precipitation in their own words and label each stage on a diagram.”
This single input, combined with the grade level from Step 1, is what determines which standard the generated objectives align to.
TIP: Do you need a different local standard or lesson types the generator doesn’t support by default? You can easily rework the agent in the visual editor . Simply point the agent to official documents and relevant context for the standards via knowledge sources . Then edit the prompt to reflect these changes.
Once your topic, grade level, and goals are in, the generator returns a complete plan built around five parts:
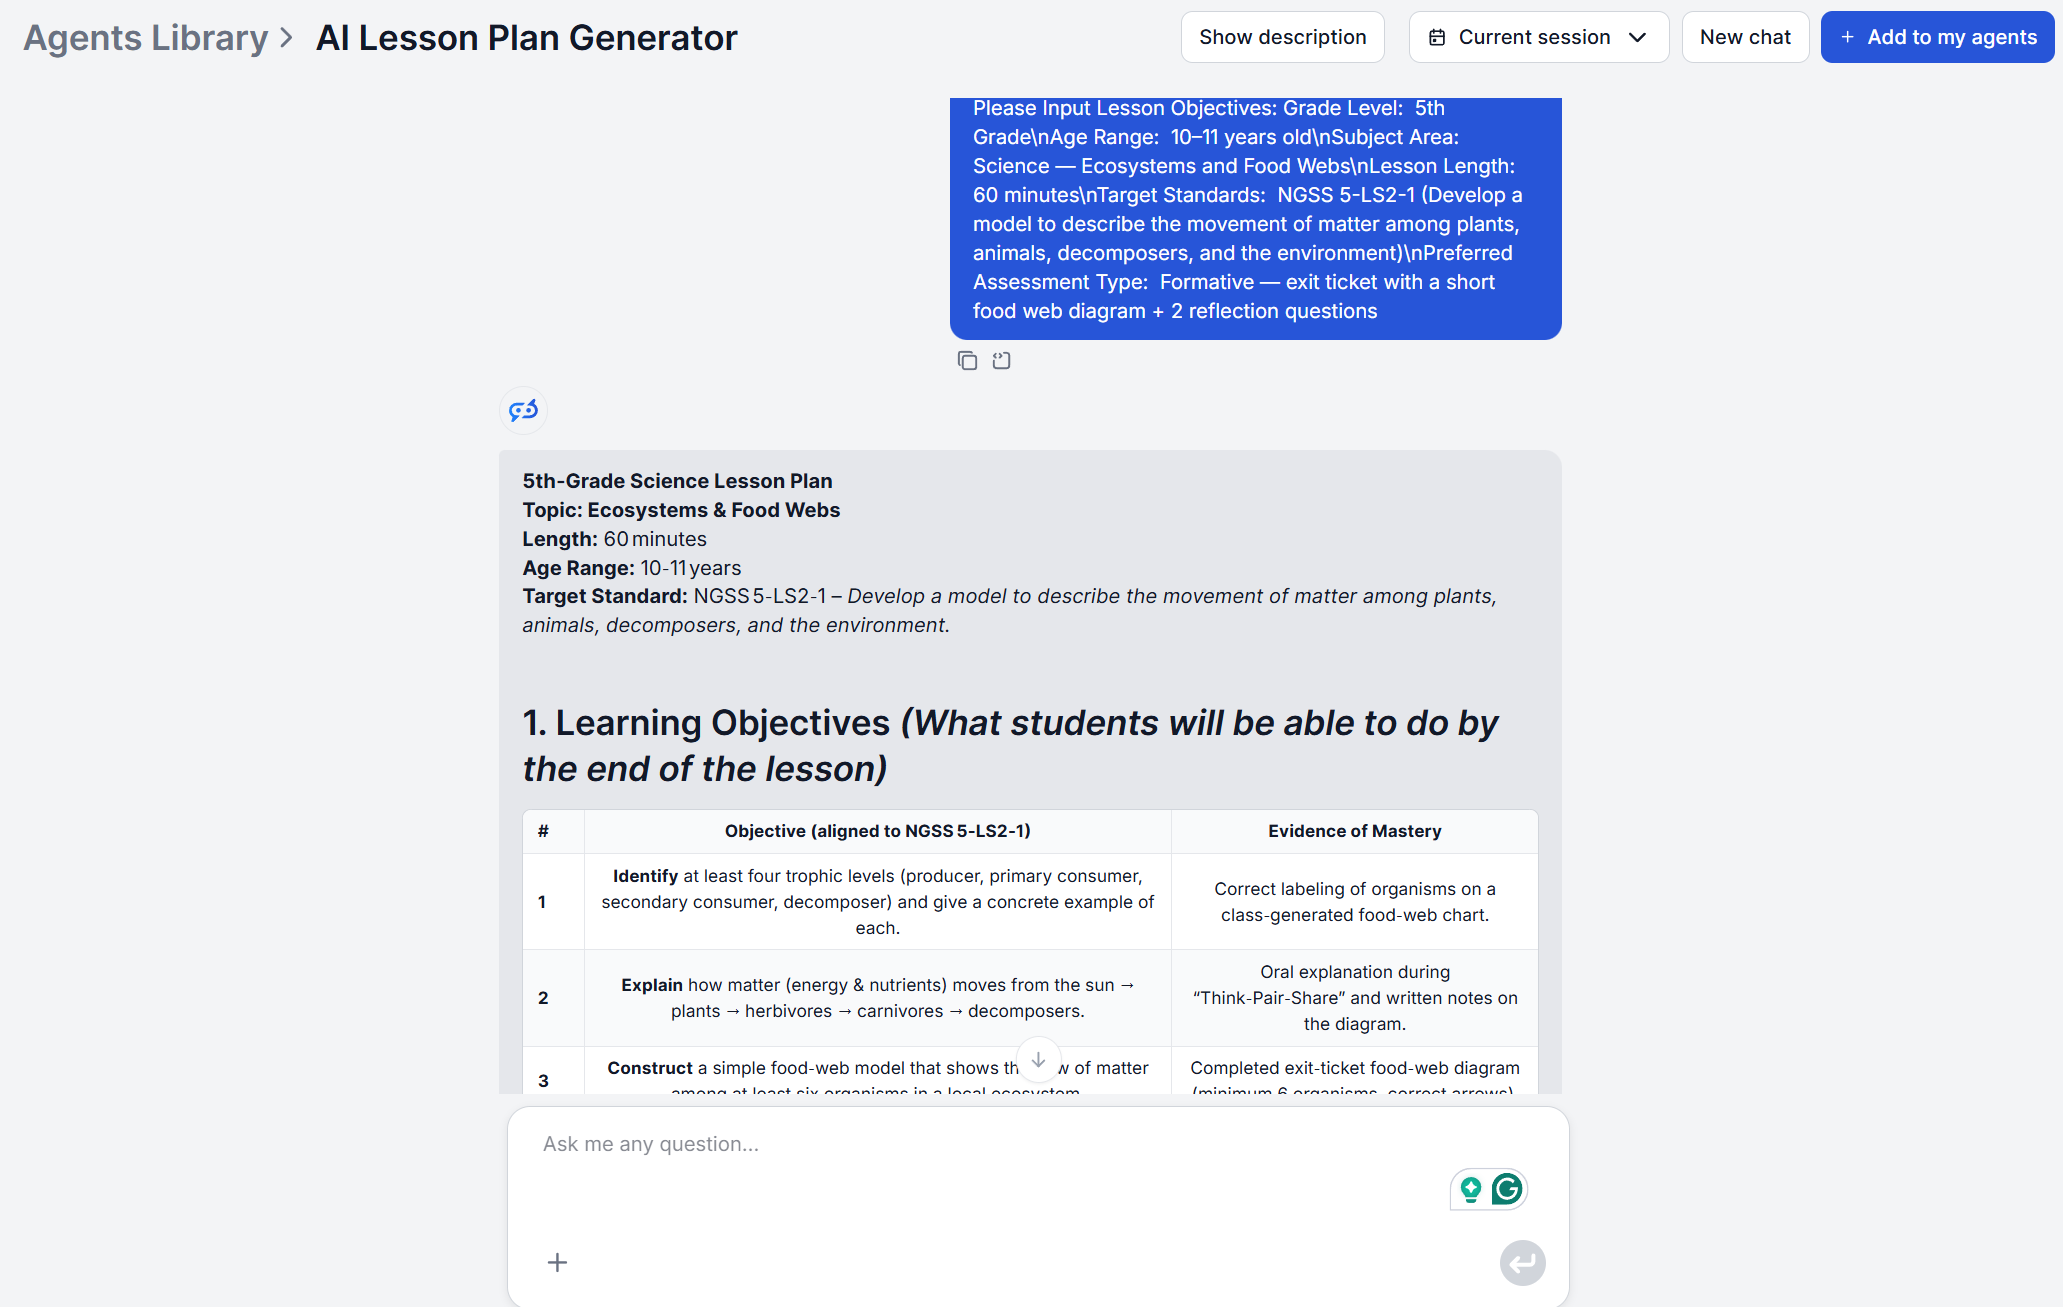
Read through the whole plan once before editing anything. Check that the objectives actually match what you described in Step 2, and that the activity sequence fits the class period you have in mind. If the objectives drifted significantly, it’s easier to just regenerate the plan with a sharper goal statement than to invest time and resources into heavy editing.
Get latest tips, trends, and deals for free.
Compare the materials list against what you actually have on hand, and the activity sequence against your classroom setup. Since this is a chat interface, you can simply follow up directly in the same conversation. For example, ask for a swap to an activity that doesn’t require materials you don’t have, or a different sequencing if the pacing doesn’t fit your class period.
This is also the point to double-check the suggested timing against your actual schedule. A generated 45-minute sequence dropped into a 35-minute period will run long unless you trim a section yourself or ask for a version scoped to the shorter window in your follow-up message.
The plan already includes formative and summative assessment ideas matched to your stated objectives. This isn’t something you need to request separately. What it won’t include is anything specific to your actual students, such as IEP or 504 accommodations, English language learner supports, or behavioral considerations. Add these as your own notes on top of the generated plan before teaching from it.
Once you’re familiar with how the tools and what output to expect, you can start adjusting the underlying agent in the visual editor to better fit your needs. Do you need to adhere to local standards? Do you need lesson plans for other subjects outside the default scope? Is there anything unique to your classroom you’d like reflected in all future generated plans? The workflow can be adjusted to account for all of these.
The way to do that is with a clever mix of prompting and knowledge sources . Upload your standards documents as knowledge sources and add the GoogleSearch component as a retriever, so the workflow can read the official guidelines for your intended standards as well as bridge the gaps by searching the internet. Then edit the agent’s prompt to ensure it uses these sources, to modify the output behavior, or to add any new fields you need.
By default, the plan arrives as text in the chat, ready to copy into wherever you need. If you want it delivered straight without a copy-paste step, FlowHunt connects to wherever you actually keep your lesson plans through its integrations library . Google Docs and Notion are common destinations for this kind of output.
Be specific in your teaching goals. “Teach the water cycle” gives the generator far less to work with than “students should be able to explain evaporation, condensation, and precipitation and label each stage on a diagram.” The more concrete the goal, the more targeted the objectives and activities.
Name the standard if you’re not in ELA, Math, or Science. Built-in alignment covers CCSS and NGSS; for other subjects, say so in your goals input so the generator doesn’t default to a citation that doesn’t apply. If you want to be absolutely sure, edit the workflow in the visual editor to add official documentation on the standards as a knowledge source and make sure the workflow adheres to it.
Re-run rather than force one plan to cover everything. If you need a version for a different ability level or a shorter class period, generating again with adjusted inputs is faster than manually reworking a single plan to stretch across every case.
Once you’ve reviewed and adjusted your first plan, the same three-input process repeats for every lesson after it, typically in well under ten minutes.
Explore more workflows in the academy , or see how curriculum teams and instructional coaches use the same generator across grade levels in 5 ways teachers use AI lesson planning to reclaim hours every week .
Give the AI Lesson Plan Generator a topic, grade level, and teaching goals, and get a complete, standards-aligned plan back — objectives, activities, timing, and assessments included.
Generate complete, standards-aligned lesson plans in seconds with FlowHunt's AI Lesson Plan Generator. Provide a topic, grade level, and teaching objectives to ...

An AI lesson plan generator turns a topic, grade level, and duration into a complete, standards-aligned lesson plan in minutes. Here's how it works.
From first-year teachers to curriculum coordinators, here are five concrete ways AI tools for teachers cut lesson planning time without cutting quality.
Cookie Consent
We use cookies to enhance your browsing experience and analyze our traffic. See our privacy policy.