



Content Brief Generator
Generate SEO-optimized content briefs from a single keyword with FlowHunt's Content Brief Generator. Get an SEO-friendly title, meta description, and a detailed...
2 min read
Content Brief
SEO
+3
FlowHunt content brief tutorial covering the full workflow, from entering your target keyword to reviewing the generated title, meta description, and outline.
This FlowHunt content brief tutorial walks you through a real first run of the Content Brief Generator , from typing in a keyword to reviewing the finished title, meta description, and outline. For the reasoning behind why a brief needs SEO research baked in rather than being written from a template, see how to create SEO content briefs automatically with AI .
No API keys, no flow to build first, no onboarding call. The default flow is ready to run as soon as you settle on your primary keyword.
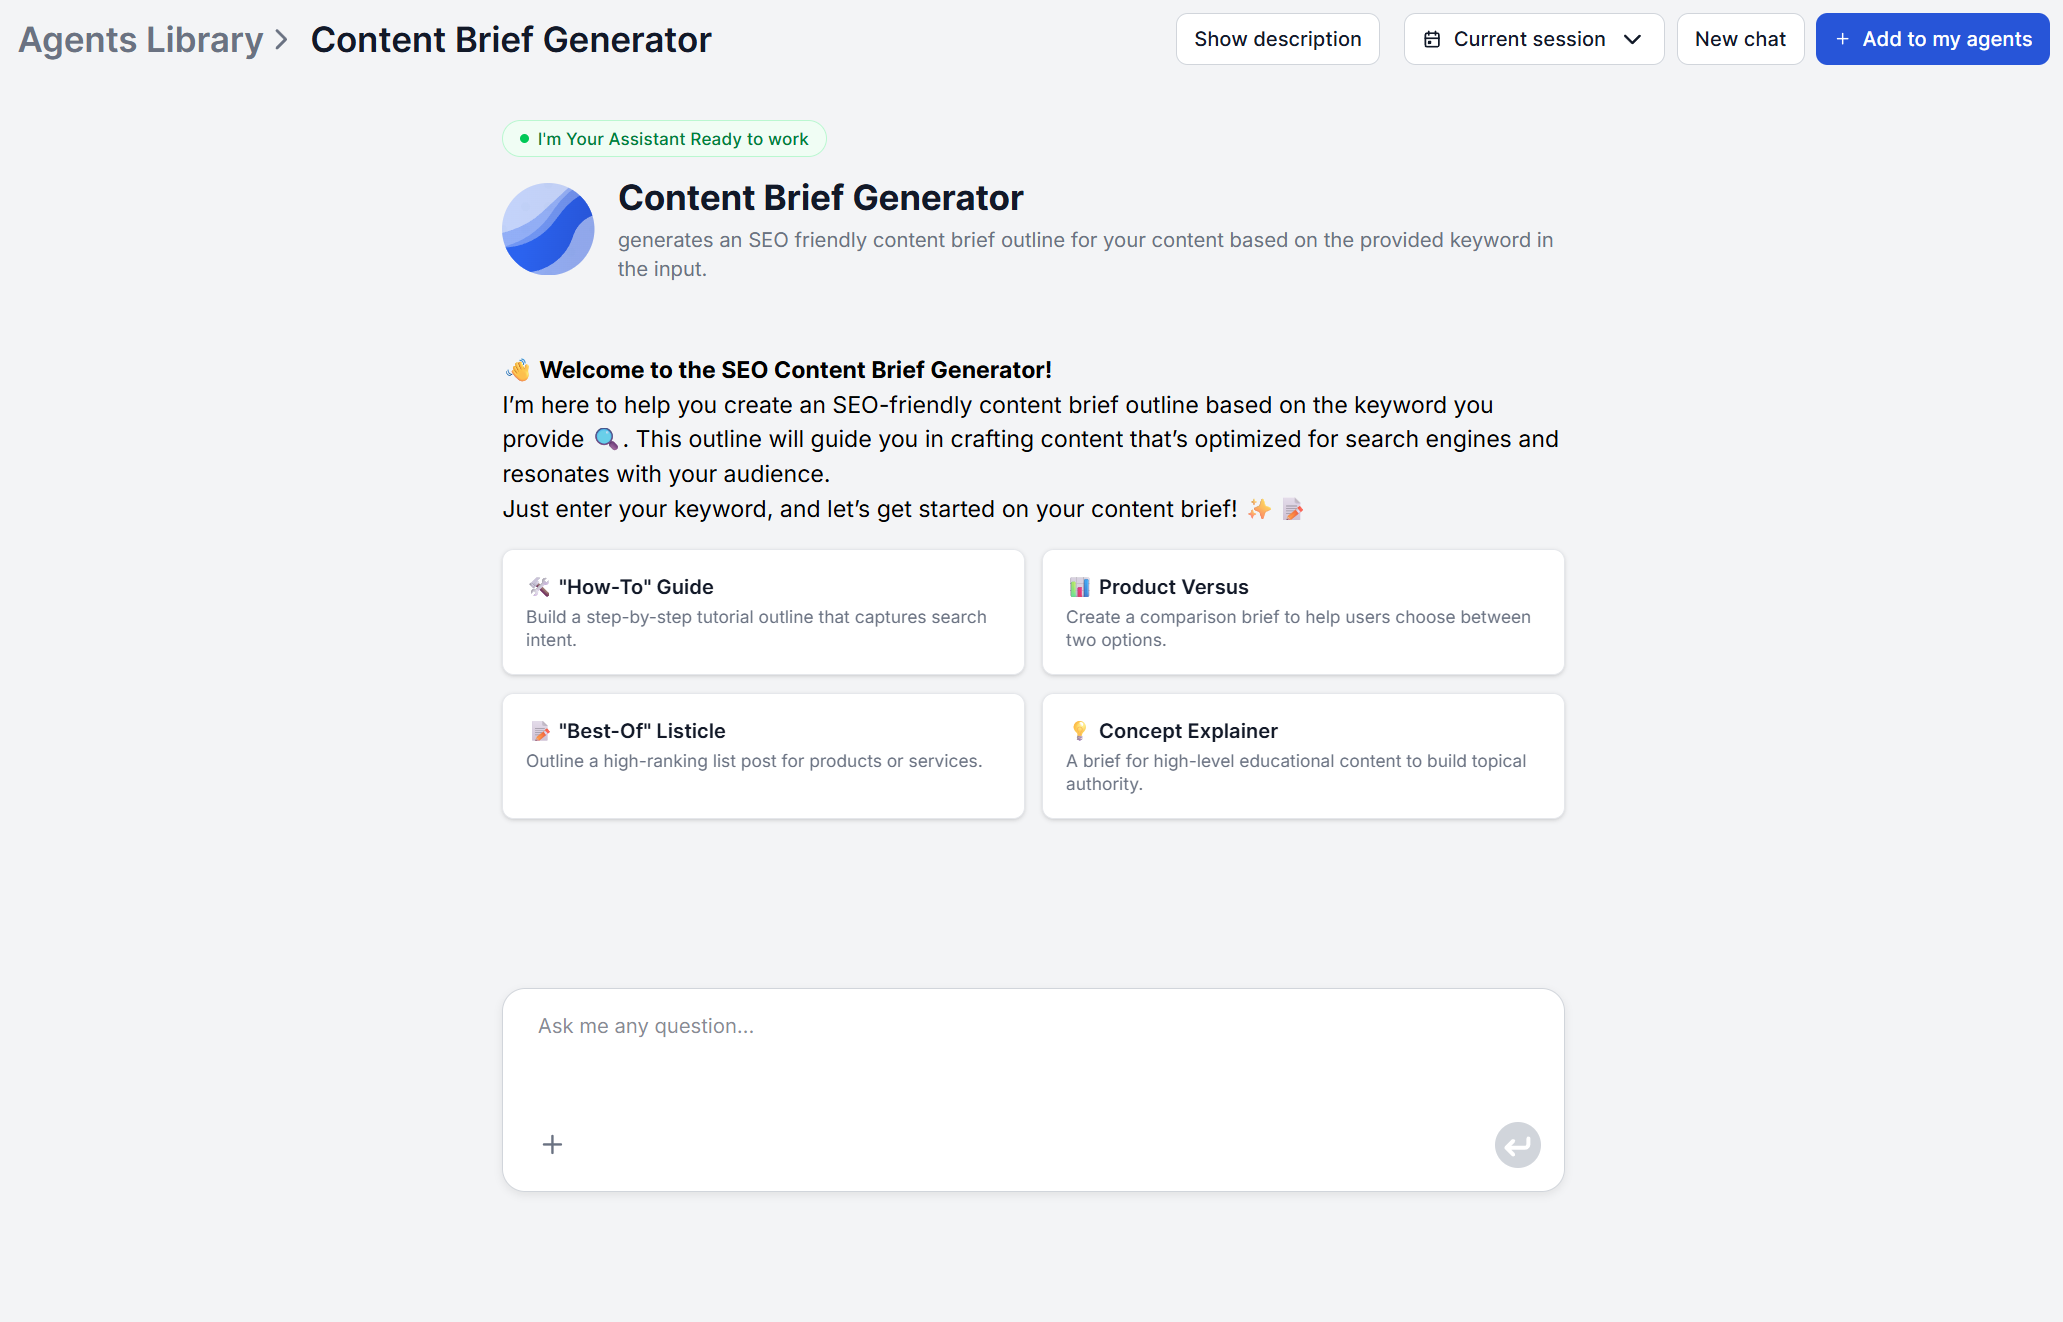
Open the Content Brief Generator and type your primary keyword into the chat interface. That’s the entire input. No URL is required and none is used anywhere in this flow. If the output feels ambiguous, try a slightly more specific phrasing of the same keyword.

Start your free trial today and see results within days.
Once you submit the keyword, the generator searches Google for that keyword, identifies the top-ranking URLs, and retrieves their content. There’s nothing to configure or click through during this phase. It’s the research step the rest of the brief is built on, and it happens before the AI agent writes anything. This is also why the keyword you choose in Step 1 matters more than anything else you’ll do in this workflow.
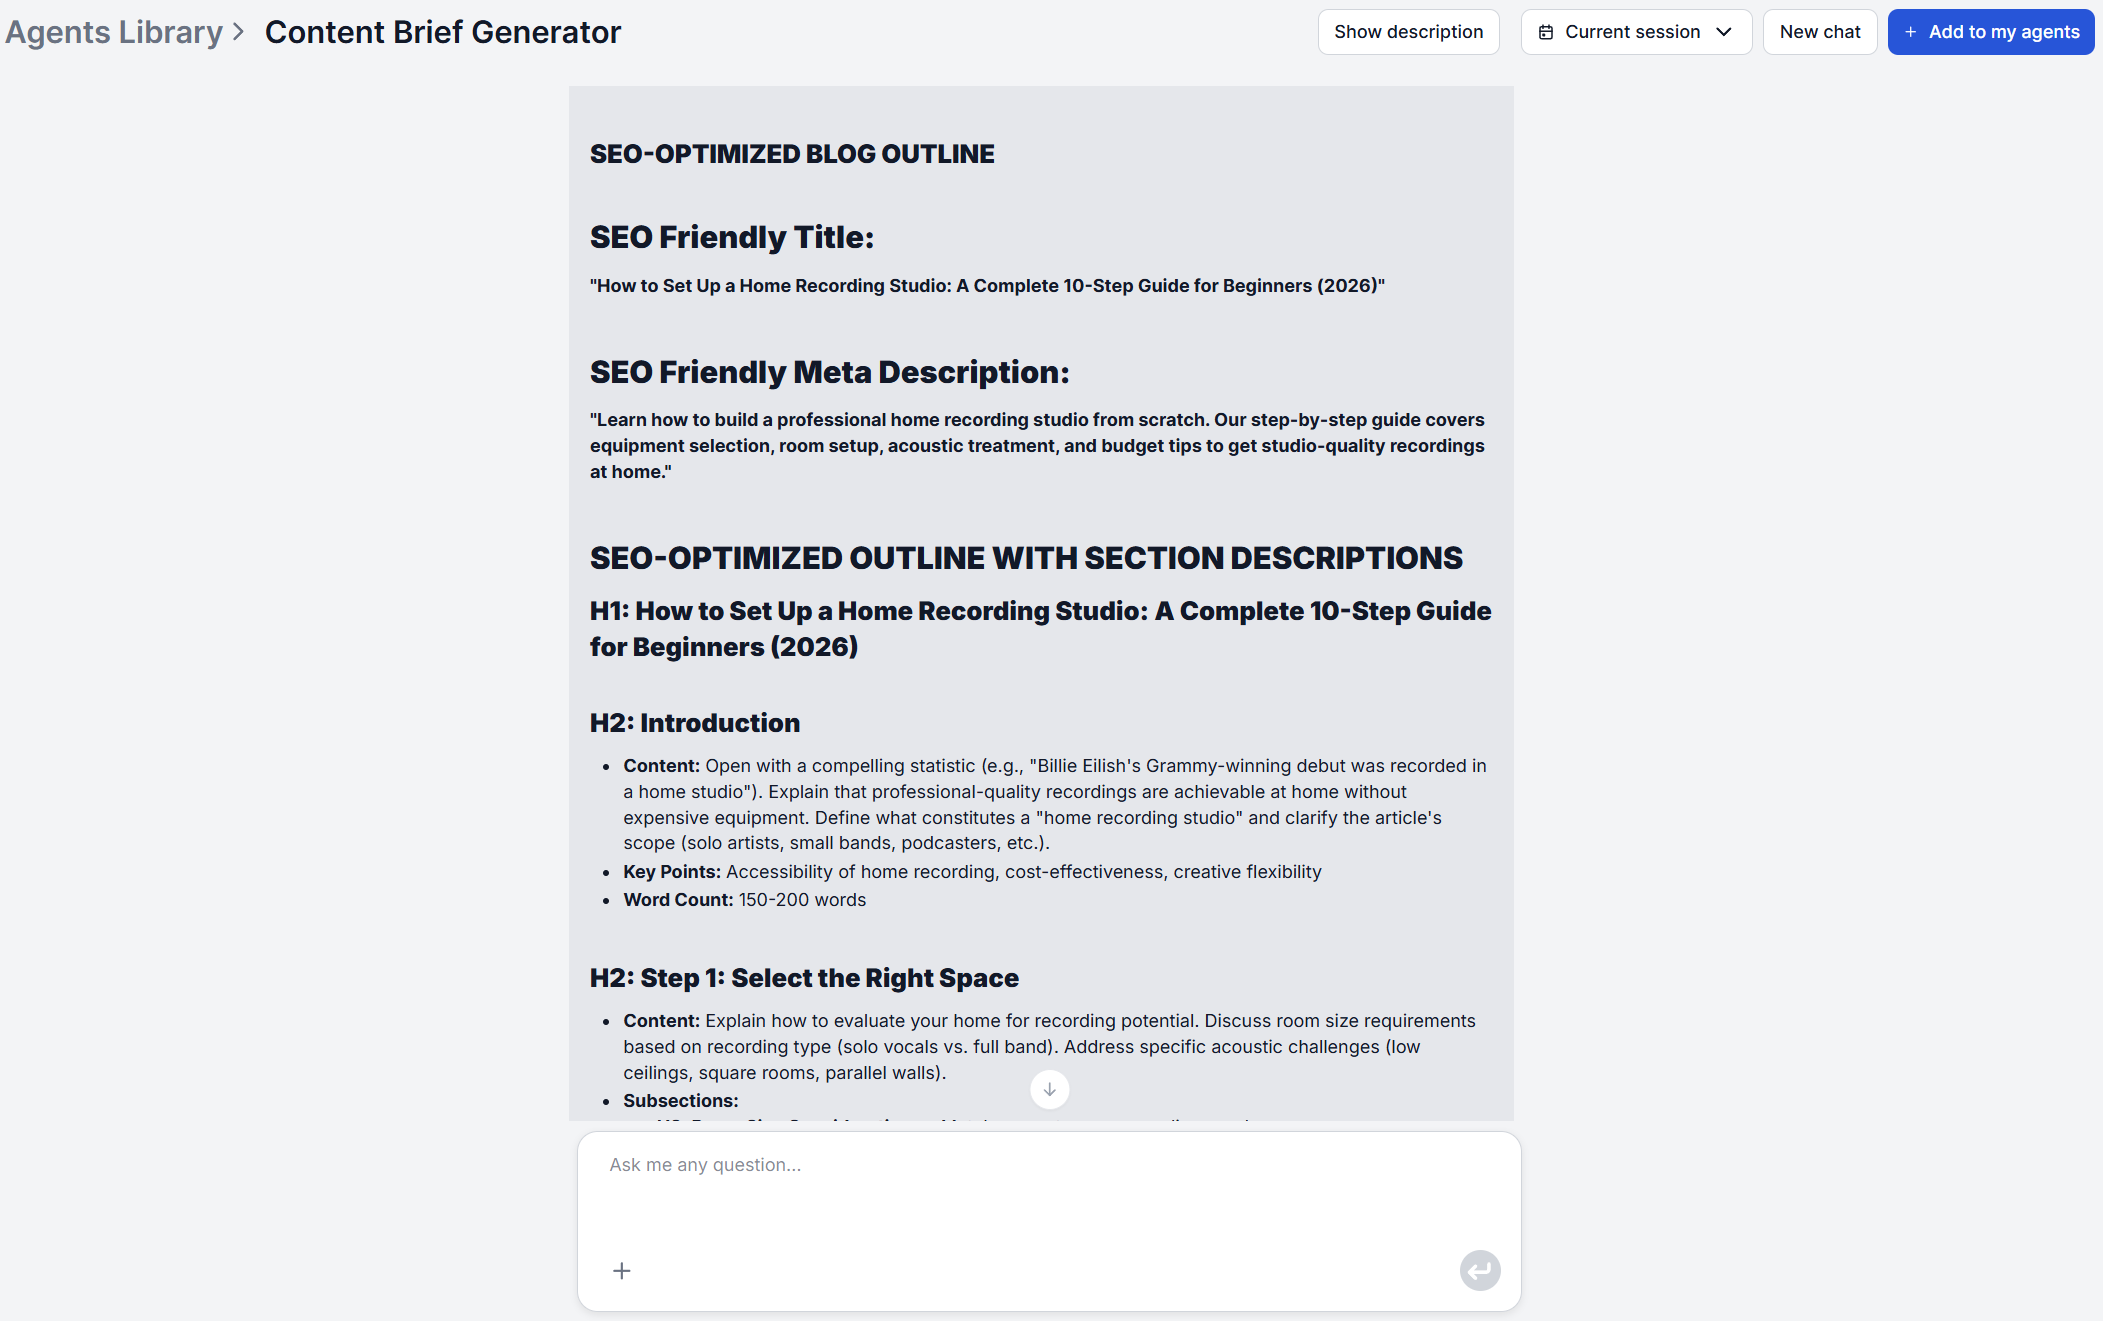
The output arrives as a single, fixed-format result. An SEO-friendly title, meta description, and a section-by-section outline where each heading comes with a description of what that paragraph should cover. This is generated by an AI agent that analyzed the structure and topics of the top-ranking pages before writing the brief. In other words, the outline reflects what’s actually ranking, not a generic template applied to your keyword.
There’s no separate report for search intent or competitor gaps shown alongside it. That analysis happens inside the research and structure-analysis steps, and its result is the outline itself. The sections and their descriptions are the output of that analysis, not a second document to cross-reference.
The brief always follows the same three-part shape:
SEO-friendly Title:
SEO-friendly Meta Description:
SEO-friendly Outline (with a description of what each paragraph should contain):
Get latest tips, trends, and deals for free.
When first running the agent, read the outline start to finish before changing anything. It’s worth seeing the unedited default. From there, you can edit the output directly or adjust the undrelying flow logic and prompt to make sure future output is more in line with what you need.
For example, if the generated outline gives you a section description like “Explain what the tool does and who it’s for,” and you know your readers already understand that from a previous page, tighten it to something like “Skip the intro, link back to [existing page], and go straight into setup.” That kind of angle-specific instruction is exactly what a writer needs and exactly what the AI, working only from public competitor pages, has no way to know on its own.
If a brief comes back with phrasing or depth that doesn’t match your brand, there’s no toggle in the chat window to fix that going forward, as the input is only ever a singular keyword. To make a lasting change, open the flow in FlowHunt’s visual builder and edit the prompt template the AI agent works from, adding your tone, formatting, or depth requirements directly into it. Do this once and every future brief generated from that flow carries the adjustment, instead of manually fixing the same thing on every run.
The brief lives in the chat output as plain text, so the direct path is copying it into wherever your writers take assignments . If you’d rather not copy-paste every time, FlowHunt connects to tools like Notion, Google Docs, Slack, and more through MCP servers, so the brief can land directly wherever you need.
TIP: No writer lined up, short on time, or just want to see the brief turned into an actual draft? Feed the same keyword into the AI Blog Writer and skip straight from brief to draft.
The entire workflow is one input and one output. A keyword goes in, a structured title, meta description, and outline come out, built from a live look at what’s actually ranking. All that’s left to do is review and edit. Customization happens after that core output exists, either as a direct edit to the text or as a change to the flow itself. Start with one keyword you’re planning to write about next, and read the unedited brief before touching anything. Browse more walkthroughs like this one in the academy .
FlowHunt's Content Brief Generator takes a single keyword and returns an SEO-friendly title, meta description, and a full section-by-section outline — no setup required.
Generate SEO-optimized content briefs from a single keyword with FlowHunt's Content Brief Generator. Get an SEO-friendly title, meta description, and a detailed...
A step-by-step walkthrough of generating your first blog post with FlowHunt's Blog Content Agent, from entering your topic to publishing a fully optimized artic...
An AI content brief tool comparison across FlowHunt, Surfer SEO, Clearscope, Frase, and NeuronWriter — brief quality, SEO depth, writer usability, and pricing....
Cookie Consent
We use cookies to enhance your browsing experience and analyze our traffic. See our privacy policy.