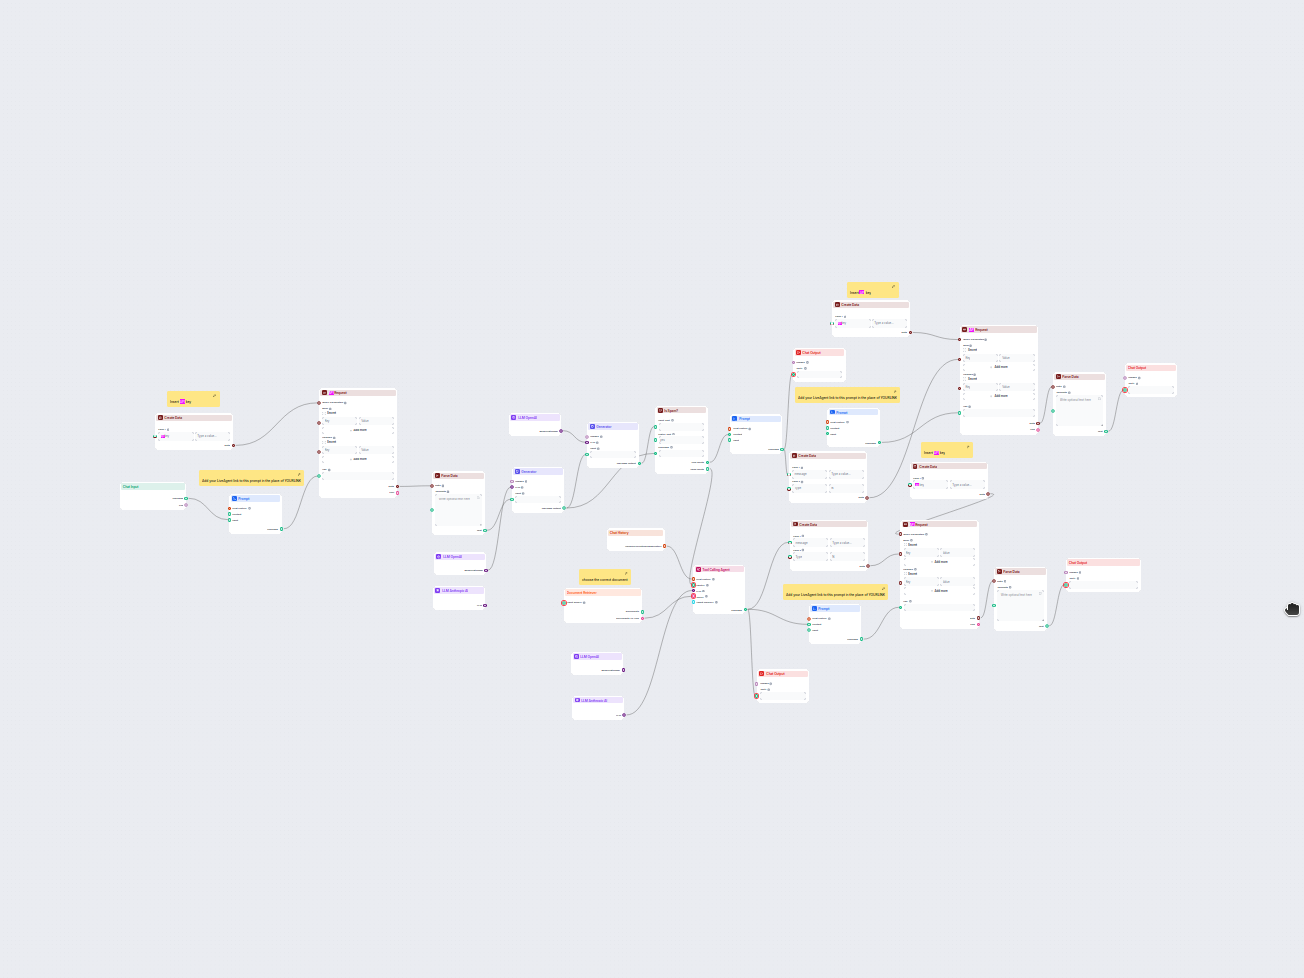
The Email & Chat Automation Flow comes pre-built with the core logic and structure already configured. However, to make it work for your specific business, you need to customize several key components: API credentials, URLs, knowledge base connections, and response policies. This guide walks you through exactly what needs to be changed and where to find each setting.
Required Changes Checklist
Before you start, gather these items:
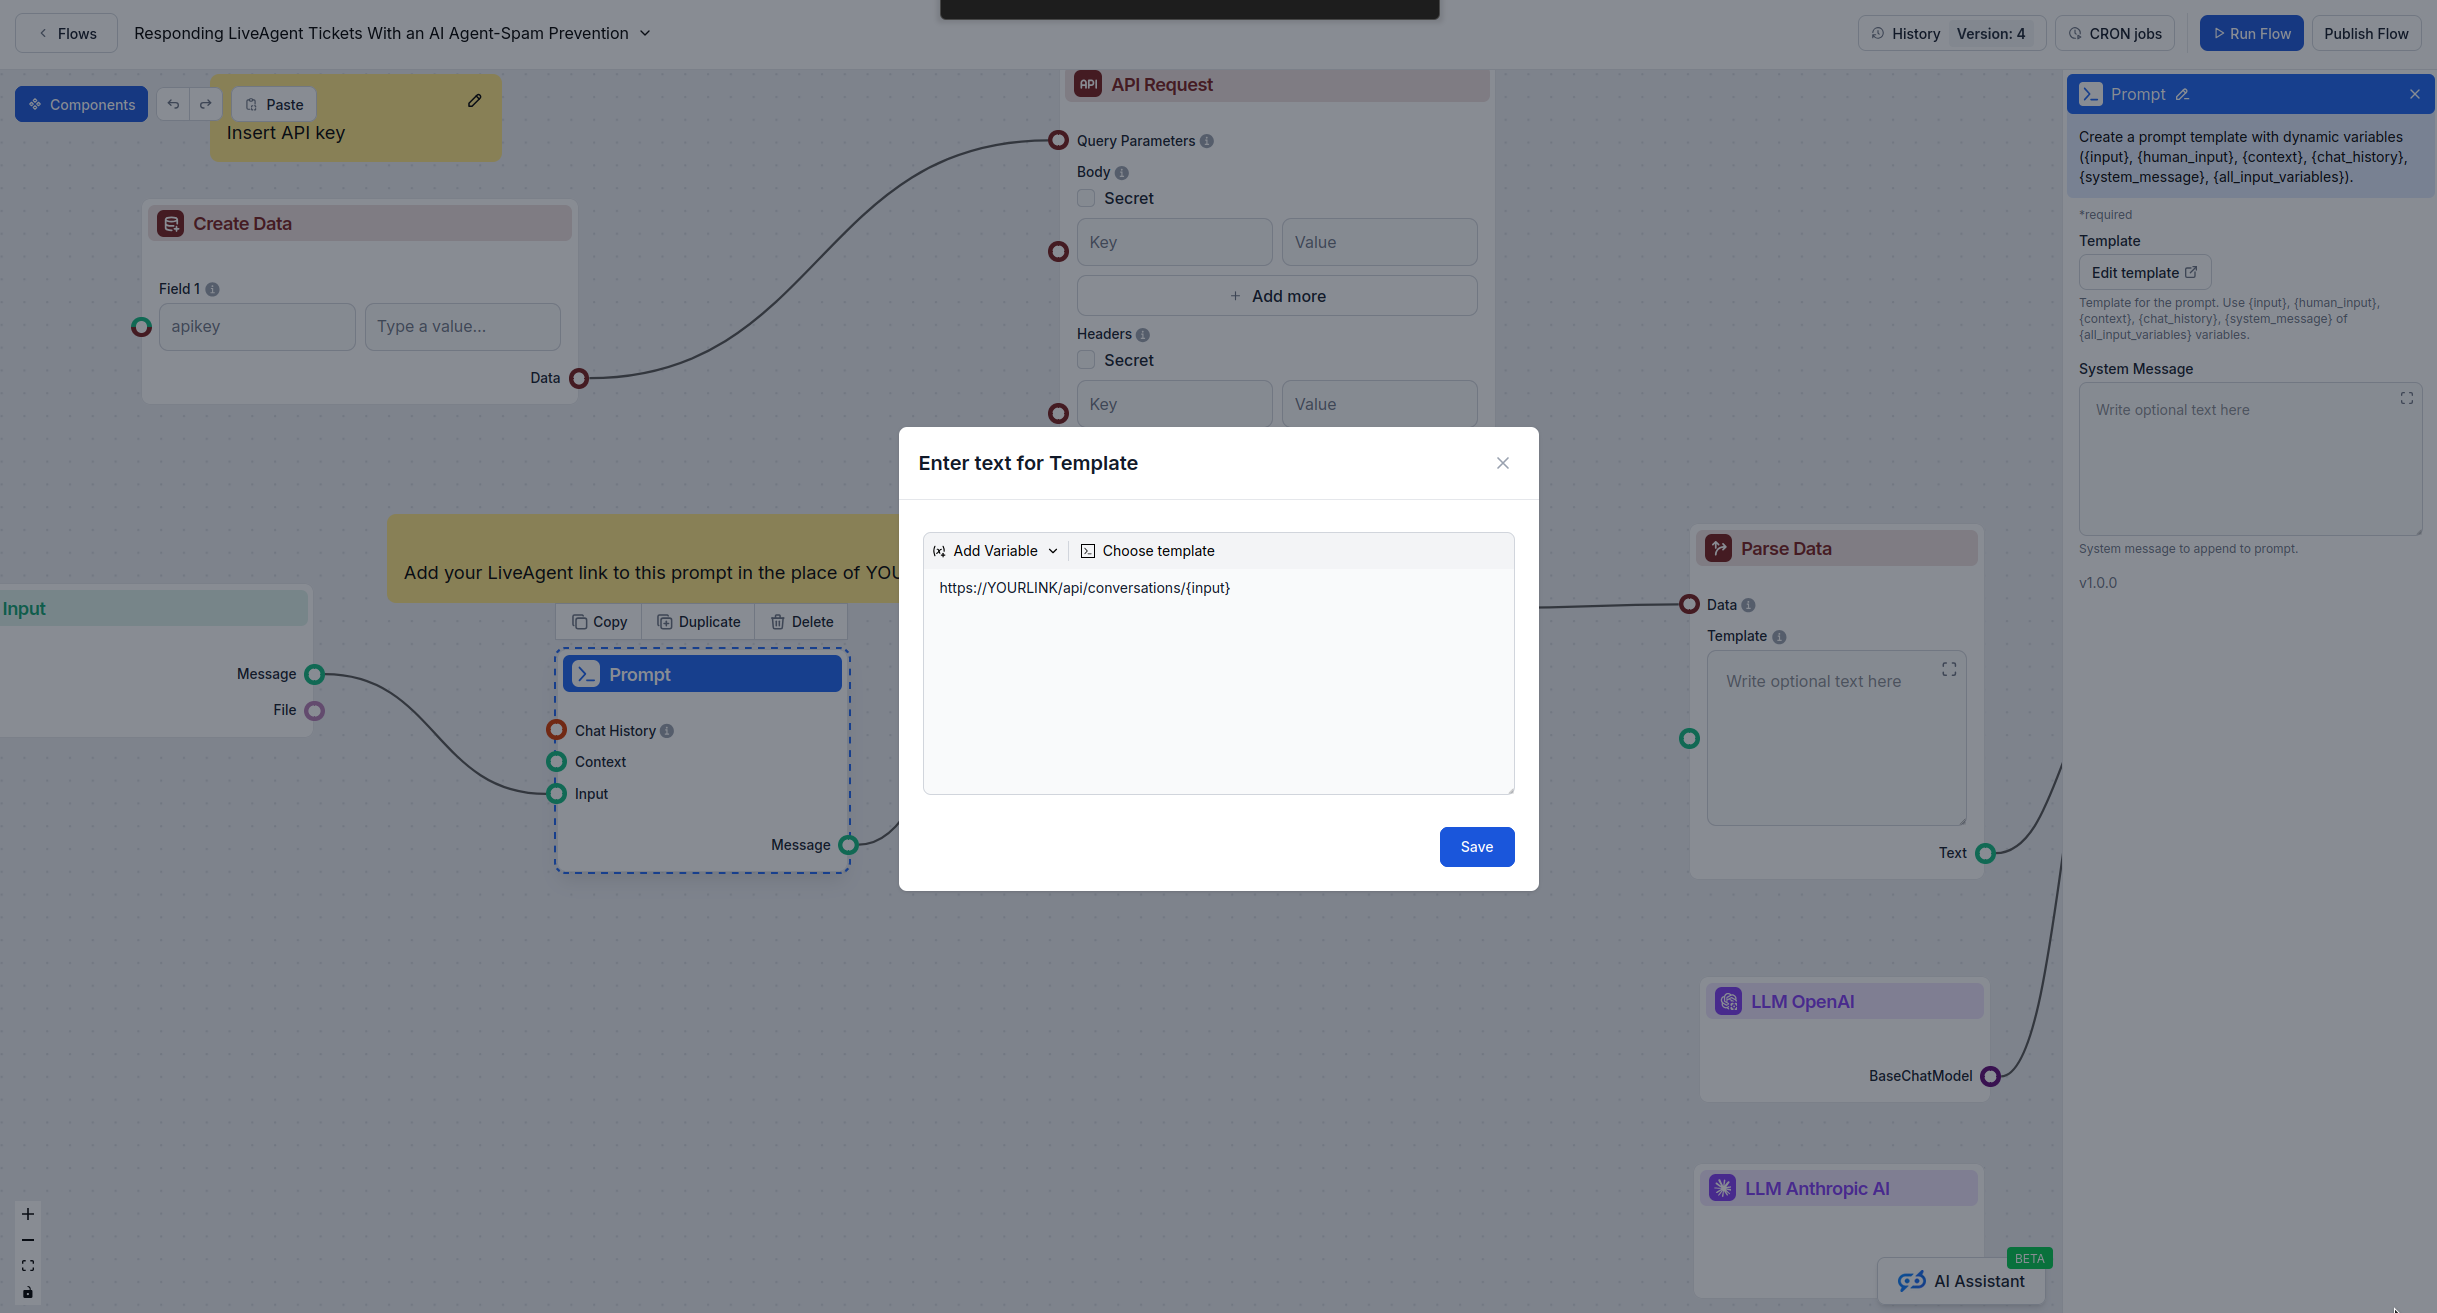
✅ LiveAgent API key and workspace URL (if integrating)
✅ Your knowledge base documents uploaded to FlowHunt
✅ Your brand voice and support policy guidelines
Ready to grow your business?
Start your free trial today and see results within days.
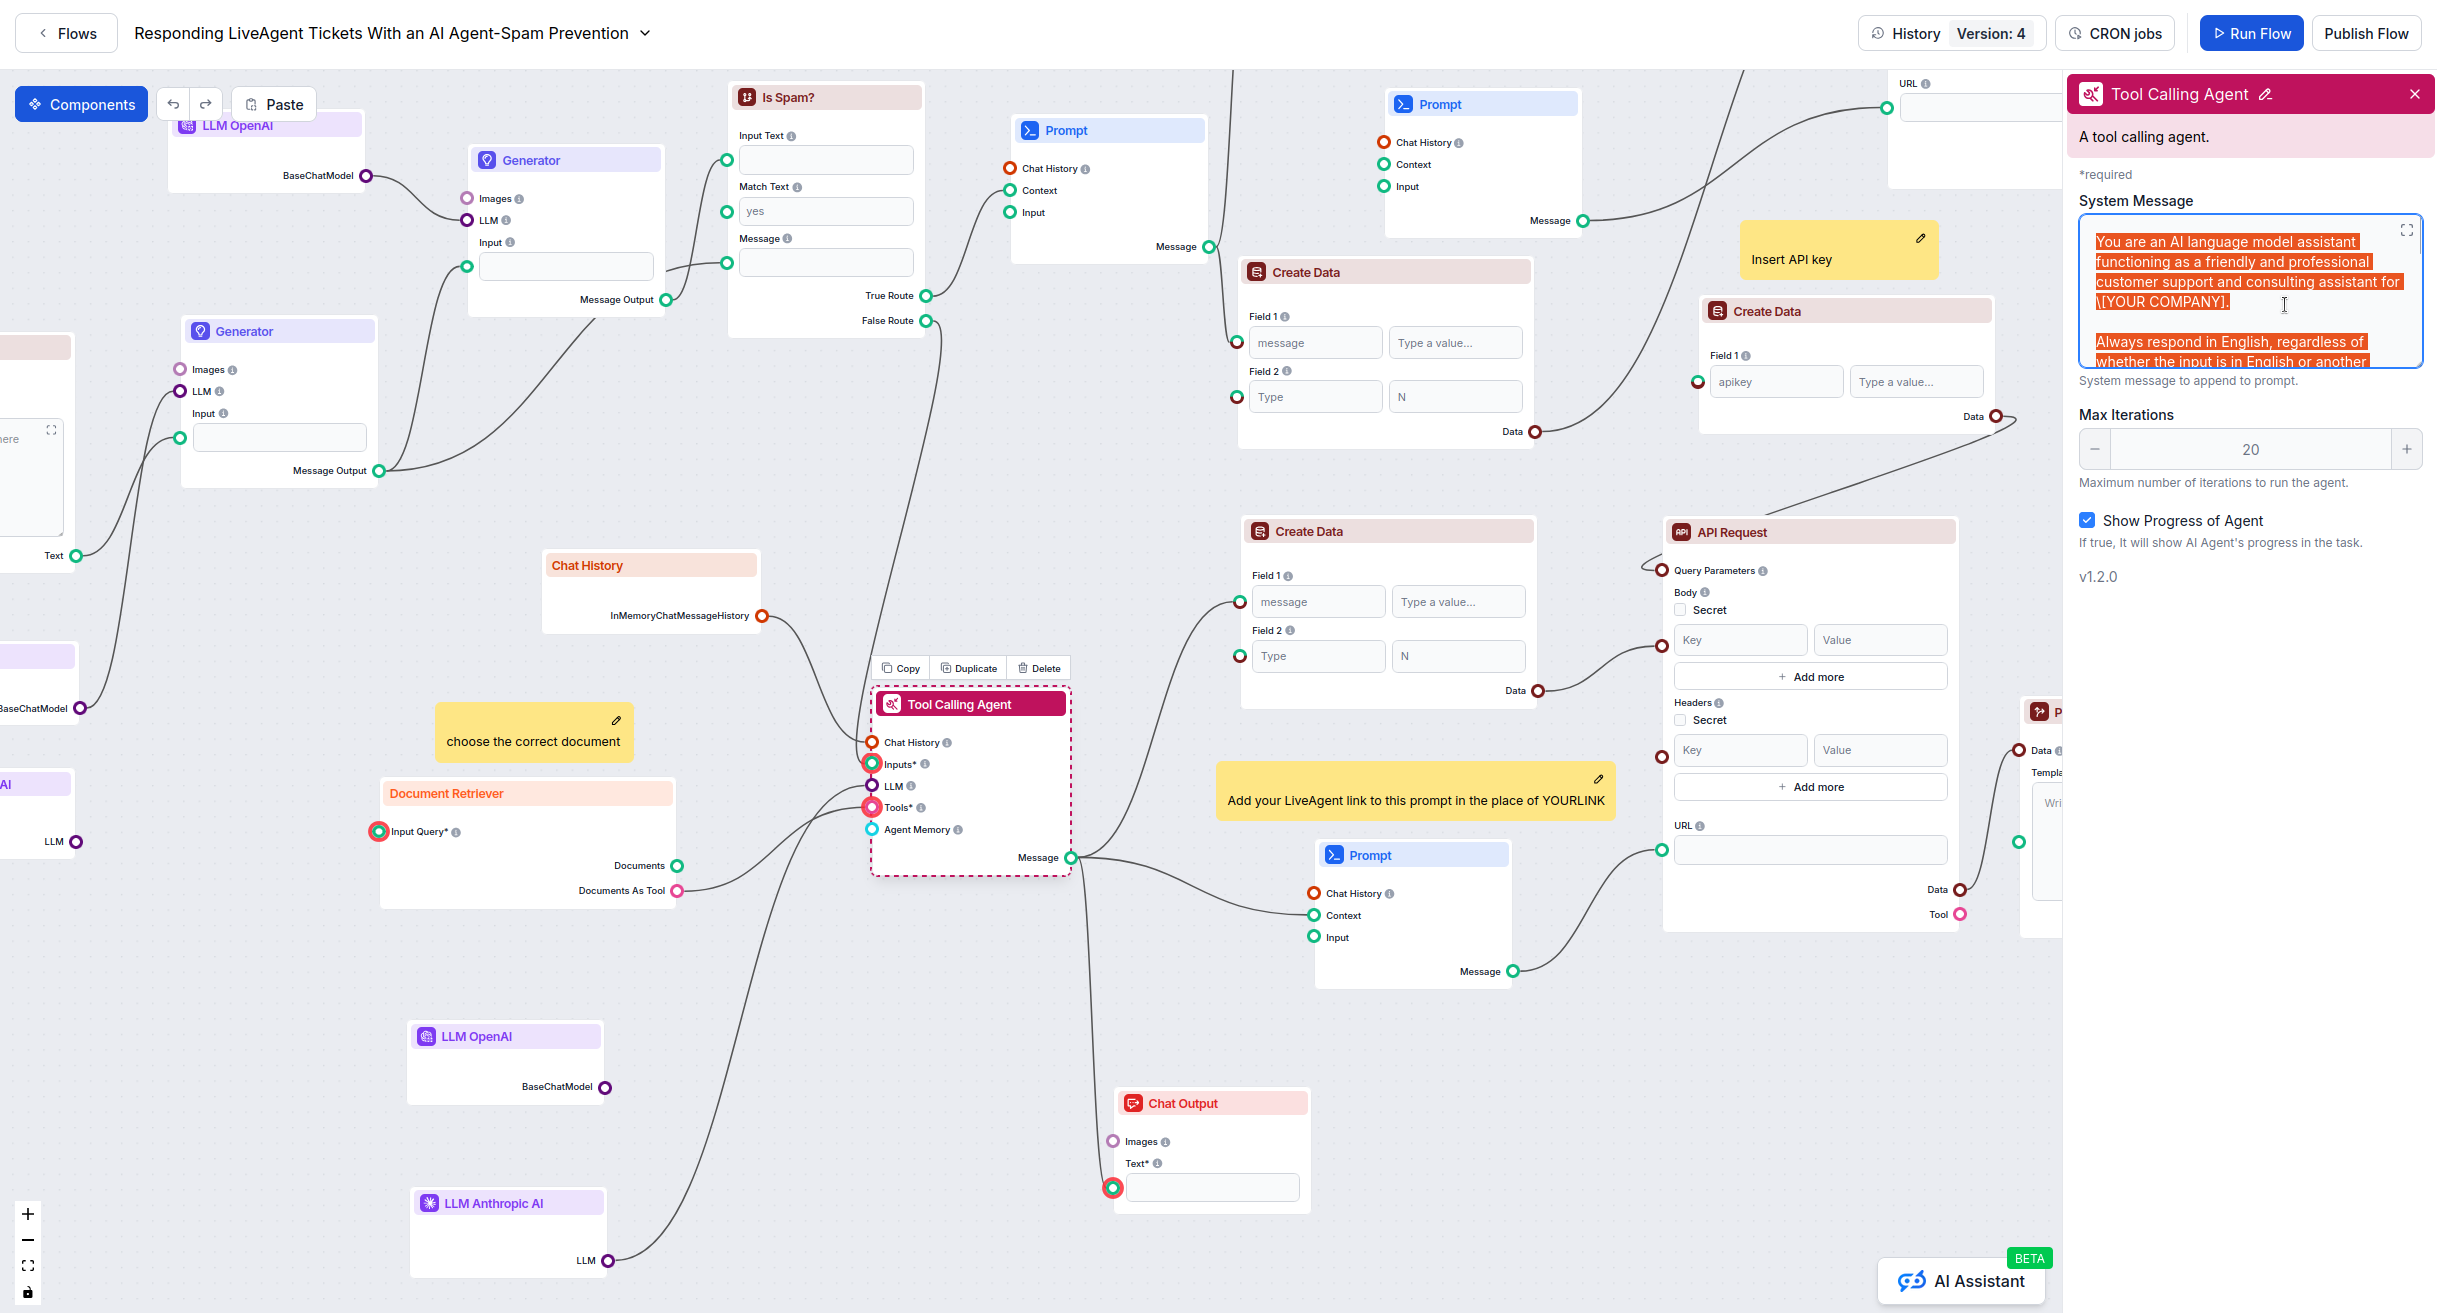
This is the most important customization—it defines how your AI agent behaves.
Click the Tool Calling Agent node
Find the System Message field (large text area)
Replace or modify the default guidelines
Key sections to customize:
Response Language:
Always respond in [YOUR LANGUAGE] regardless of input language.
Brand Voice:
Use a [formal/casual/friendly] tone. Address customers as [you/valued customer/etc].
Citation Rules:
When referencing documentation, cite sources as: [your format]
Include URLs in the format: [your format]
Limitations:
Do not discuss: [topics outside your scope]
Do not provide: [financial advice/medical info/etc]
Escalation Policy:
If unable to help, guide customers to: [contact method/ticket system]
Common Configuration Issues
API Connection Failed:
Double-check URL format (include https://)
Verify API key is correct and active
Check workspace URL matches your LiveAgent account
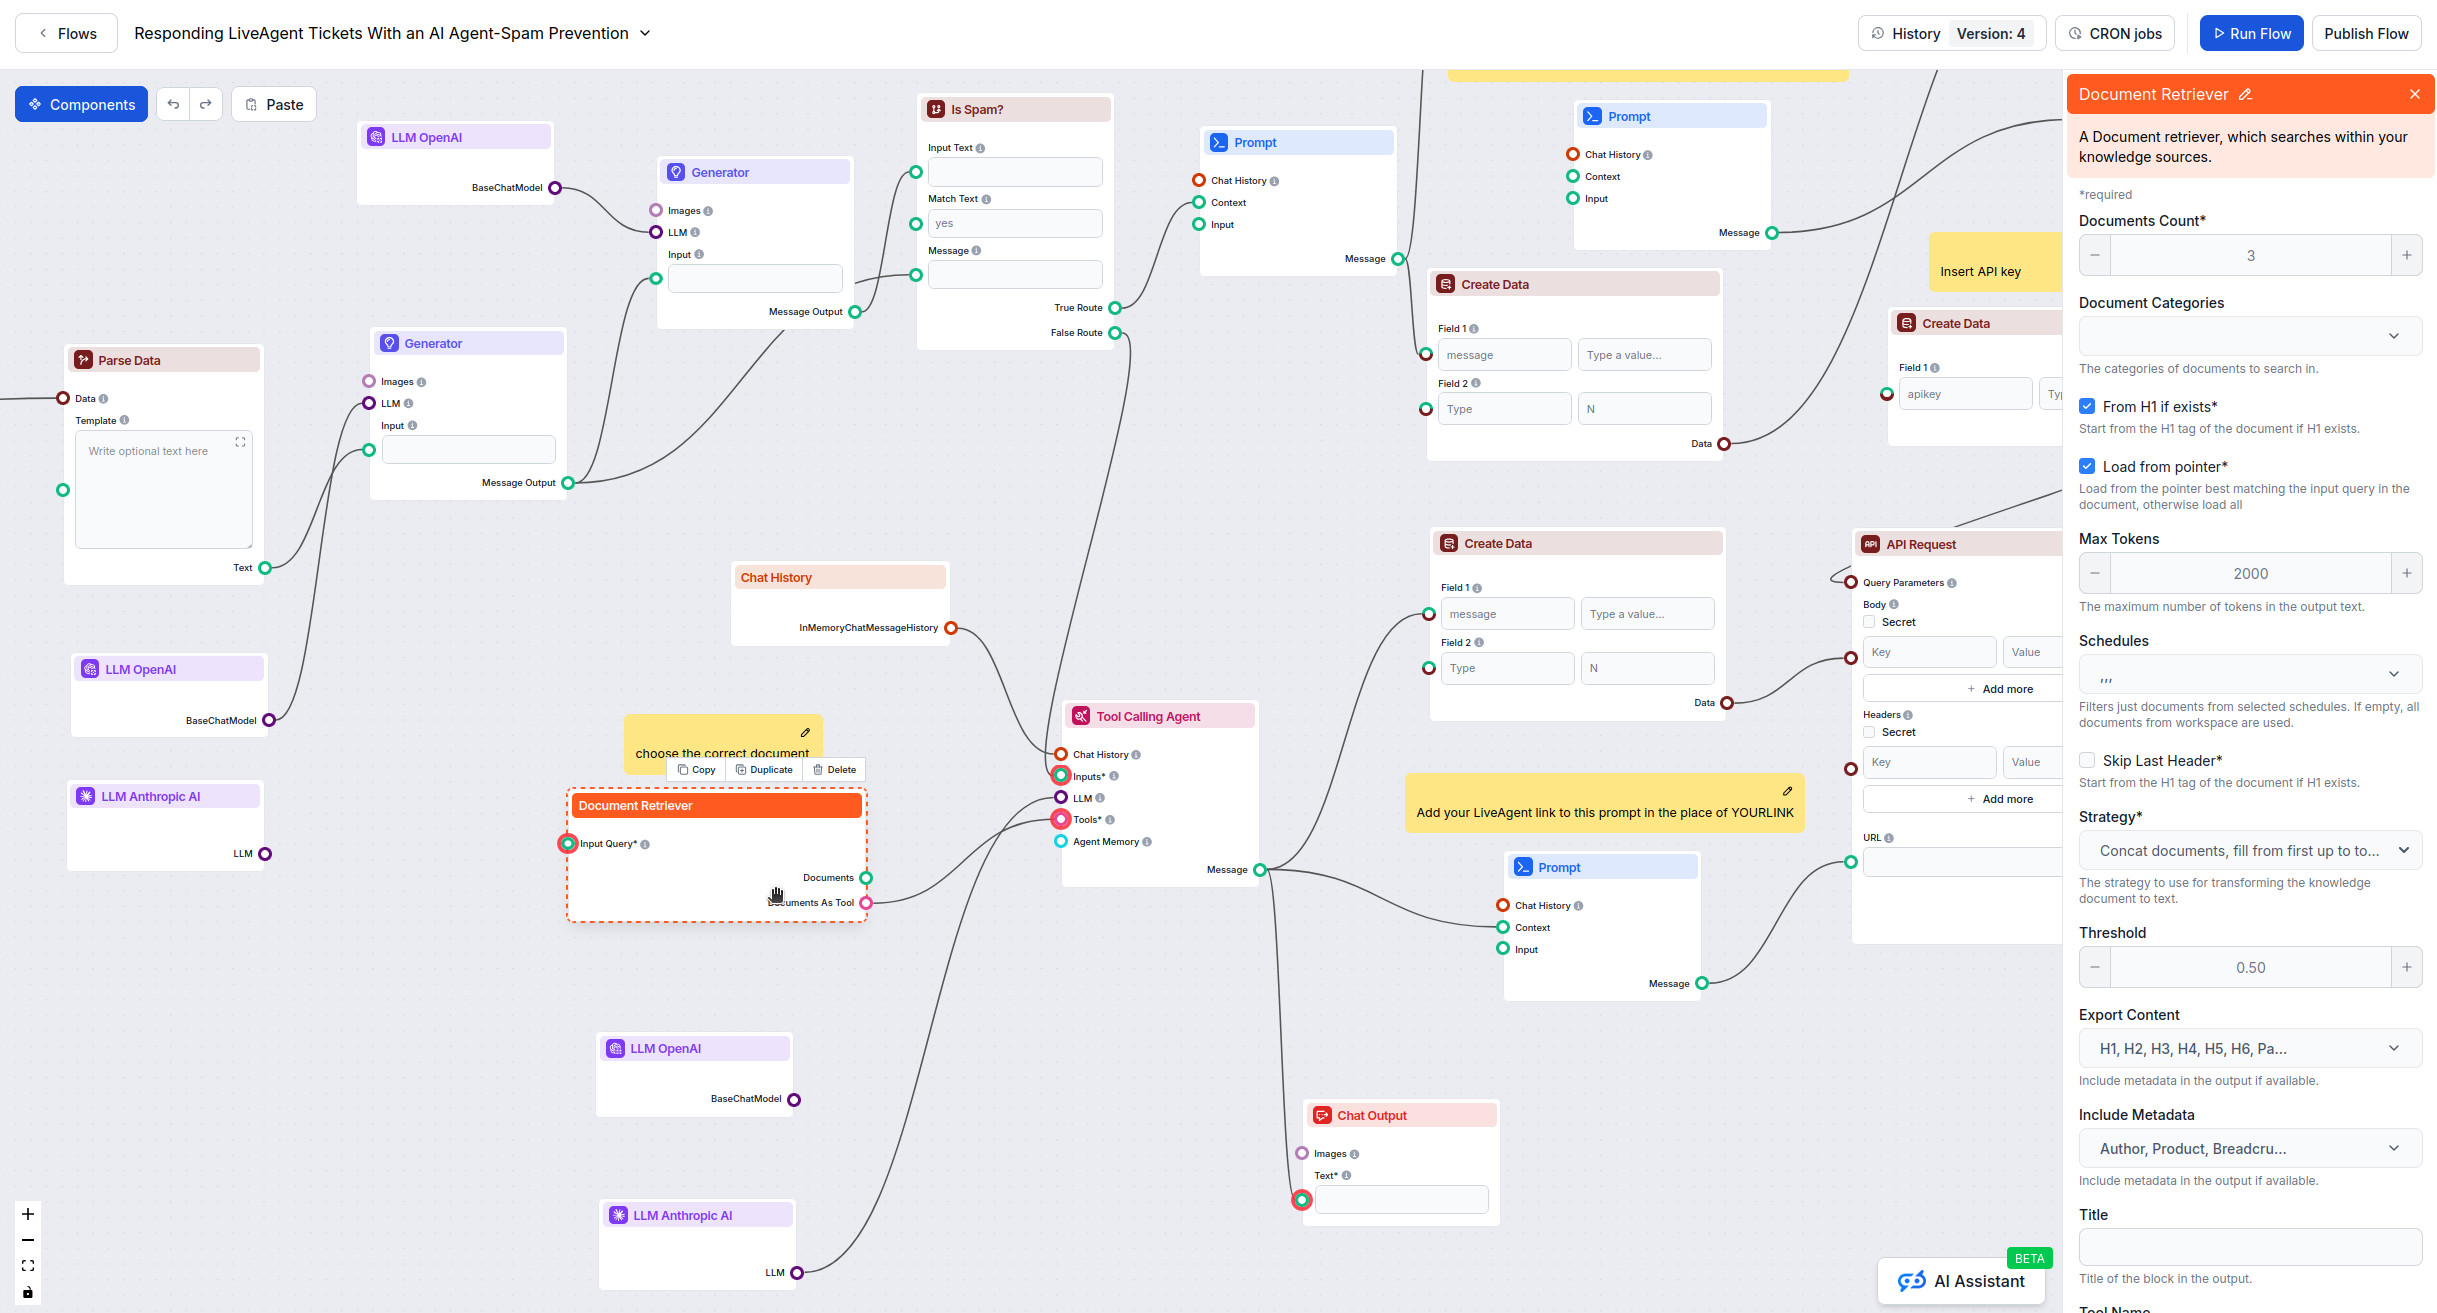
Agent Not Finding Documents:
Verify documents are in selected categories
Check Document Retriever is connected to agent
Ensure documents contain relevant content
Responses Not Following Guidelines:
Review system message for clarity
Check temperature isn’t too high (>0.7)
Test with specific examples to refine prompts
Spam Detection Too Aggressive/Lenient:
Adjust the spam classification prompt in OpenAI node
Provide more specific examples of spam vs. legitimate messages
Consider adding conditional logic for edge cases
Multi-Language Support
For international customers:
Modify system message to detect input language
Add language detection conditional logic
Configure agent to respond in detected language
Going Live Checklist
Before deploying to production:
✅ All “YOURLINK” placeholders replaced
✅ API keys configured and tested
✅ Knowledge base documents verified
✅ System message customized for your brand
✅ Flow tested with realistic customer messages
By completing these configuration steps, your email and chat automation flow will be customized for your business and ready to handle customer interactions automatically.
Frequently asked questions
What information do I need before configuring this flow?
You need your OpenAI API key, Anthropic API key, LiveAgent API credentials (if using), your LiveAgent workspace URL, and access to your knowledge base documents in FlowHunt.
Where do I find the placeholder values that need to be replaced?
Look for 'YOURLINK' in API Request nodes, placeholder API keys in headers sections, and default system messages in the Tool Calling Agent. These all need to be customized for your setup.
Do I need to configure both spam detection and the AI agent?
Yes, both components require configuration. The spam detection needs API setup (if using LiveAgent) and model credentials, while the AI agent needs your knowledge base connected and system message customized.
Can I use this flow without LiveAgent?
Yes, you can remove or disable the LiveAgent API Request nodes if you're not using LiveAgent. The spam detection and AI agent will still function for direct chat interactions.
Advanced FlowHunt–LiveAgent Integration: Language Control, Spam Filtering, API Selection, and Automation Best Practices
A technical guide to mastering advanced FlowHunt integration with LiveAgent, covering language targeting, markdown suppression, spam filtering, API versioning, ...
How to Connect Your LiveAgent Account to a FlowHunt Flow
A comprehensive guide for integrating your LiveAgent (LA) account with a FlowHunt automation flow, including setup steps, message configuration, and support acc...
FlowHunt JS API: Integration Guide for Advanced Users
Complete reference for the FlowHunt JS API v2 integration. Learn how to embed the chatbot, subscribe to all 10 events, use flow variables, track interactions wi...
8 min read
FlowHunt
JavaScript API
+3
Cookie Consent We use cookies to enhance your browsing experience and analyze our traffic. See our privacy policy.