What Is OpenClaw?
OpenClaw is a personal AI assistant that runs on your own computer. Think of it like having your own private chatbot, similar to ChatGPT or Claude, except it lives on a machine you own instead of on someone else’s servers. Your conversations stay with you, and you choose which AI powers it.
It’s free and open-source, and once it’s set up you can talk to it right from your computer or connect it to chat apps you already use. There are a couple of moving parts behind the scenes (the app itself, plus a small background helper that keeps it running and connects it to the AI), but you don’t need to understand any of that to get started. This guide handles it for you.
We’ll install OpenClaw from scratch on a Mac, step by step, and check that it’s working. Everything you see below is from a real install of OpenClaw 2026.6.1: same commands, same screens you’ll get.
Why Run It Yourself?
- Your computer, your data. Your chats and settings stay on your own machine, not on a company’s servers.
- Use any AI you like. Plug in a paid AI like Claude or GPT, or a free one that runs on your computer, and switch any time without starting over.
- One assistant, everywhere. Set it up once and reach the same assistant (with the same memory) from your computer or your phone.
- Private by default. Out of the box it only listens on your own computer; nothing is exposed to the internet unless you choose to open it up.
Ready to grow your business?
Start your free trial today and see results within days.
Prerequisites
Before you start, make sure you have:
- Node.js 24 (recommended) or Node 22.19+. Check with
node --version. If you are below 22.19, install Node 24 first via nodejs.org , Homebrew (brew install node), or nvm. - A supported OS: macOS, Linux, or Windows (native or WSL2).
- A terminal you are comfortable working in.
- An account or API key for at least one model provider (Anthropic, OpenAI, Ollama running locally, etc.). You will plug this in during onboarding; you do not need it to install.
- pnpm, only if you intend to build from source. The script and npm installs do not need it.
Installing OpenClaw
There are three supported ways to install. Pick one.
Option A: One-line installer (recommended)
On macOS, Linux, or WSL2, the fastest path is the official installer script:
curl -fsSL https://openclaw.ai/install.sh | bash
This detects your platform, installs the CLI, and drops you straight into onboarding. If you want to install but configure later, skip the wizard:
curl -fsSL https://openclaw.ai/install.sh | bash -s -- --no-onboard
Option B: Global npm install
If you already manage Node and prefer npm, install the package globally:
npm install -g openclaw@latest
On a clean machine this pulls the CLI and its dependencies in a few seconds:
added 285 packages in 10s
macOS note: if the install errors out mentioning
sharp, run it again withSHARP_IGNORE_GLOBAL_LIBVIPS=1in front.
Option C: Build from source (contributors only)
If you want to run an unreleased commit or hack on OpenClaw itself, clone the pnpm workspace and build it. Plain npm install at the repo root is not supported; the repo is a pnpm workspace with bundled plugins.
git clone https://github.com/openclaw/openclaw.git
cd openclaw
pnpm install && pnpm build && pnpm ui:build
pnpm link --global
Whichever option you chose, confirm the CLI is on your PATH before continuing:
openclaw --version
OpenClaw 2026.6.1 (2e08f0f)
Join our newsletter
Get latest tips, trends, and deals for free.
Onboarding: openclaw onboard
Installing the CLI gives you the binary; onboarding configures it. This is the step that turns a freshly installed command into a working assistant. Run:
openclaw onboard --install-daemon
The --install-daemon flag installs a background service so the gateway starts on its own: a LaunchAgent on macOS, systemd on Linux. The wizard then walks you through everything one screen at a time. Here is the whole flow, step by step.
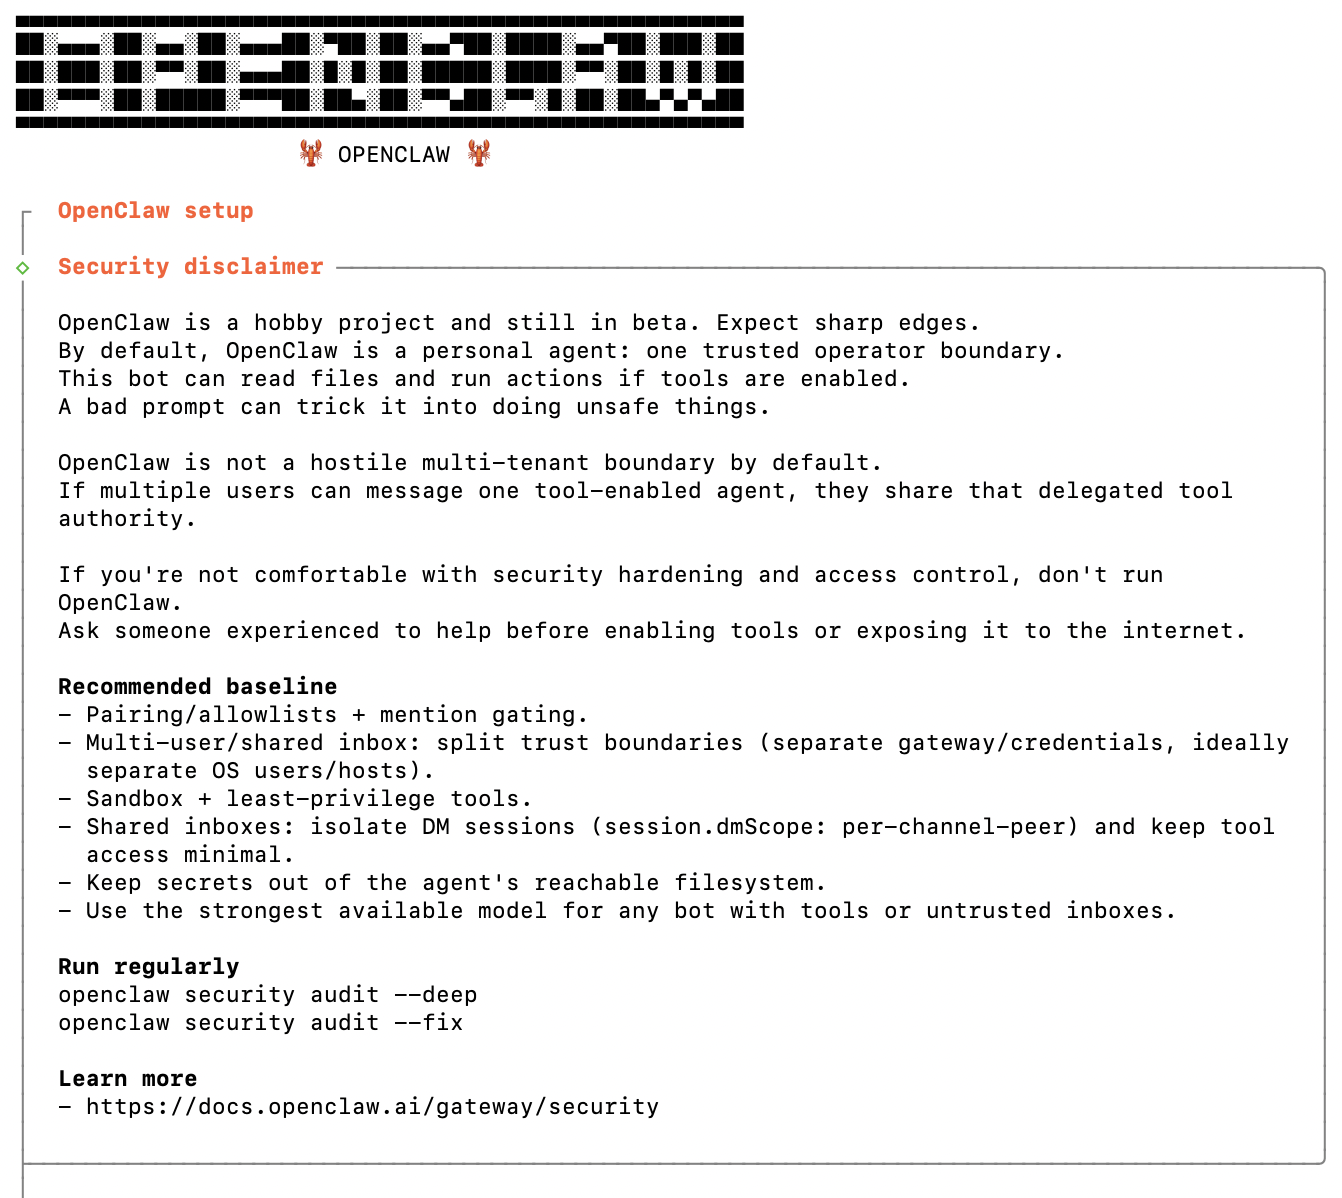
Step 1: Read the safety notice
OpenClaw opens with its banner and a short security disclaimer. It is a capable agent that can read files and take actions on your machine, so it asks you to confirm you understand before going any further. Type Yes to continue.
Step 2: Pick a setup mode
Choose QuickStart (recommended). It uses sensible defaults for everything that follows, so you can be running in about a minute. Manual setup and Import are there if you want full control later.

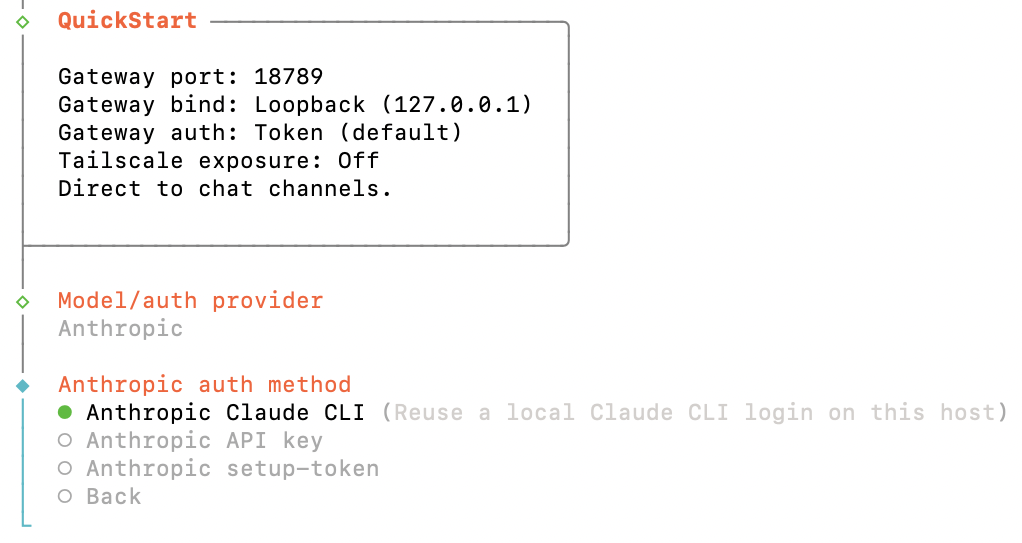
Step 3: Confirm the gateway and choose your AI
QuickStart shows the gateway defaults (port 18789, bind loopback / 127.0.0.1, token auth) and then asks which AI provider to use. Pick Anthropic, then choose how to sign in. Here we reused the local Claude login, but you can also paste an API key.
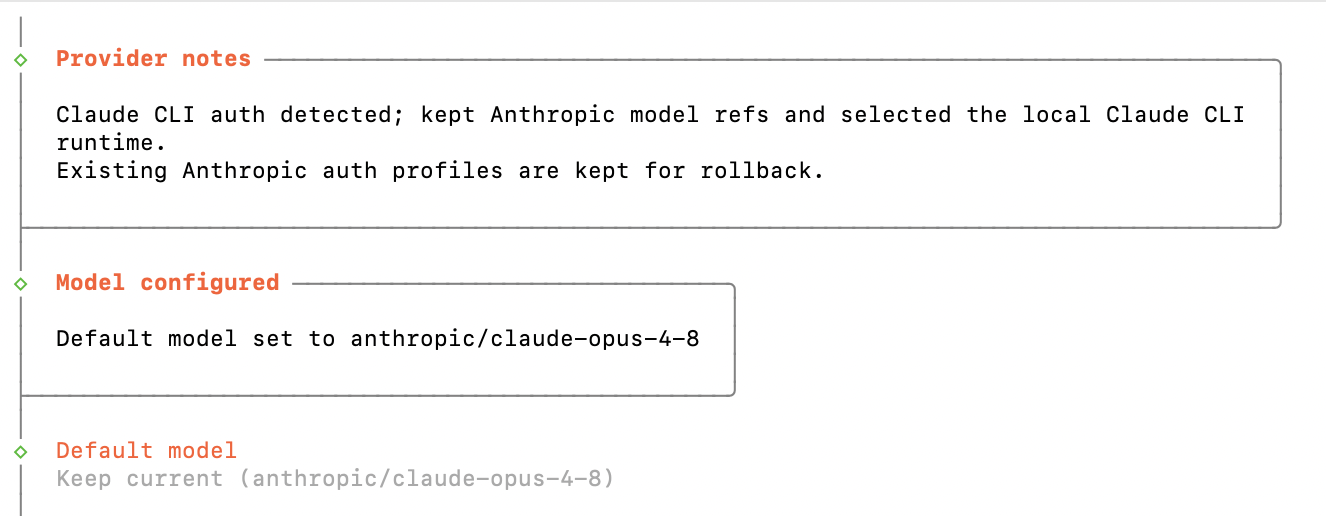
Step 4: Confirm the model
The wizard sets your default model (here claude-opus-4-8) and moves on to channels.
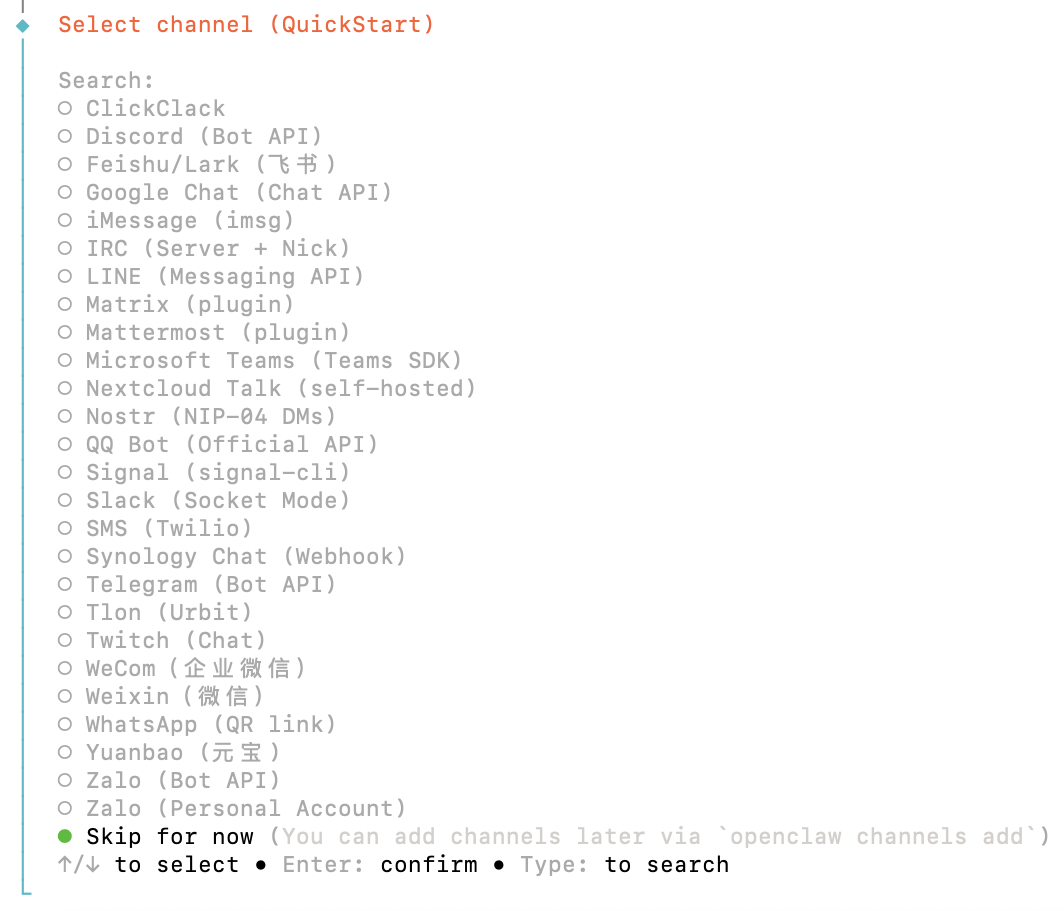
Step 5: Pick channels (or skip)
Channels let you talk to your assistant from apps like Telegram, Slack, or WhatsApp. Wire one up now, or just choose Skip for now and add them later.
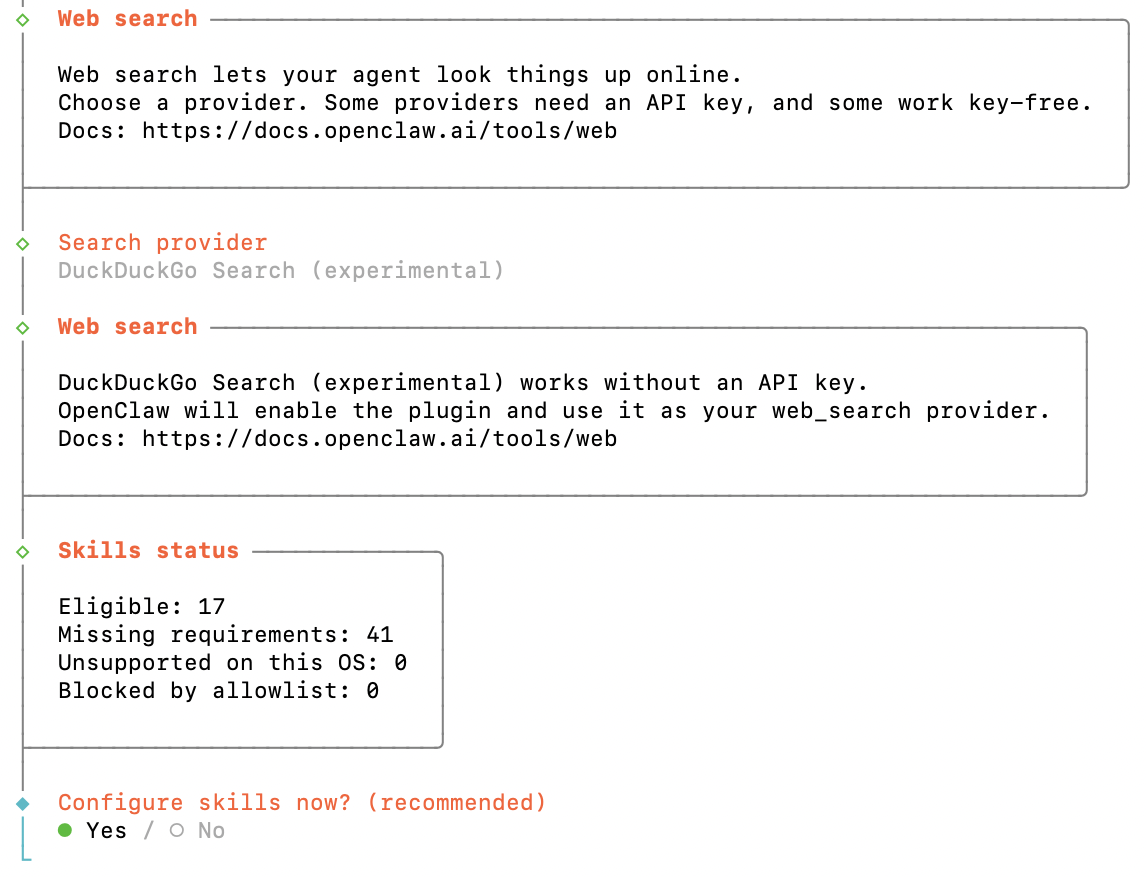
Step 6: Web search and skills
Next it offers a web-search provider (DuckDuckGo works without a key) and shows your skills status. Choose Yes to set up skills.
Step 7: Install the starter skills
Pick which skills to enable and the package manager to install them with (npm is fine).

Step 8: Dependencies installed
OpenClaw pulls the dependencies its skills need. You can safely decline the optional API keys it asks about; any skill that needs one just stays dormant until you add it. The wizard also offers hooks here, which I skipped, and then it finishes.
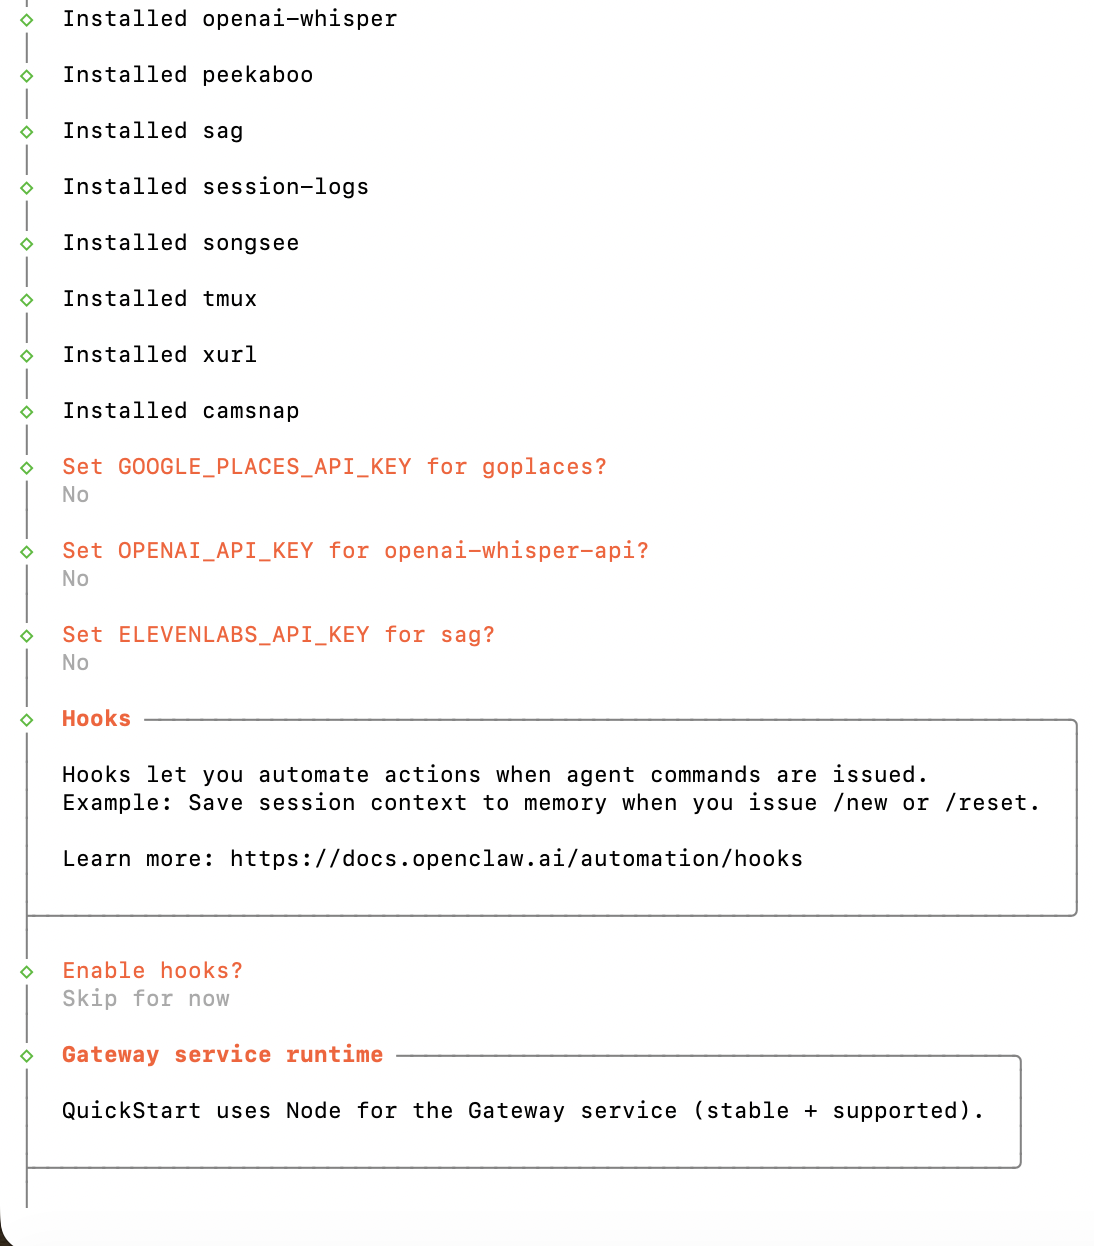
What are hooks? Hooks let OpenClaw automatically run an action whenever a certain command or event happens, so you do not have to do it by hand. A good example (the one the wizard shows) is saving your conversation to memory every time you start fresh with /new or /reset, so nothing useful is lost. Other handy uses include sending yourself a notification when a long task finishes, or logging every command for an audit trail. They are purely optional housekeeping, though, so it is completely fine to choose Skip for now like I did and turn them on later once you know what you want automated. That is the last question, after it, onboarding is complete.
Tip: running this on a server or in a script?
openclaw onboardcan take all its answers as flags so it runs with no prompts. Runopenclaw onboard --helpto see them.
Verifying the Install
Three commands confirm everything is wired up. Run them in order.
1. Confirm the CLI
openclaw --version
If this prints a version (OpenClaw 2026.6.1 (2e08f0f) here), the binary is installed and on your PATH.
2. Audit the configuration with doctor
openclaw doctor
doctor is OpenClaw’s self-check. It audits the gateway, your model auth, the command owner, state directories, and security posture, then tells you exactly what (if anything) to fix. Right after onboarding a fresh install you should see it report 0 plugin errors with the plugins loaded, plus a short triage list of non-blocking items worth knowing about (shown below).
None of those block you from using OpenClaw; they are the things to tidy up when you have a minute (set a command owner, re-auth before the token lapses). A clean doctor run is the fastest way to know your install is healthy.

3. Check the gateway is running
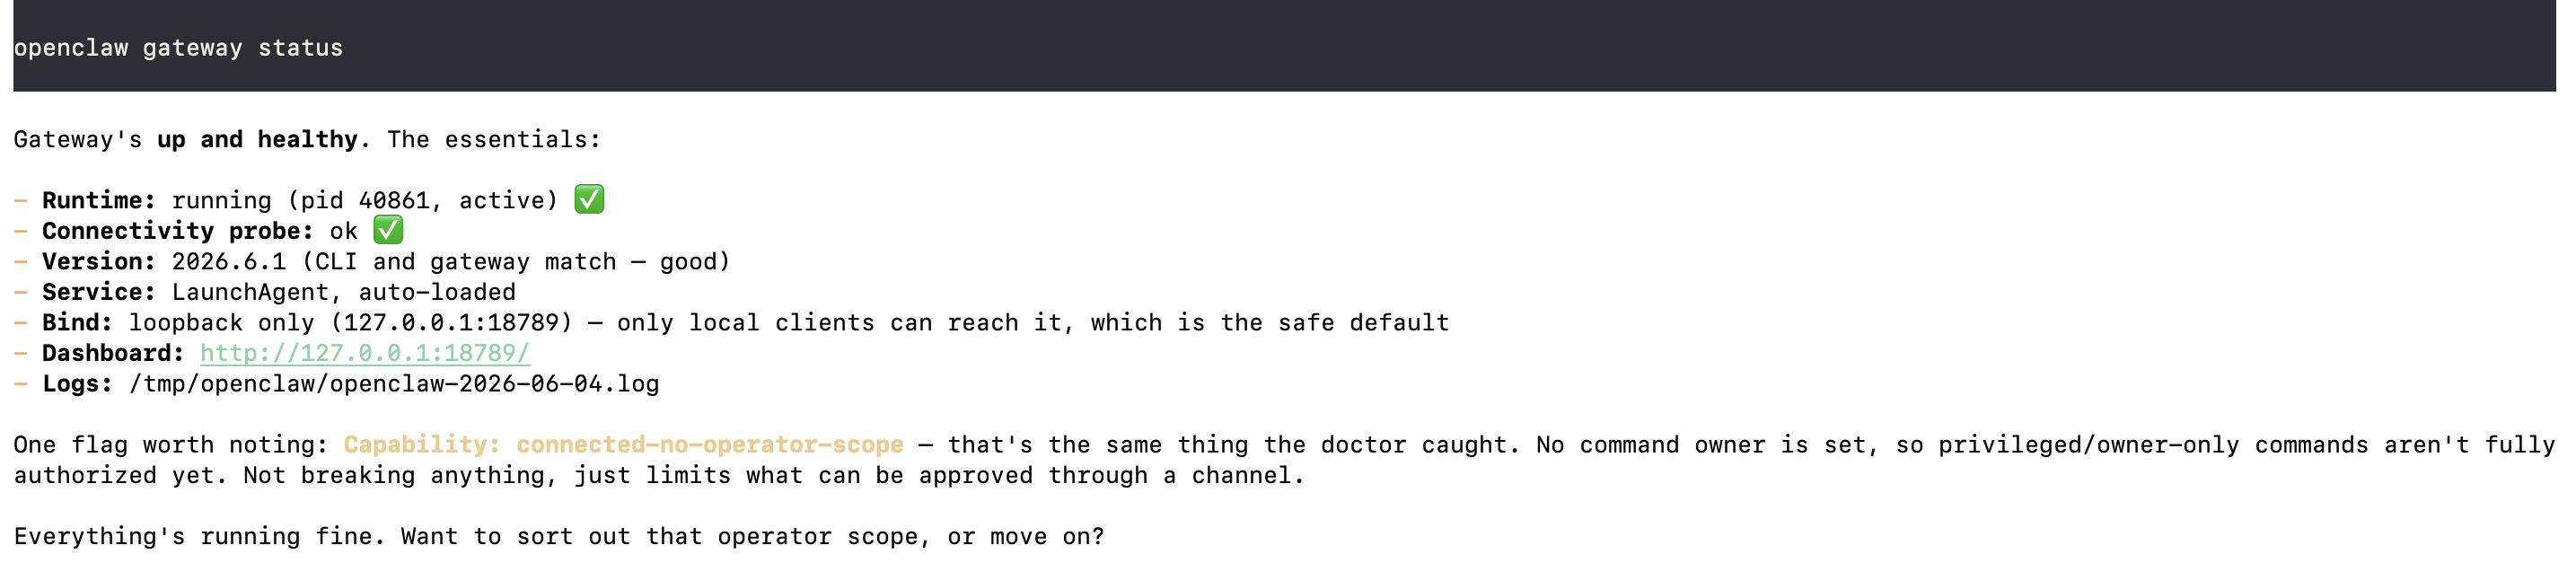
openclaw gateway status
This reports whether the background gateway service is loaded and reachable. On a healthy install you’ll see it running with a successful connectivity probe (shown below).
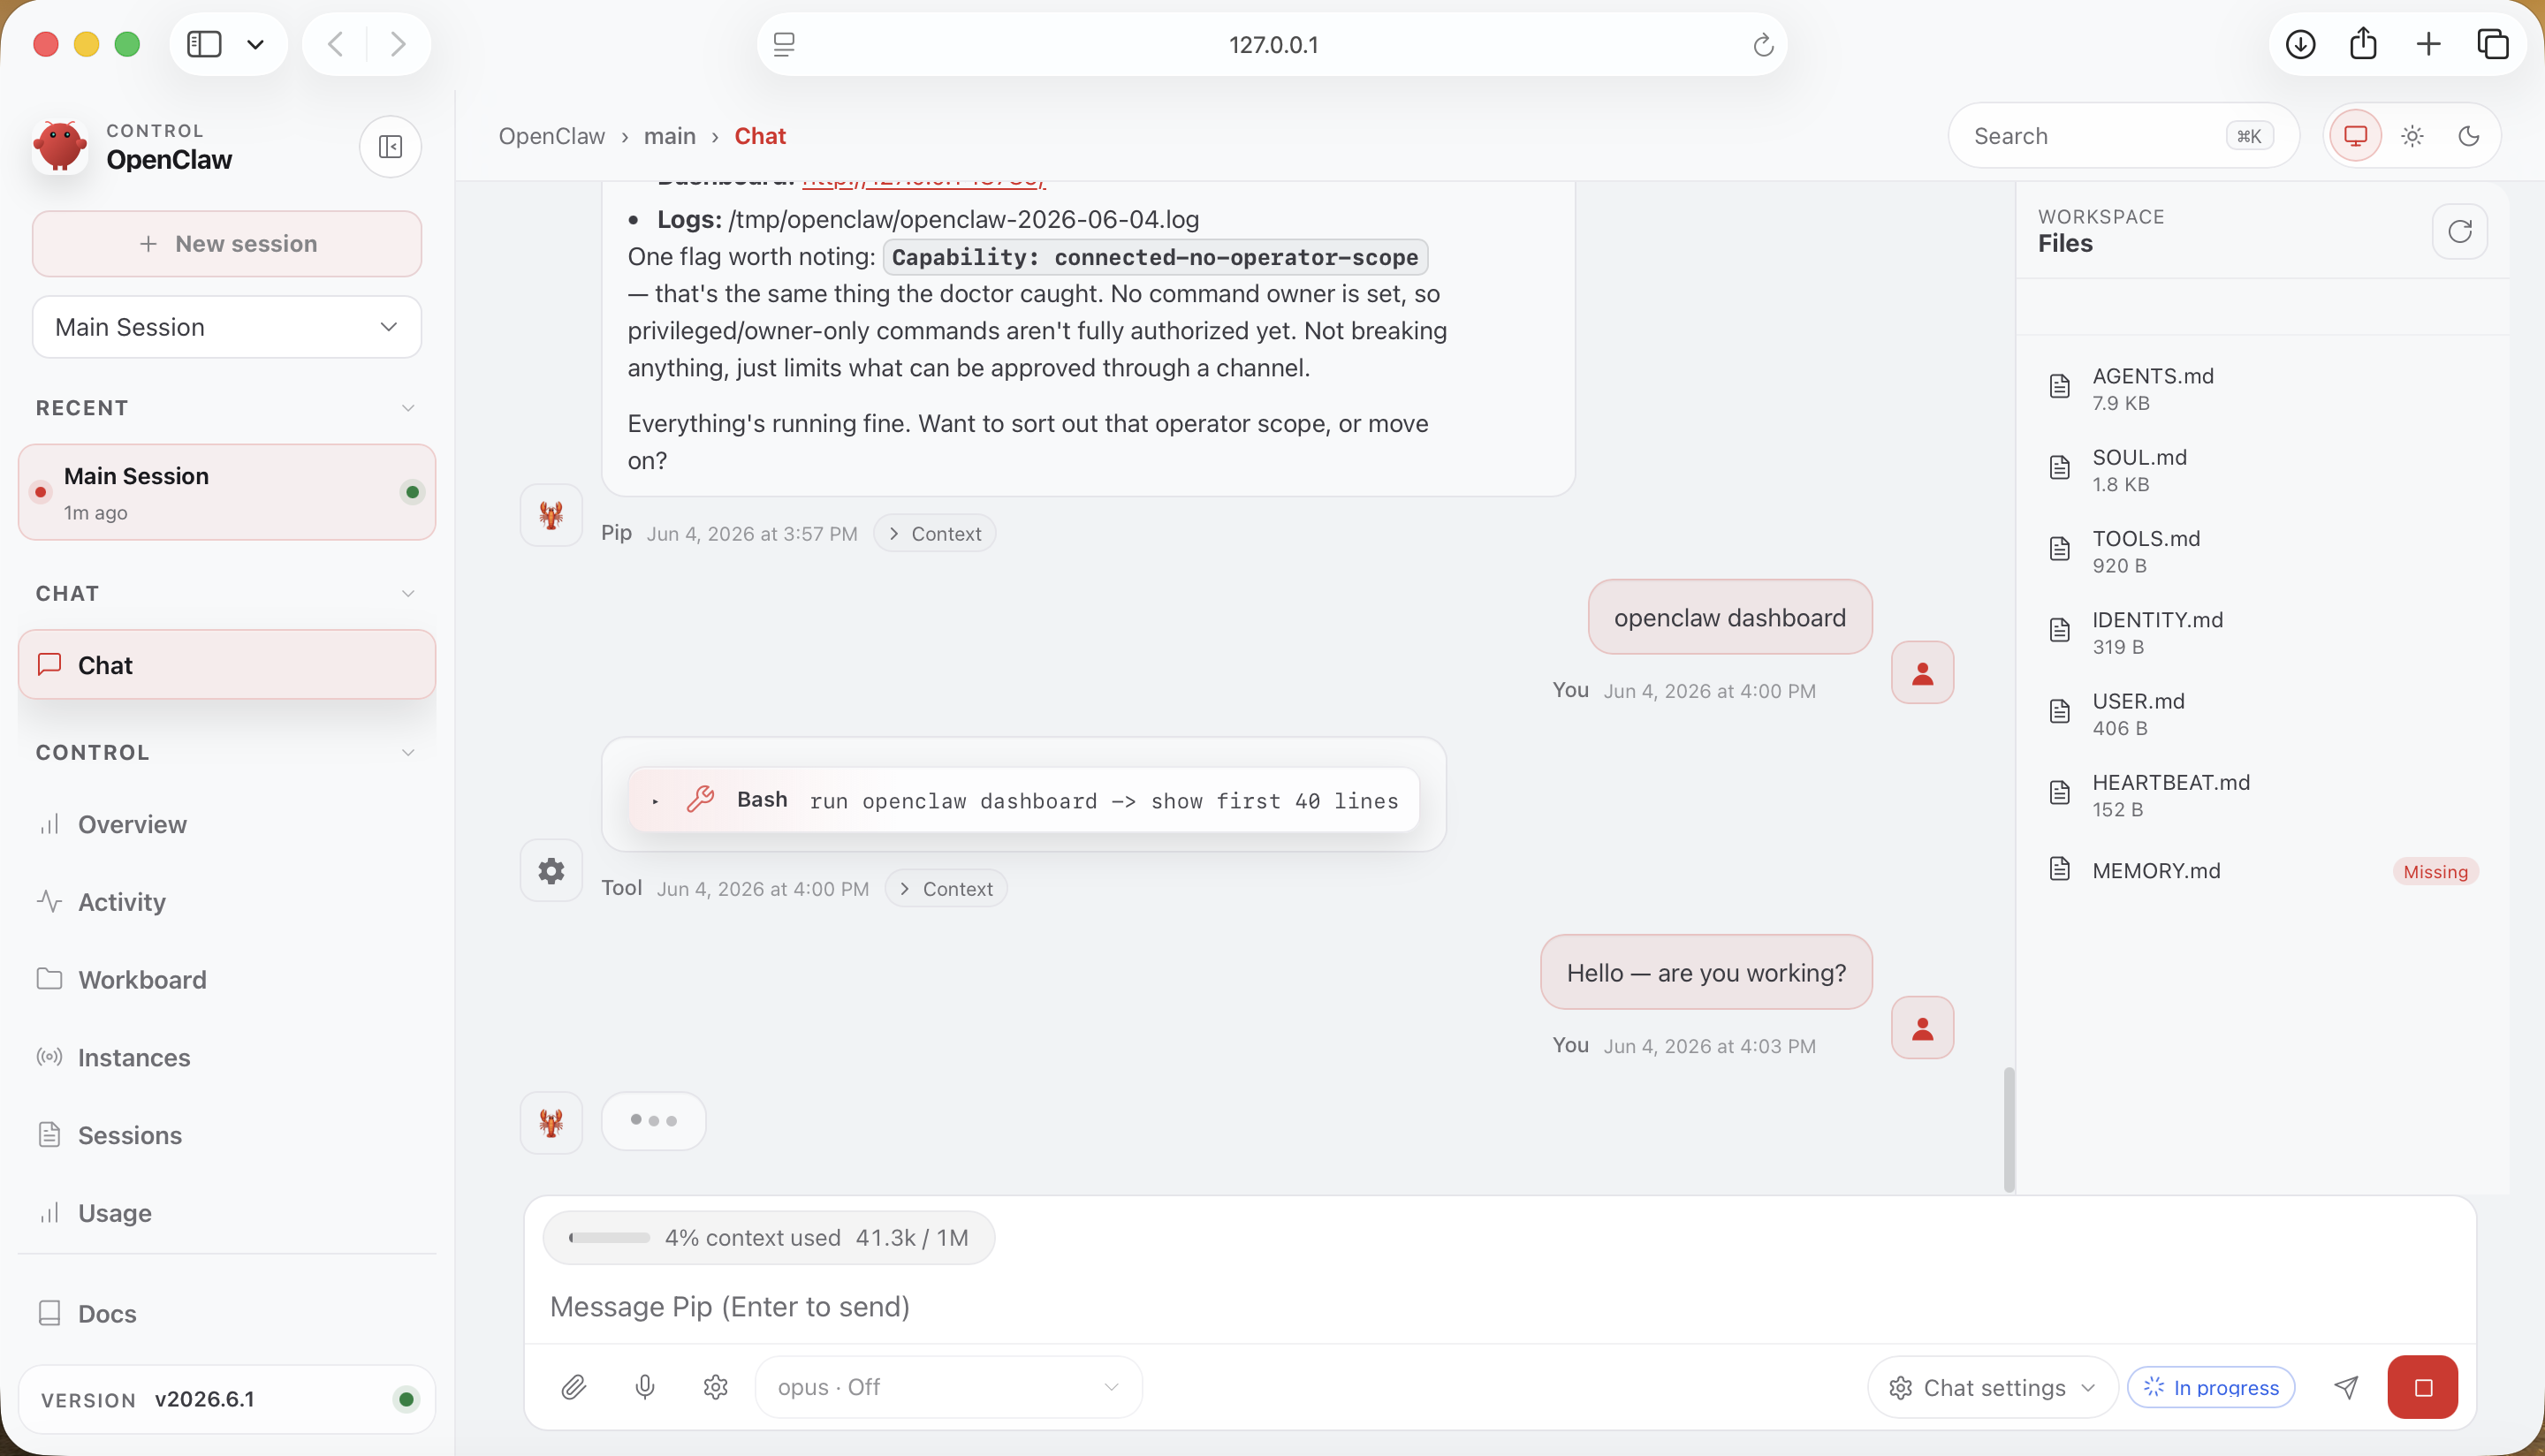
With the daemon running, you also get a dashboard: a full control panel in your browser for chatting with your assistant, browsing your sessions and workspace files, and changing settings. The simplest way to open it is:
openclaw dashboard
That launches it in your browser already signed in, so you can start using it right away. (You can also just visit http://127.0.0.1:18789/ directly, but it will ask you to sign in with a gateway token first, so openclaw dashboard saves you that step.)
First Run: Talk to Your Assistant
With the gateway up, open a local terminal chat:
openclaw chat
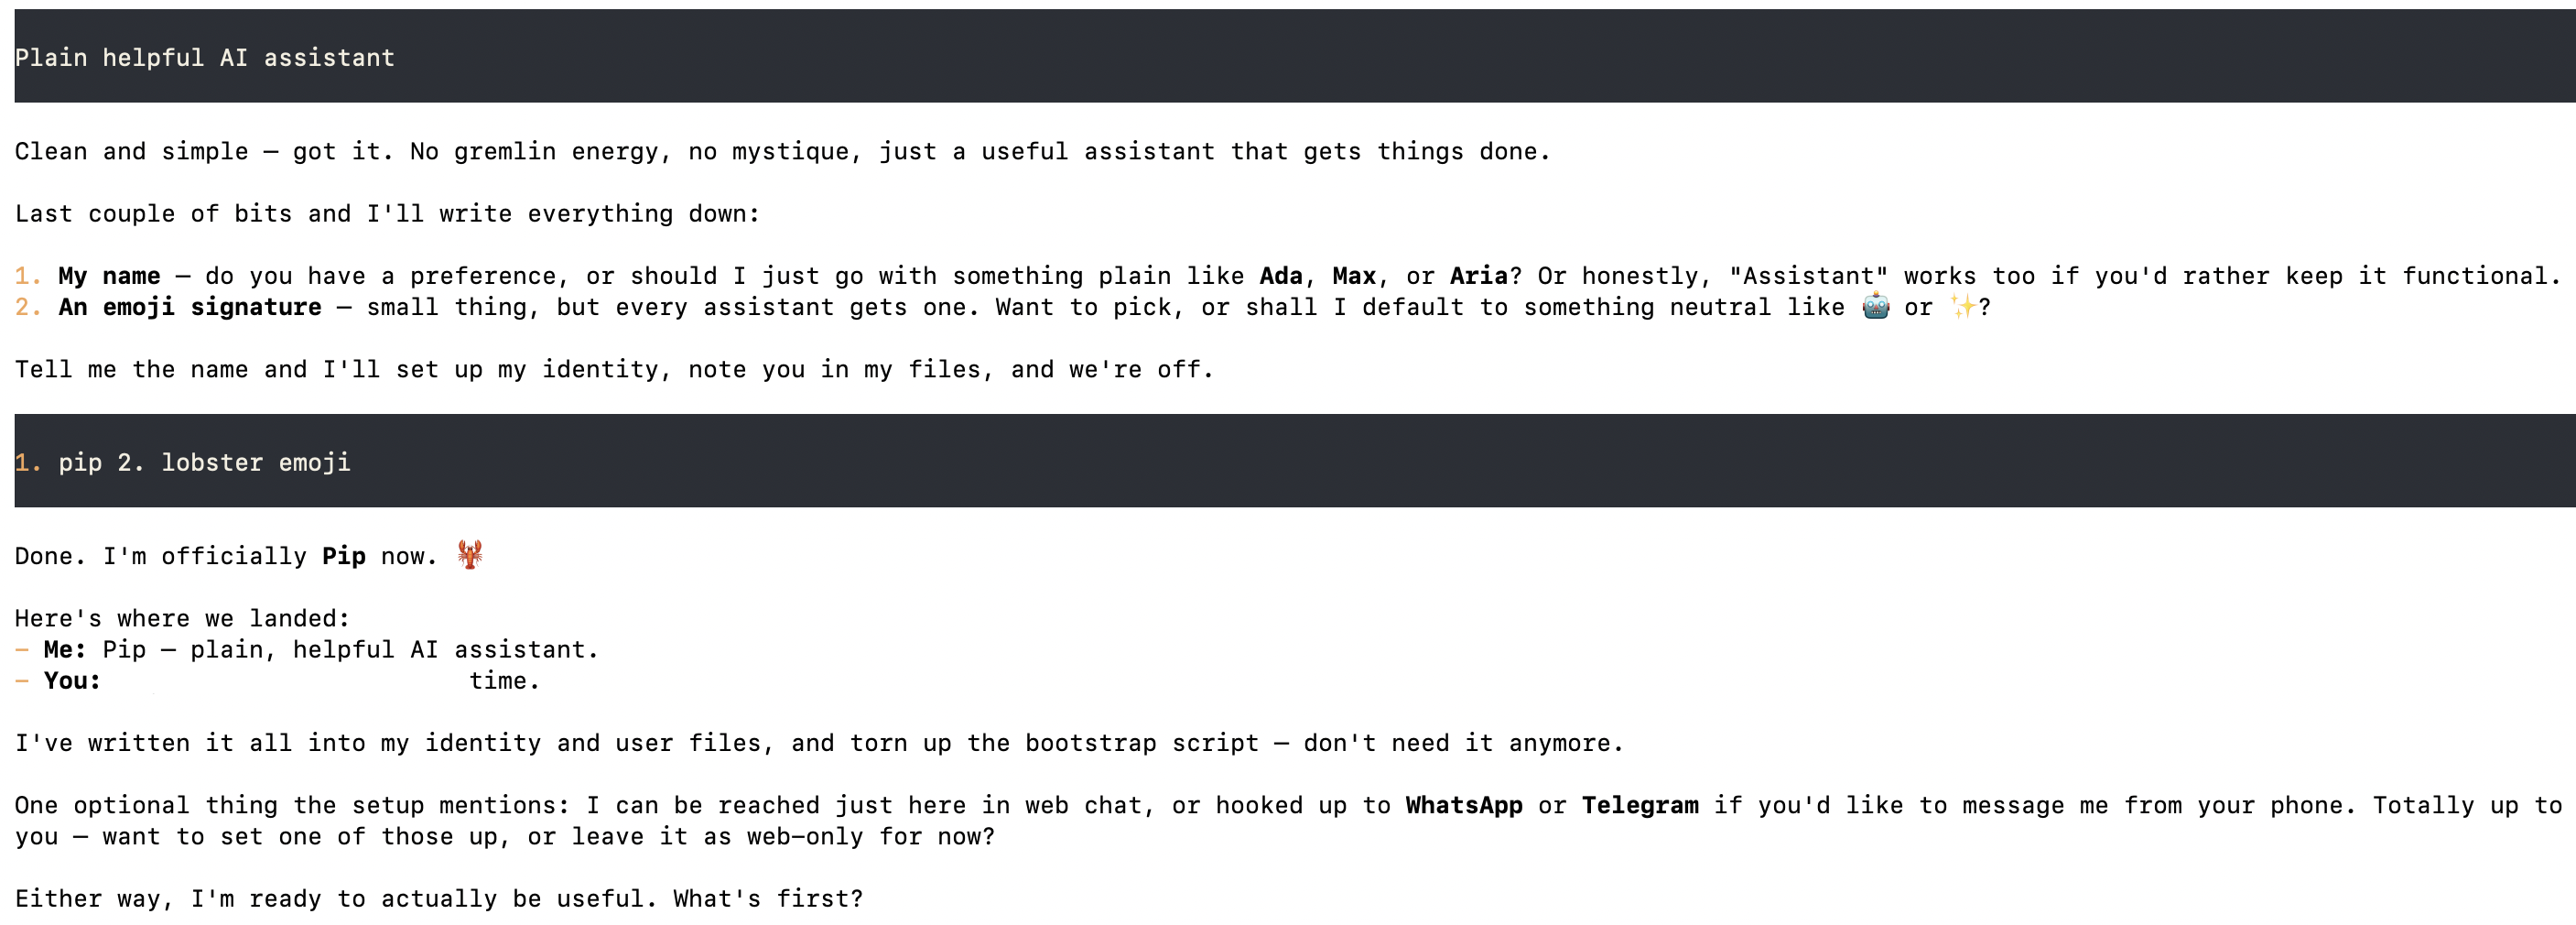
On first launch your assistant boots up, introduces itself, and asks a few questions to set up its own identity: a name, your timezone, and the personality you want it to have. That first exchange is the real confirmation that auth, the gateway, and your provider are all working together.
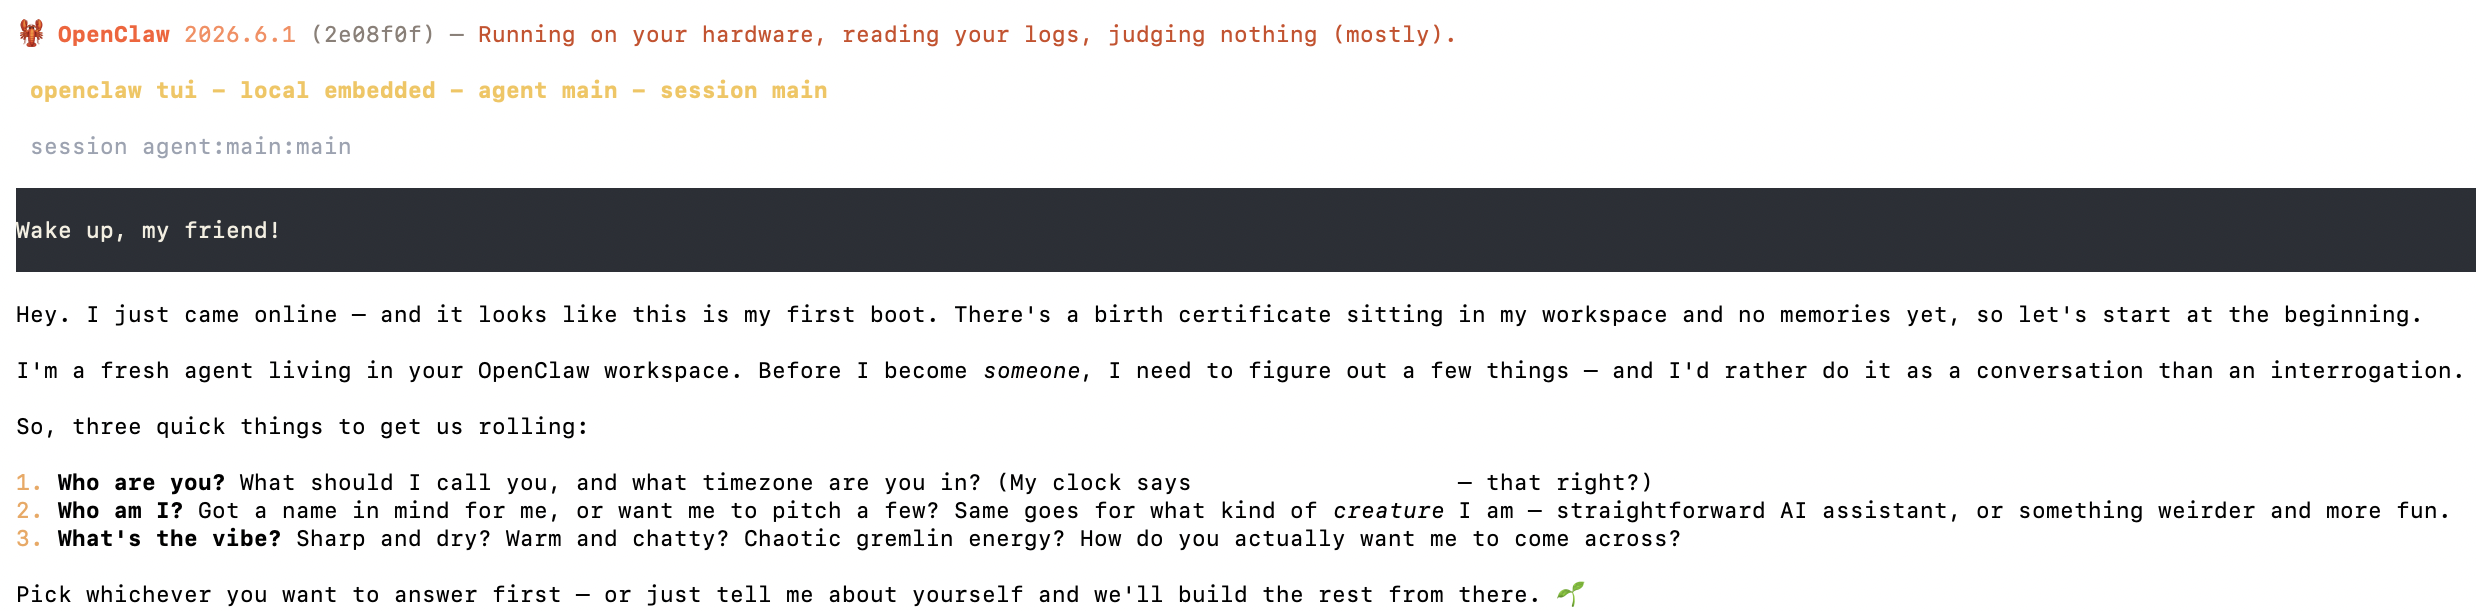
Answer in plain language and it sets itself up, picks a name, and writes its identity to your workspace, ready to actually help.
You can also chat from the dashboard’s web UI, or, if you connected a messaging channel during onboarding, pair your account from that channel and reach the same assistant from your phone.
Memory: How OpenClaw Remembers (and “Dreams”)
The feature that makes OpenClaw feel less like a stateless chatbot is its memory subsystem, shipped as a bundled plugin called memory-core. It is worth understanding right after install, because it is what turns scattered conversations into an assistant that actually accumulates context about you over time.
Inspect it any time with:
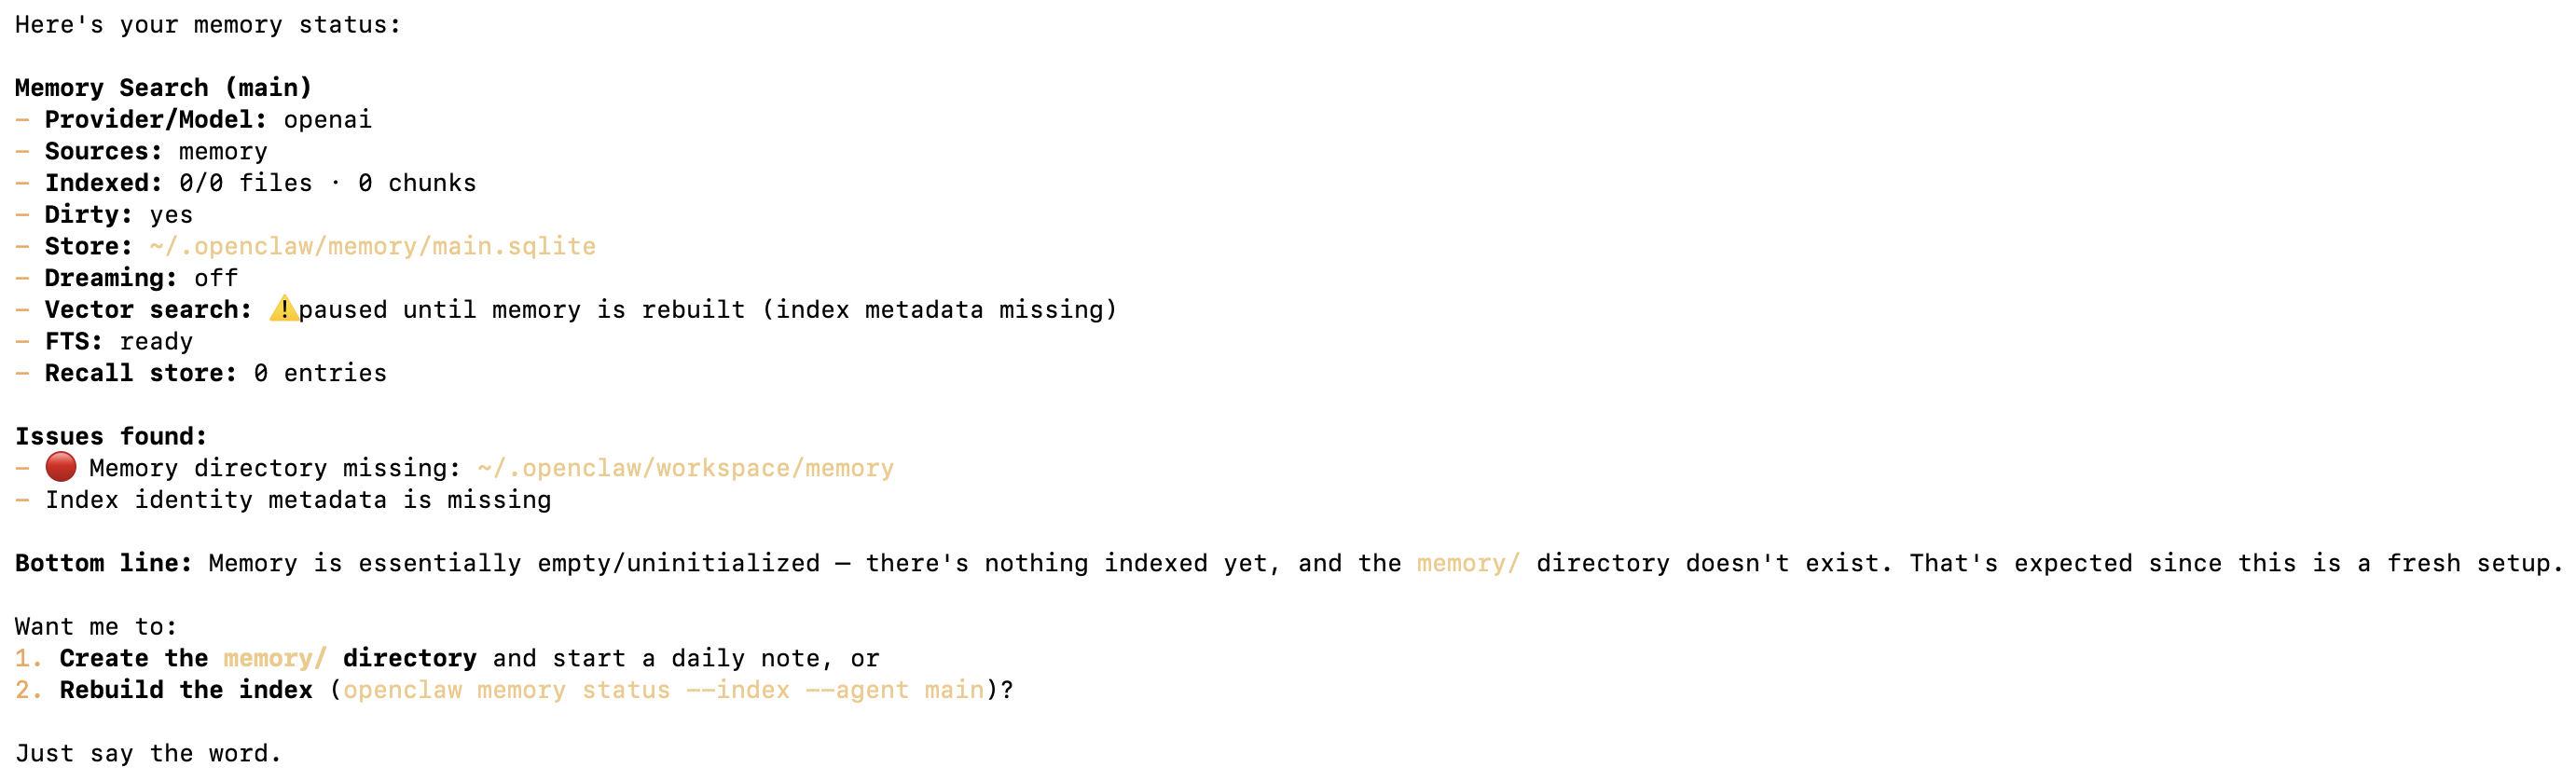
openclaw memory status
On a freshly installed machine, before you have onboarded or talked to it, the status is honest about being empty (shown below).
Here is the model behind that output, in plain terms:
| Stage | What happens | Where it lives |
|---|---|---|
| Short-term recall | As you chat, useful facts are saved automatically, and the assistant pulls from them mid-conversation. | ~/.openclaw/workspace/memory/.dreams/ |
| Long-term memory | Facts that keep proving useful get promoted into a durable file you can read and edit. | MEMORY.md |
| Dreaming | An optional nightly pass (default 3 a.m.) reviews past sessions, distills recurring themes, and writes a narrative diary. | DREAMS.md |
Promotion is deliberately cautious (a fact has to recur a few times before it sticks), and dreaming is off by default, so nothing builds up long-term memory behind your back.
A few commands let you inspect or steer it:
| Command | What it does |
|---|---|
openclaw memory status | Show what is indexed, where it lives, and whether dreaming is on |
openclaw memory search "notes" | Search your memory directly |
openclaw memory promote --apply | Promote qualifying short-term facts into MEMORY.md |
You never have to touch any of this to use OpenClaw, but it is good to know your assistant’s long-term knowledge lives under ~/.openclaw, on your own disk, entirely under your control.
How OpenClaw Compares to FlowHunt
Both run AI agents, but they aim at very different users, and once you’ve gone through the install above, the contrast is worth understanding.
OpenClaw is a self-hosted, single-user assistant. As this guide showed, getting it running means a terminal install, an onboarding wizard, model auth you keep re-authing, a gateway you keep alive, and a doctor list of things to harden yourself. That’s the deal with self-hosting: total control, but the infrastructure (updates, uptime, security, token rotation) is permanently your job. It’s a great personal project. It is not built to run a team’s workload.
FlowHunt is the cloud-hosted, no-code platform for building and running AI agents at work, and it removes every maintenance step you just did. There’s nothing to install and nothing to keep alive. You build multi-step Flows and teams of collaborating agents (“Crews”) in a visual drag-and-drop editor, wire in 60+ integrations (with more added constantly) and MCP servers in a few clicks, attach live knowledge sources (websites, docs, PDFs, video), deploy chatbots to your site, LinkedIn, or Slack, schedule everything to run unattended, and watch ROI in built-in analytics. And you rarely start from a blank canvas: FlowHunt ships nearly 500 prebuilt agents (with around 30 of them covering the majority of everyday jobs), so most workflows are a matter of picking one and tweaking it, not building from scratch. What takes a terminal, a daemon, and an embedding key to half-configure in OpenClaw is a managed feature in FlowHunt.
| OpenClaw | FlowHunt | |
|---|---|---|
| Hosting | Self-hosted, you run the server | Fully managed cloud, nothing to install (app.flowhunt.io ) |
| Setup | Terminal install, wizard, daemon, auth upkeep | Sign up and build in your browser |
| Interface | CLI + local gateway | No-code visual flow builder |
| Built for | One person’s private assistant | Teams automating marketing, SEO, support & sales |
| Scope | A single assistant with sessions | Multi-step Flows + collaborative agent Crews |
| Prebuilt agents | None, you configure one assistant | ~500 ready-made agents (≈30 cover most jobs) |
| Integrations | Wire up MCP/channels by hand | 60+ ready integrations (and growing) + MCP, point-and-click |
| Maintenance | Updates, uptime, security are on you | Managed for you, zero ops |
| Scheduling & analytics | Roll your own | Built-in scheduling + ROI dashboards |
Which should you pick? If OpenClaw is a weekend project (a private assistant on hardware you control and don’t mind babysitting), it’s a fun one. But if you actually need AI work to get done, repeatable workflows, chatbots, and agents your team can build and trust without anyone running a server, FlowHunt is the faster, lower-maintenance path, and you can be live today. It even speaks the same MCP servers and models OpenClaw does, so you lose nothing by letting FlowHunt handle the orchestration and ops for you.
Wrapping Up
Installing OpenClaw is genuinely a few-minute job: one install command, one onboarding wizard, and three verification checks. The install puts the openclaw CLI on your PATH; openclaw onboard --install-daemon wires up your model provider, the loopback gateway, your workspace, and a background service; and doctor plus gateway status confirm it is live before you ever open the dashboard.
From there the assistant is yours to extend: connect more channels, enable more skills, point it at a different model, or, when you want it to run scheduled multi-step work alongside your other tools, orchestrate it from FlowHunt. The setup you just did is the foundation; everything after it is configuration, not installation.