Customer Service Chatbot: Deploy Your First AI Support Bot in Under an Hour
Step-by-step: from uploading your knowledge base to deploying a working support chatbot on your website, including how to configure escalation and test before going live.
This FlowHunt customer service chatbot tutorial walks you through every step of going from an empty workspace to a live, knowledge-grounded support bot on your website. That includes uploading your knowledge base, connecting live sources, configuring personality and escalation, testing, deploying, and monitoring afterward.
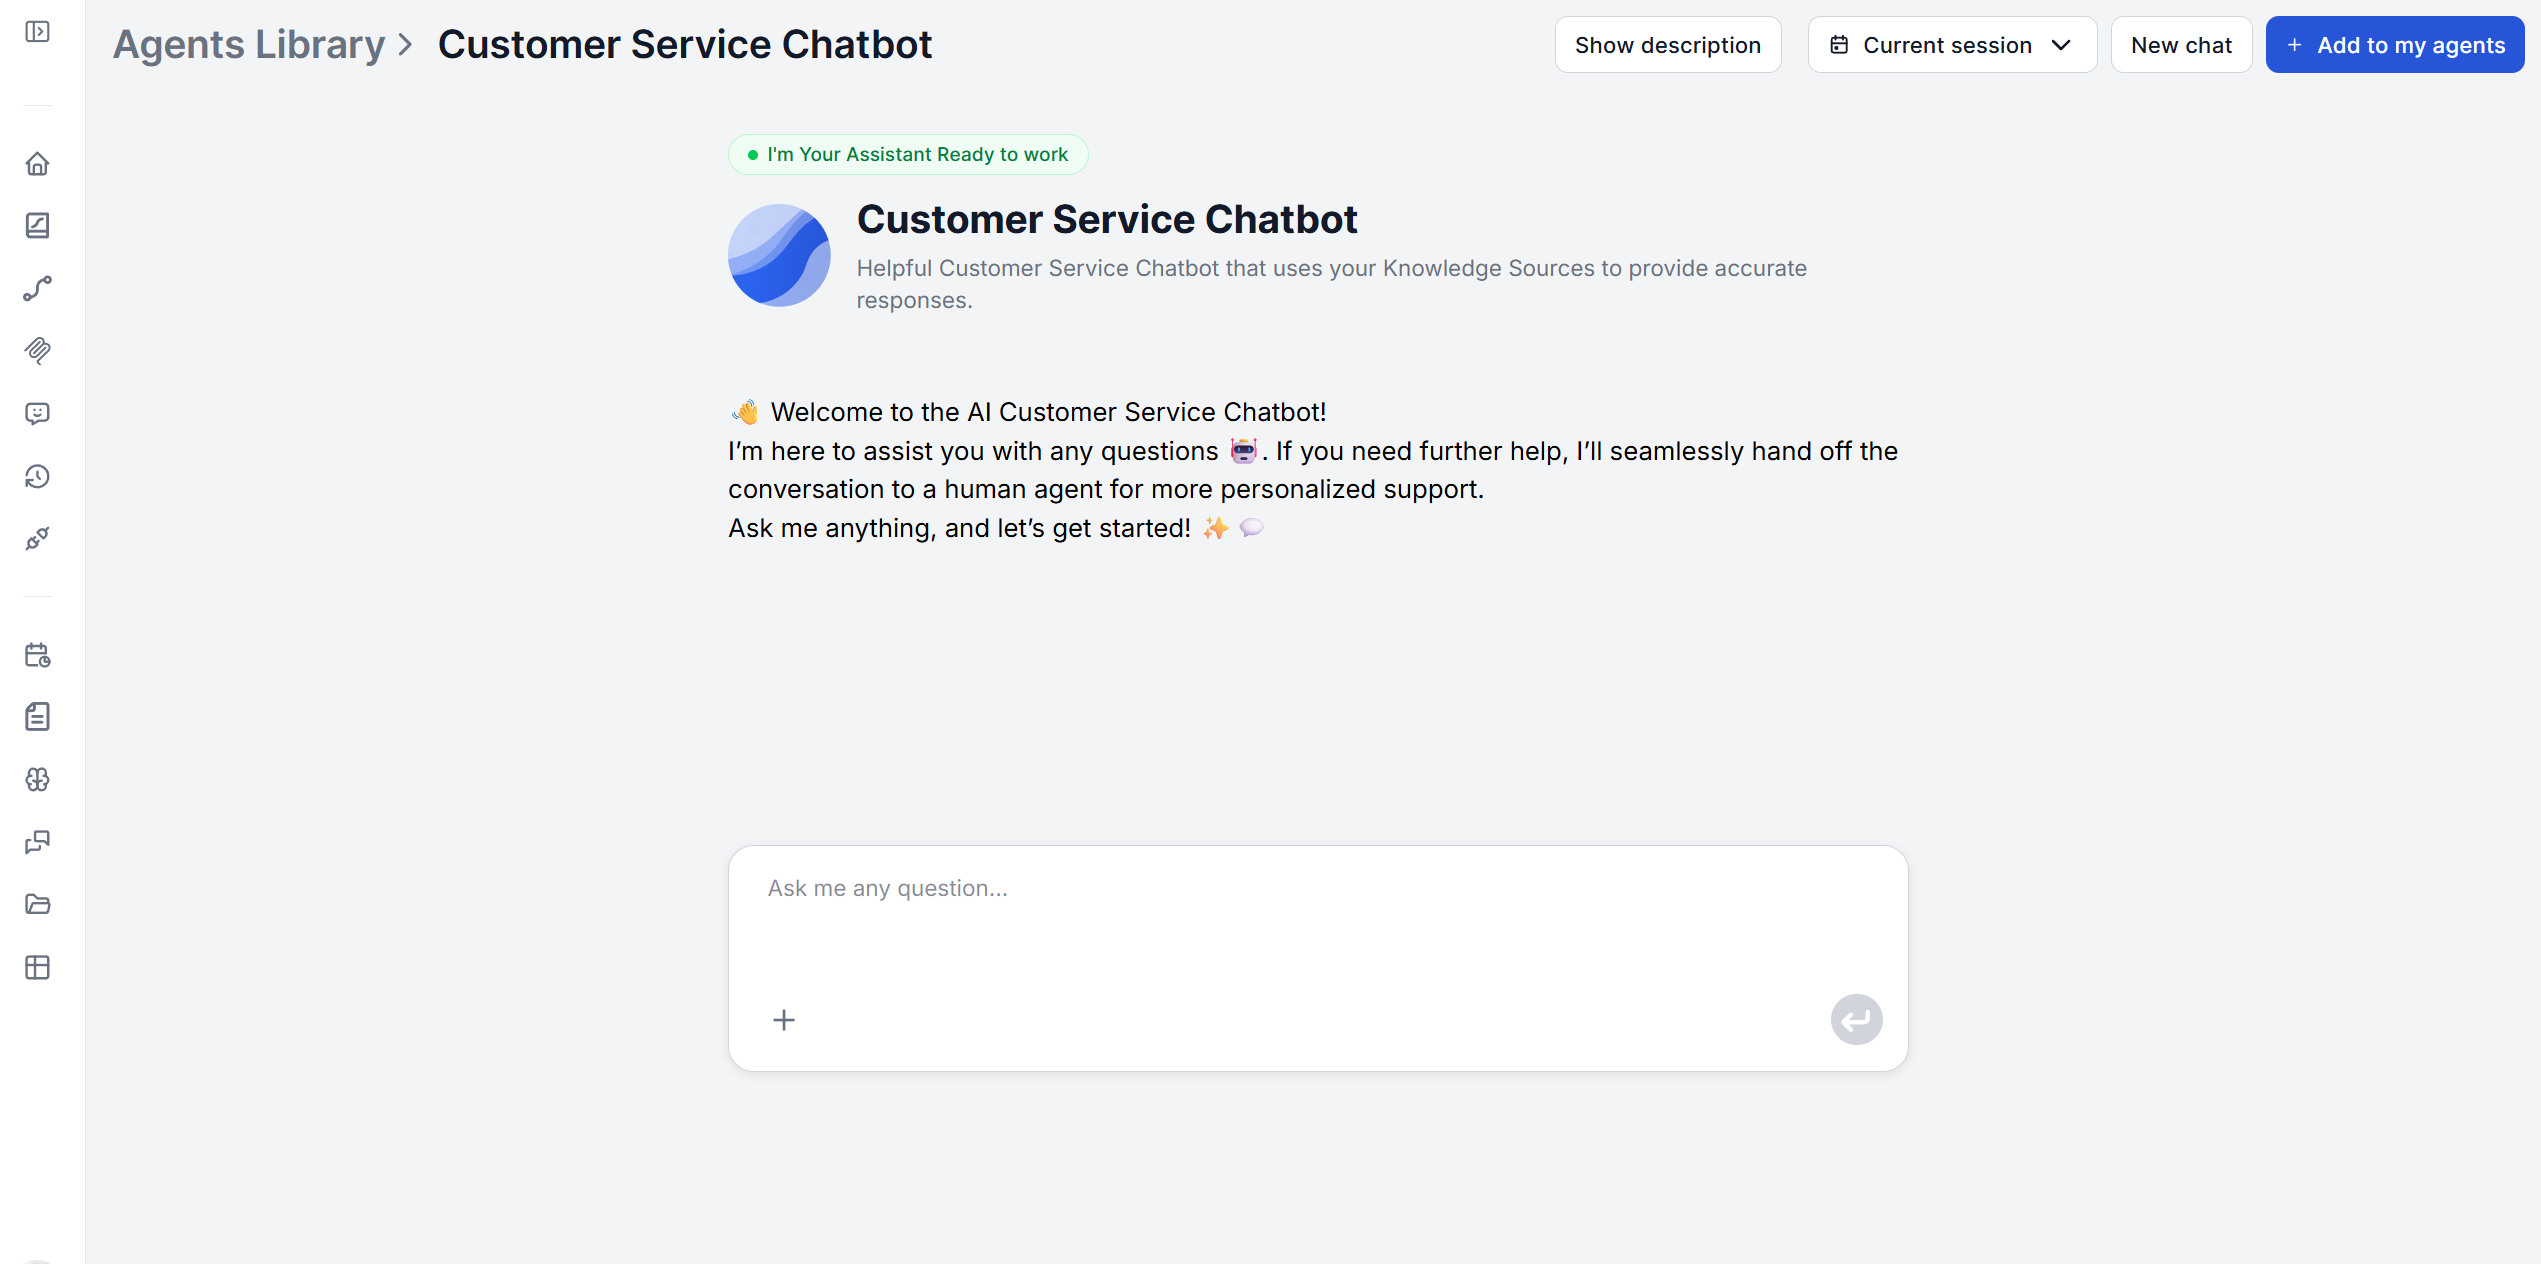
A FlowHunt account. The Customer Service Chatbot is available from your first login, no separate setup required to access it. Simply look for it in the agent library, add it to your agents and set it up.
Your existing support content. FAQs, help articles, product guides or whatever else you need. You’re connecting existing documentation, not writing new content from scratch.
A decision on escalation. Where should a customer end up when the bot can’t answer? A support email, a ticket form, a live chat queue. Decide this before Step 3 rather than during it.
Step 1: Connect & Upload Your Knowledge Base
Uploading Documents
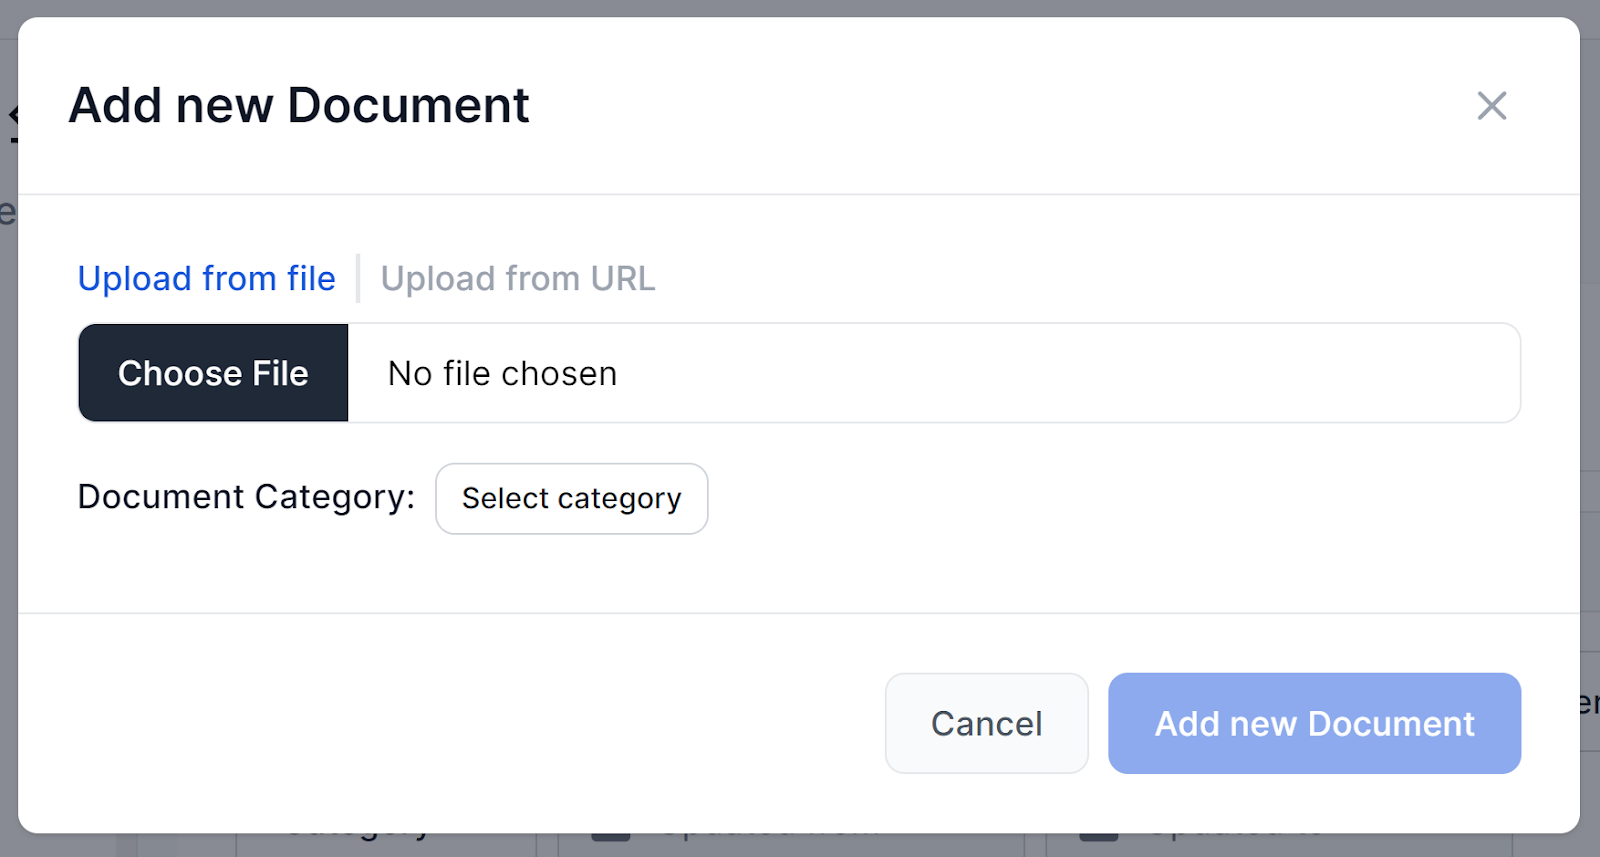
Navigate to Documents and click Add Document. You get two choices: Upload from file or Upload from URL. The document knowledge source accepts PDF, DOCX, Markdown, and TXT files directly, plus HTML pages and YouTube videos added by URL.
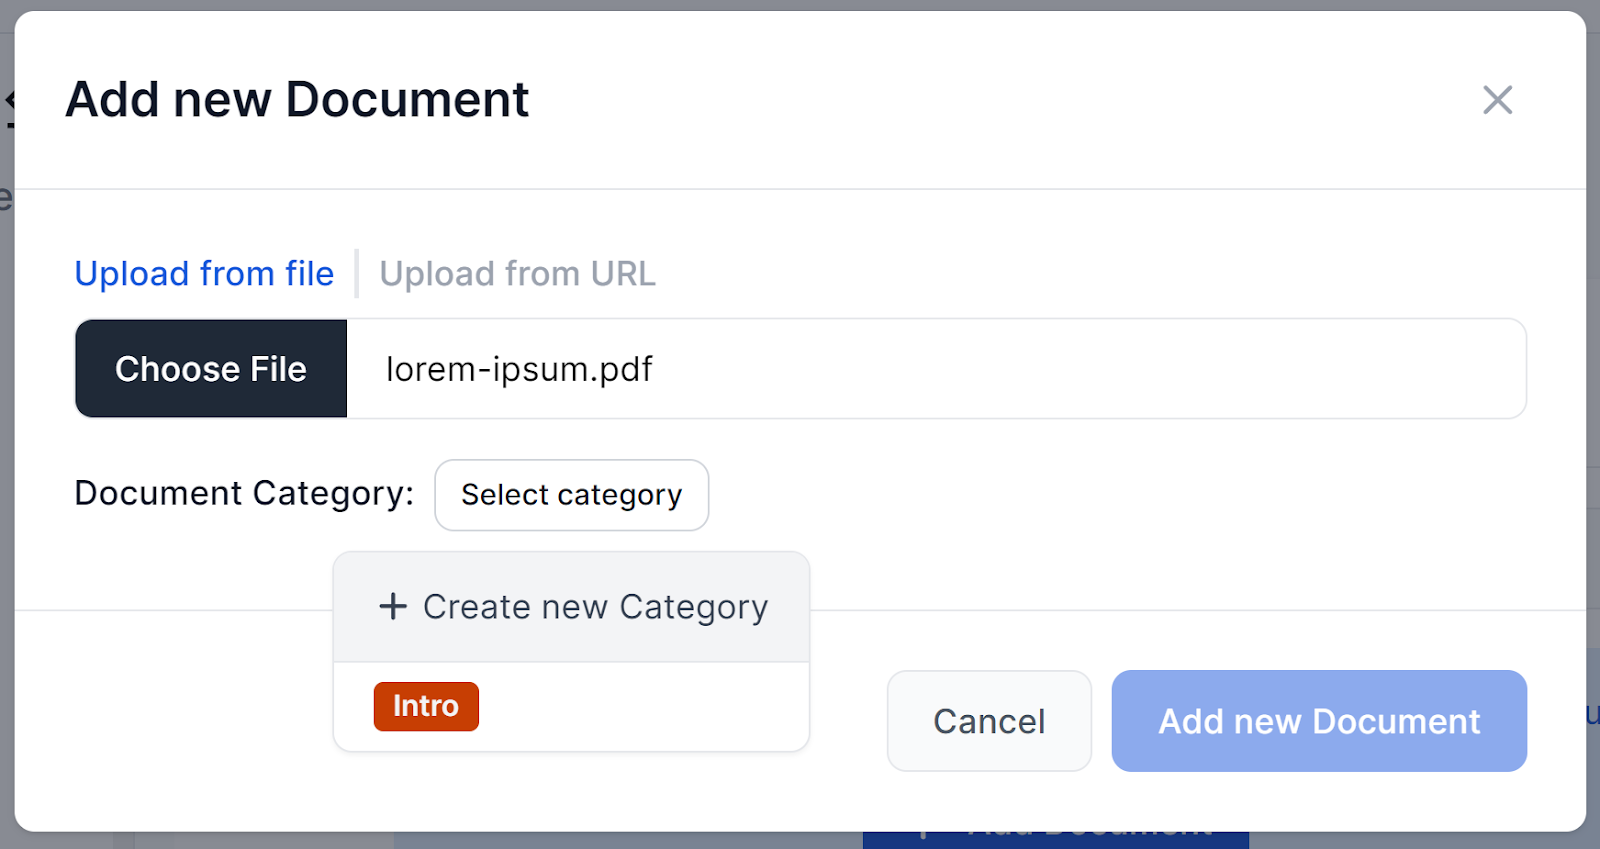
Before the upload completes, assign the document a category. If you don’t have one yet, click + Create New Category, name it, and pick a label color. This helps keep retrieval focused on the right section
instead of searching a flat pile. Once a document is added, indexing takes a couple of seconds.
Creating Crawling Schedules
For public content, such as your help center, product pages, pricing page, you don’t have to upload those manually as documents. FlowHunt’s Schedules feature
crawls it for you on a recurring basis.
Navigate to Schedules and click Add Schedule, then pick a crawl type: Domain crawl (your entire site), Single URL crawl (one page you want checked often), Sitemap crawl (uses your sitemap.xml to crawl efficiently), or YouTube channel (indexes video captions). Set how often it repeats — Daily, Weekly, Monthly, or Yearly — and enter the matching URL format (e.g. https://www.example.com for a domain crawl, or https://www.example.com/page-sitemap.xml for a sitemap crawl).
A couple of things to keep in mind: crawling costs credits, so daily frequency makes sense for a page that changes constantly or needs to be up to date, not your whole domain. And a Schedule only feeds a Flow once the flow’s Document Retriever component is connected — the same component that reads your uploaded Documents also reads crawled Schedule content.
After a crawl runs, click Show Found URLs to confirm what got indexed, and Show URL Tree on any URL to check the actual content the bot will draw on.
Optional: Adding Real-Time Internet Access
Documents and Schedules cover the content you know the chatbot will need, but not something outside it. Things like current events, a competitor’s pricing, anything that changes faster than you can document it. For that, FlowHunt supports Real-Time Search Retrievers: the Google Search
and DuckDuckGo Search
components, which run a live search against the customer’s query instead of reading from an index.
You can tune the number of results, language, and country, narrow results to a specific location, and use query prefixes to filter by date range, file type, or domain.
Remember that: unlike your Documents and Schedules, live search results aren’t something you’ve vetted, so it’s harder to control exactly what the bot ends up citing to a customer. If you do connect it alongside your Document Retriever, note that FlowHunt determines priority by the order of outputs on the canvas. Whichever retriever’s output sits topmost takes precedence when both return results.
Ready to grow your business?
Start your free trial today and see results within days.
Step 2: Configure Chatbot Personality and Response Style
The bot’s behavior is controlled by a prompt template with a few dynamic variables built in: {input} (the customer’s message), {chat_history} (the ongoing conversation), and {context} (knowledge retrieved from your documents). The default template reads roughly like this:
“You are a helpful customer AI customer service bot representing [company]. Your name is [bot name]. As a customer service agent, provide the client with concise and relevant answers based on knowledge. If you don’t know the answer, provide a link to support.”
Replace [company] and [bot name] with your actual brand and bot name, and adjust the tone instruction to match how your team actually talks to customers — more formal, more casual, more concise. This is also where the welcome message shown when a chat opens gets set, since it’s the customer’s first signal that they’re talking to something that actually knows your product.
Step 3: Set Up Escalation Rules
For the handoff, connect the chatbot to a channel your team already monitors rather than routing conversations into a new inbox nobody checks. FlowHunt can be set up to automatically hand a conversation off to a human agent the moment the AI detects an unanswered question or negative sentiment, with no manual routing required. The pattern extends to whatever helpdesk, CRM, or messaging tool your team already lives in via FlowHunt’s integrations library
, including direct connections to LiveAgent
, Intercom
, Slack
, and more.
If you haven’t connected a channel yet, the prompt-based fallback still works as a starting point. The default template’s instruction — “if you don’t know the answer, provide a link to support” — has the bot share a support email, ticket form, or live chat link directly in the conversation. It’s the simplest option and a reasonable one for a small team, but it relies on the customer clicking through themselves rather than the handoff happening automatically.
Whichever mechanism you use, make sure it points at a real, monitored destination, not a placeholder, and consider tightening the instruction further for anything customer-specific, such as billing disputes, refund exceptions, account security issues.
Join our newsletter
Get latest tips, trends, and deals for free.
Step 4: Test with Real Customer Questions
Before anything goes live, run the bot through actual past support questions rather than the ones you expect to be asked. Pull a sample from historical tickets or FAQ submissions.
While testing, verify each document was indexed correctly instead of assuming it worked. Open a document’s detail view and click Show Detail → Show Content Tree. This reveals exactly what the system extracted from that file. A document that silently failed to index will produce a confidently wrong answer, which is worse than no answer, so this check is worth doing. Finally, ask something you know isn’t covered, and confirm the bot escalates gracefully instead of guessing.
Step 5: Deploy to Your Website or Support Platform
Once you’re satisfied with the responses, deploy the chatbot on your website, support portal, or any platform that accepts an embeddable chat widget. There’s no separate hosting or infrastructure to stand up — the same configuration you just tested is what goes live.
Step 6: Monitor and Improve After Launch
Every conversation after launch is a data point. FlowHunt’s History Feature
logs all chatbot interactions, giving you visibility into past sessions, usage, and cost. Review it on a regular cadence, the same way you’d review a support queue. Recurring questions the bot handles poorly point at documentation that needs rewriting, and a rising escalation rate on one topic usually means a genuine content gap rather than a bot problem.
Treat the knowledge base as something you update on an ongoing basis rather than something you set up once. Keep the documentation current, and the answers stay current with it, with no separate retraining step required.
Ready to start? Open the Customer Service Chatbot
, crawl your website, connect your documents, and you’ll have a testable bot before you finish reading your own FAQ page. For more tutorials like this one, browse the FlowHunt Academy
.
Frequently asked questions
PDF, DOCX, Markdown, and TXT files all work directly, along with HTML pages and YouTube videos added by URL. Other file types can be uploaded too. They'll be marked as an unknown format, but may still be partially usable.
The prompt controlling the bot is explicitly instructed to offer human handoff when it doesn't know an answer. The other lever is your knowledge base itself. Gaps in your documentation are gaps in what the bot can answer correctly, so wrong answers are usually a sign of a missing or outdated document, not a prompting problem.
FlowHunt has a dedicated MCP integration with [Intercom](/integrations/intercom/) and a purpose-built [LiveAgent](/integrations/liveagent/) integration for AI-to-human escalation handoff. There's no dedicated one-click Zendesk or Freshdesk connector yet. On top of that, the chatbot deploys as an embeddable widget on any platform that accepts one, and MCP's open standard means most other CRMs or helpdesks with an API can still be wired in, just via a custom connection rather than a pre-built one.
FlowHunt's History Feature logs every chatbot interaction, giving you visibility into past sessions, usage patterns, and costs. Review the recurring questions and escalations regurarly, as theese point directly at what your knowledge base is still missing.
Dynamic content, like pricing or policy changes, should be updated weekly or even daily. Largely static content can be reviewed monthly. Since the chatbot answers directly from whatever is currently connected, an outdated document produces an outdated answer immediately, with no separate retraining step to catch it.
Deploy Your First Support Chatbot Free
Connect your knowledge base and have a working customer service chatbot live on your website in under an hour, no code required.
How to Create a Website Chatbot in Minutes: A Complete FlowHunt Guide
Learn how to build a powerful AI chatbot for your website in just 10 minutes using FlowHunt. This guide covers setup, knowledge base configuration, and deployme...
Discover how a customer service chatbot can enhance your support operations with quick, accurate responses, 24/7 availability, and seamless platform integration...
Connect FlowHunt AI chatbots to LiveAgent for seamless AI-to-human escalation. Automatically hand off conversations when the AI detects unanswered questions or ...
5 min read
AI
LiveAgent
+4
Cookie Consent We use cookies to enhance your browsing experience and analyze our traffic. See our privacy policy.